English 6
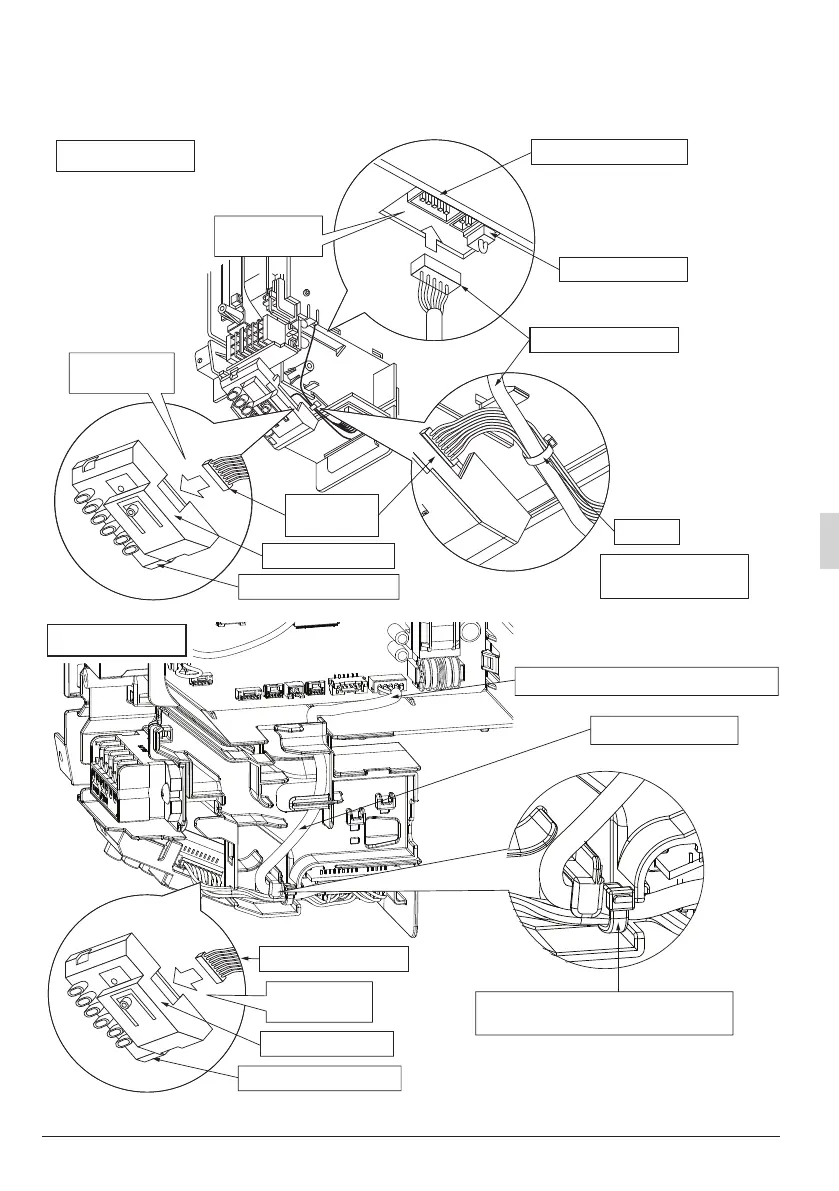
4. Connect the relay harnesses which were connected to the transmission PC-board (2) in step 1. as follows.
• Relay harness – long (3) to connector X24A on the indoor
unit PC-board
• Relay harness – short (4) to connector CN1/X1A on the light receiver assembly (1)
After making these connection, clamp down relay harness – long (3) and relay harness – short (4) using
the included clamp (7).
Connect firmly to
the connector.
Connect firmly to
the connector.
Connector (X24A) (Black)
Indoor unit PC-board
Relay harness – long (3)
Clamp (7)
Cut off any excess
material after tightening.
Relay harness
– short (4)
Connector (CN1/X1A)
Light receiver assembly (1)
BRC7EA628/29
BRC7EA630
Use clamp (7) to fix the wires if necessary.
Cut off any excess material after tightening.
Connect firmly to the connector X24A (black)
Relay harness - long (3)
Connect firmly to
the connector.
Relay harness - short (4)
Connector (CN1/X1A)
Light receiver assembly (1)
3(1%ERRN3DJH:HGQHVGD\-DQXDU\30