17
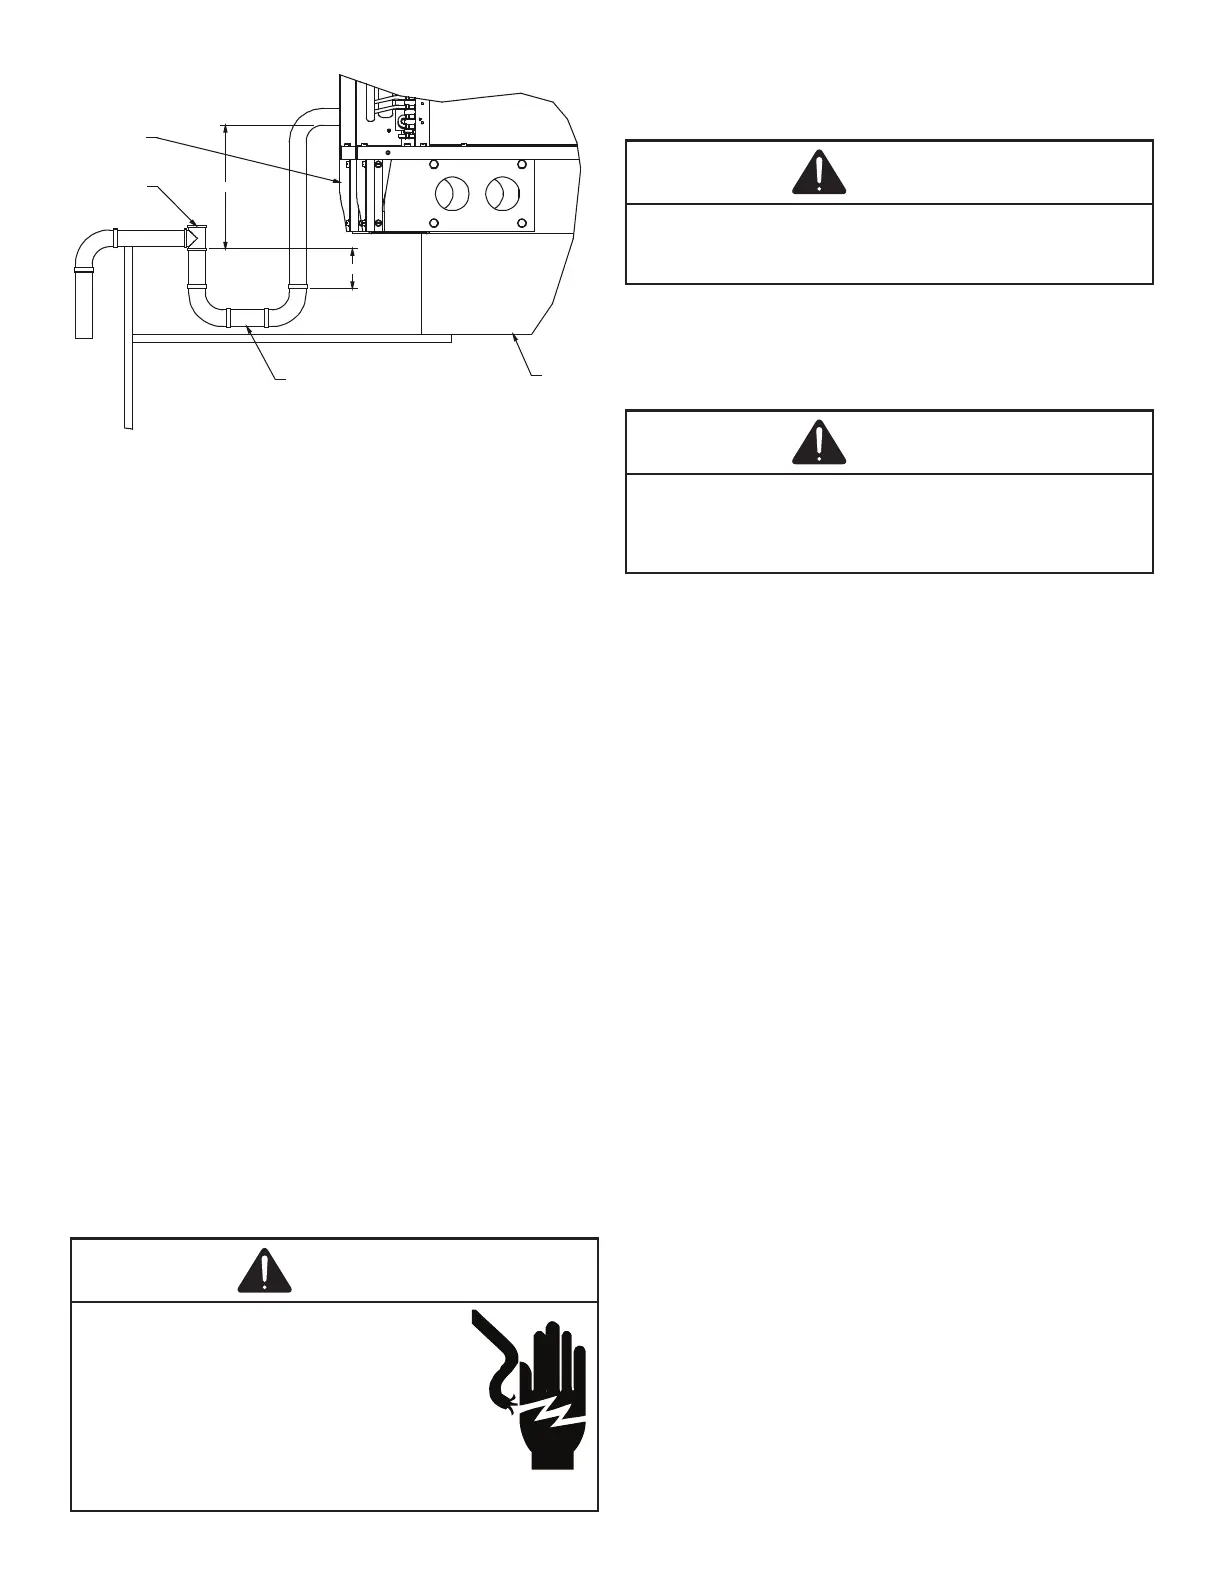
NOTE: Trap should be deep enough to offset maximum
unit static difference. A minimum 4” trap is recommended.
Drain Plug
Roof Curb
See NOTE
Base Rail
Open Vent
2” Min
Install condensate drain trap as shown. Use 3/4" drain line
and ttings or larger. Do not operate without trap.
Drainage of condensate directly onto the roof may be
acceptable; refer to local code. It is recommended that a
small drip pad of either stone, mortar, wood or metal be
provided to prevent any possible damage to the roof.
To use the bottom drain connection, remove the drain plug
from the bottom connection and install it in the horizontal
connection.
Due to the fact that the drain pans in any air conditioning
unit will have some moisture in them, algae and fungus
will grow due to airborne bacteria and spores. Periodic
cleaning is necessary to prevent the build-up from plugging
the drain.
To remove the drain pan for cleaning, remove the drain pan
cover rst (located in horizontal drain pans) then the drain
pan could be slid out.
CAUTION
Prior to the beginning of Startup, Adjustments, and Checks
procedures, the following steps should be completed in the
building.
This unit is equipped with an electronic ignition device to
automatically light the main burners. It also has a power
vent blower to exhaust combustion products.
On new installations, or if a major component has been
replaced, the operation of the unit must be checked.
Check unit operation as outlined in the following
instructions. If any sparking, odors, or unusual sounds
are encountered, shut o electrical power and recheck for
wiring errors, or obstructions in or near the blower motors.
The Startup, Adjustments, and Checks procedure provides
a step-by-step sequence which, if followed, will assure the
proper startup of the equipment in the minimum amount of
time. Air balancing of duct system is not considered part
of this procedure. However, it is an important phase of any
air conditioning system startup and should be performed
upon completion of the Startup, Adjustments, and Checks
procedure. The Startup, Adjustments, and Checks
procedure at outside ambients below 55°F should be
limited to a readiness check of the refrigeration system with
the required nal check and calibration left to be completed
when the outside ambient rises above 55°F.
If the unit is to be used for temporary heating or cooling,
a “Startup, Adjustments, and Checks" must rst be
performed in accordance with this manual. Damage or
repairs due to failure to comply with these requirements
are not covered under the warranty. the machines
are used for temporary heating or cooling, inspect the coils,
fans, and motors for unacceptable levels of construction
dust and dirt and install new lters.