6 Electrical installation
Installation manual
11
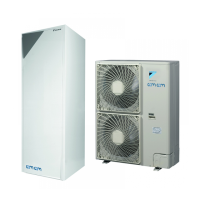
EHBH/X04+08EA/EJ6V+9W
Daikin Altherma 3 R W
4P629081-1A – 2020.08
NOTICE
Install air purge valves at all local high points.
NOTICE
Overpressure bypass valve (delivered as accessory). We
recommend to install the overpressure bypass valve in the
space heating water circuit.
▪ Mind the minimum water volume when choosing the
installation location of the overpressure bypass valve
(at the indoor unit, or at the collector). See "5.2.1 To
check the water volume and flow rate"[410].
▪ Mind the minimum flow rate when adjusting the
overpressure bypass valve setting. See "5.2.1 To
check the water volume and flow rate" [4 10] and
"8.2.1To check the minimum flow rate"[432].
NOTICE
In case an optional domestic hot water tank is installed: A
pressure relief valve (field supply) with an opening
pressure of maximum 10bar (=1MPa) must be installed
on the domestic cold water inlet connection in accordance
with the applicable legislation.
5.4.2 To fill the water circuit
To fill the water circuit, use a field supply filling kit. Make sure you
comply with the applicable legislation.
INFORMATION
Make sure both air purge valves (one on the magnetic filter
and one on the backup heater) are open.
5.4.3 To fill the domestic hot water tank
See the installation manual of the domestic hot water tank.
5.4.4 To insulate the water piping
The piping in the complete water circuit MUST be insulated to
prevent condensation during cooling operation and reduction of the
heating and cooling capacity.
If the temperature is higher than 30°C and the humidity is higher
than RH80%, the thickness of the insulation materials should be at
least 20 mm to prevent condensation on the surface of the
insulation.
6 Electrical installation
DANGER: RISK OF ELECTROCUTION
WARNING
ALWAYS use multicore cable for power supply cables.
6.1 About electrical compliance
Only for the backup heater of the indoor unit
See "6.3.2To connect the backup heater power supply"[414].
6.2 Guidelines when connecting the
electrical wiring
Tightening torques
Item Tightening torque (N•m)
M4 (X1M) 1.2~1.5
M4 (earth)
6.3 Connections to the indoor unit
Item Description
Power supply (main) See "6.3.1To connect the main power
supply"[413].
Power supply (backup
heater)
See "6.3.2To connect the backup heater
power supply"[414].
Shut-off valve See "6.3.3To connect the shut-off
valve"[415].
Electricity meters See "6.3.4To connect the electricity
meters"[415].
Domestic hot water
pump
See "6.3.5To connect the domestic hot
water pump"[416].
Alarm output See "6.3.6To connect the alarm
output"[416].
Space cooling/heating
operation control
See "6.3.7To connect the space cooling/
heating ON/OFF output"[417].
Changeover to
external heat source
control
See "6.3.8To connect the changeover to
external heat source"[417].
Power consumption
digital inputs
See "6.3.9To connect the power
consumption digital inputs"[418].
Safety thermostat See "6.3.10To connect the safety
thermostat (normally closed
contact)"[418].
Smart Grid See "6.3.11To connect a Smart
Grid"[419].
Room thermostat
(wired or wireless)
See:
▪ Installation manual of the wireless
room thermostat
▪ Installation manual of the wired
room thermostat (digital or
analogue) + multi-zoning base
unit
▪ Connection of the wired room
thermostat (digital or analogue)
to the multi-zoning base unit
▪ Connection of the multi-zoning
base unit to the indoor unit
▪ For cooling/heating operation,
you also need option EKRELAY1
▪ Addendum book for optional
equipment
Wires: 0.75mm²
Maximum running current: 100mA
For the main zone:
▪ [2.9] Control
▪ [2.A] Thermostat type
For the additional zone:
▪ [3.A] Thermostat type
▪ [3.9] (read-only) Control