Procedure to Remove Humidity Thermistor and Air Temperature Thermistor Si281312E
12 Removal Procedure
10.Procedure to Remove Humidity Thermistor and
Air Temperature Thermistor
Procedure Warning Be sure to wait for 10 minutes or more after turning off all power
supplies before disassembling work.
Step
Procedure Points
According to the
procedure for the removal
of decoration panel,
remove the decoration
panel.
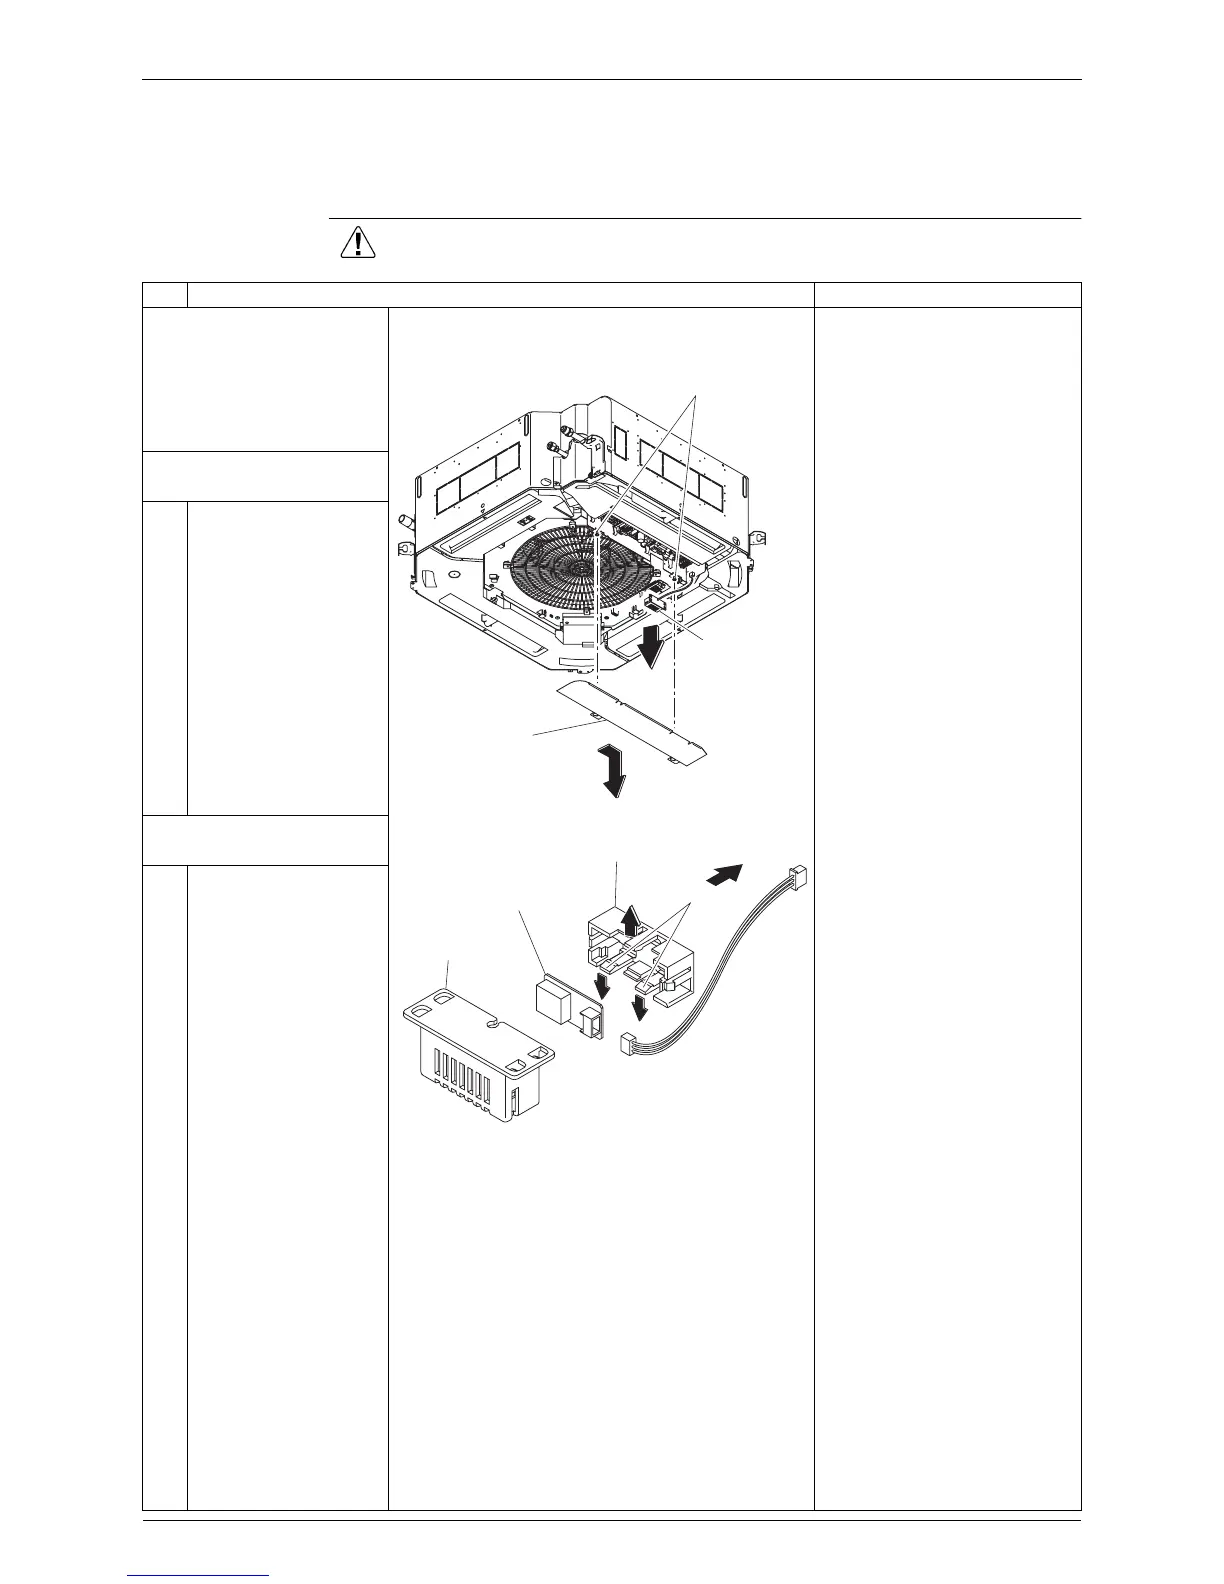
1. Removing the humidity
thermistor assembly
1
Unfasten the 2 screws
that fix the lid of the
switch box, and then
slide to remove the lid.
2
Disconnect the humidity
thermistor connector.
3
Pull out the humidity
thermistor assembly
together with the plastic
casing downward.
2. Removing the humidity
thermistor
1
Pull out the plastic
casing (2).
2
Press the 3 tabs, and
then remove the
humidity thermistor.
3
Disconnect the
connector.
Screws
Humidity
thermistor
Switch box lid
Humidity thermistor
Plastic casing (1)
Plastic casing (2)
Ta b