Procedure to Remove Air Filter and Suction Grille Si281312E
2 Removal Procedure
1. Procedure to Remove Air Filter and Suction Grille
Procedure Warning Be sure to wait for 10 minutes or more after turning off all power
supplies before disassembling work.
Step
Procedure Points
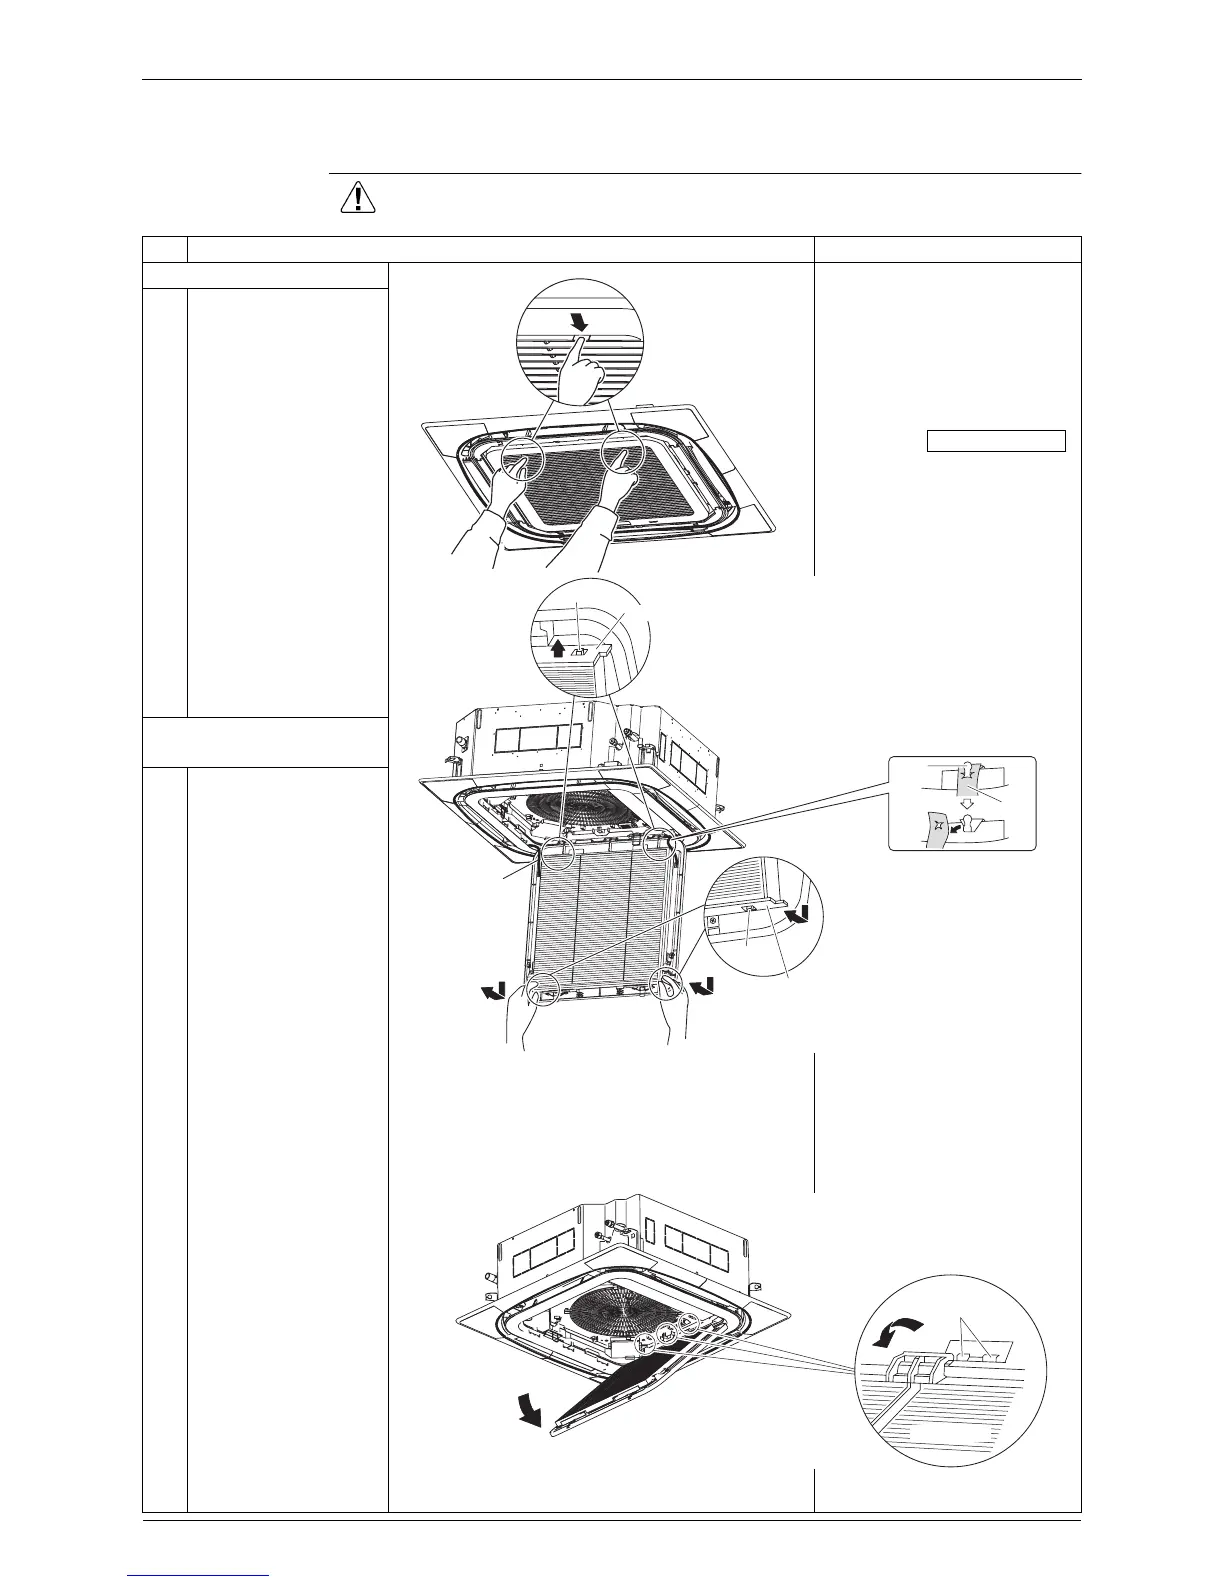
1. Removing the air filter
Clean stains off the air filter
with a vacuum cleaner or
wash them off with water.
(Do not use hot water of
50°C or more temperature
for this purpose.)
After cleaning the air filter,
press the
button on the remote
controller.
(The message “Clean Filter”
will disappear from the
remote controller display.)
1
Press the 2 buttons
simultaneously and pull
the suction grille down
slowly.
2
Pull down the bottom
part of the air filter
once, and then
disengage the hole (2
places) for latch from
the protrusion
respectively.
3
Hold up the air filter,
and then disengage the
hole (2 places) for latch
from the protrusion
located at the top end
respectively.
2. Removing the suction
grille
1
Disengage the strings
(2 places) located at the
top of the suction grille
from the panel.
2
Open the suction grille
to an angle of 45
degrees, and then hold
it up to unlatch the
latches located in 3
places.
Clean stains off the suction
grill using a soft brush with
water or mild detergent.
(Do not use hot water of
50°C or more temperature
for this purpose.)
Protrusion
Top of air filter
String
Protrusion
Bottom of
air filter
Bracket
String
Latches located in 3 places
Panel latches
Suction grille
Filter Sign Reset