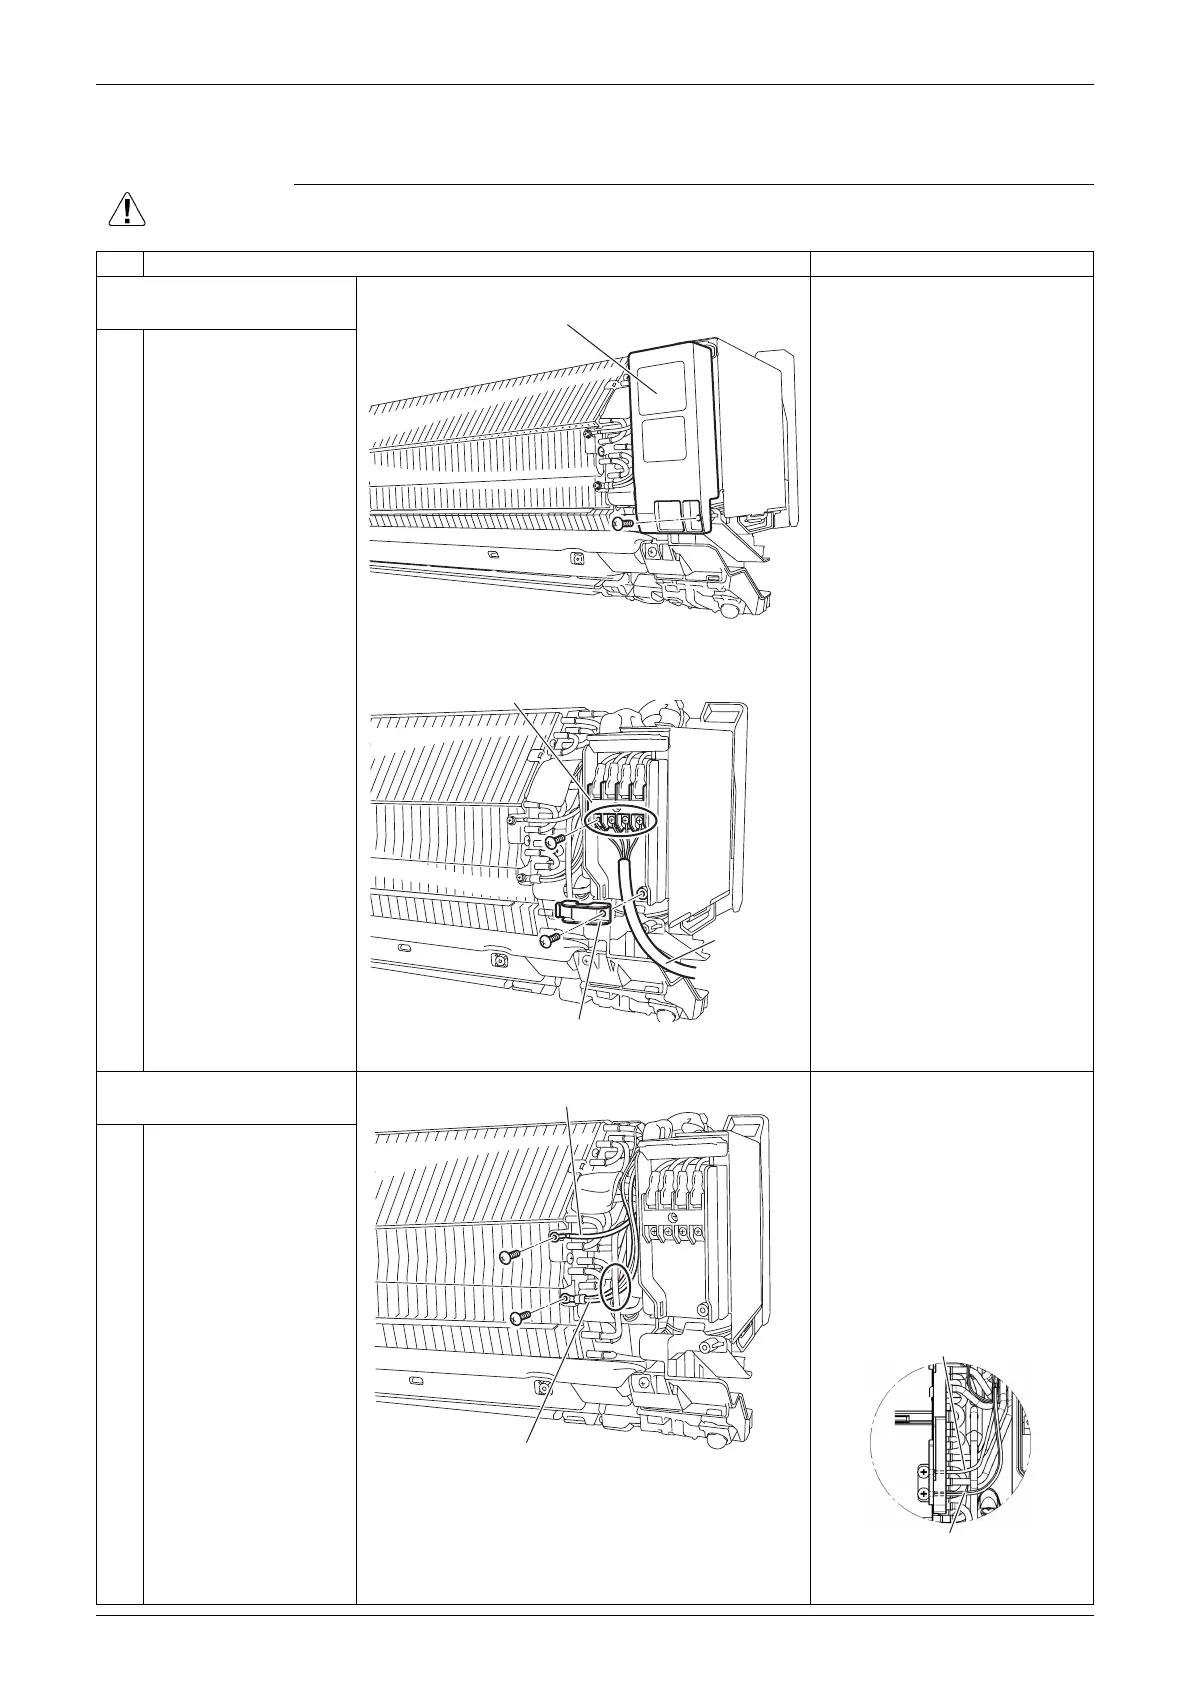
Electrical Box Si041652EB
6 Removal Procedure
5. Electrical Box
Warning
Be sure to wait for 10 minutes or more after turning off all power supplies before
disassembling work.
Step Procedure Points
1. Disconnect the
connecting wire.
The service cover can be
removed without removing
the front grille.
The service cover has no
hook and may fall when the
screw is loosened. Be
careful not to drop the
service cover.
1 Remove the screw, and
then the service cover.
2
3
Remove the screw, and
then the wire fixture.
Remove the 4 screws
of the terminal strip and
disconnect the
connecting wire.
2. Remove the electrical
box.
When reassembling, make
sure to pass the green earth/
ground wire behind the heat
exchanger tube, except for
FTXF60QVMA. For
FTXF60QVMA, the green
earth/ground wire should
pass above the heat
exchanger tube.
1 Remove the 2 screws
and detach the earth/
ground wires.
Service cover
(R22894)
Connecting
wire
Wire fixture
Terminal strip
(R24136)
Earth/ground wire (green)
Earth/ground wire (green/yellow)
(R23516)
Earth/ground wire
(green/yellow)
Earth/ground
wire (green)
(R24088)