5 ■English
Installation Tips
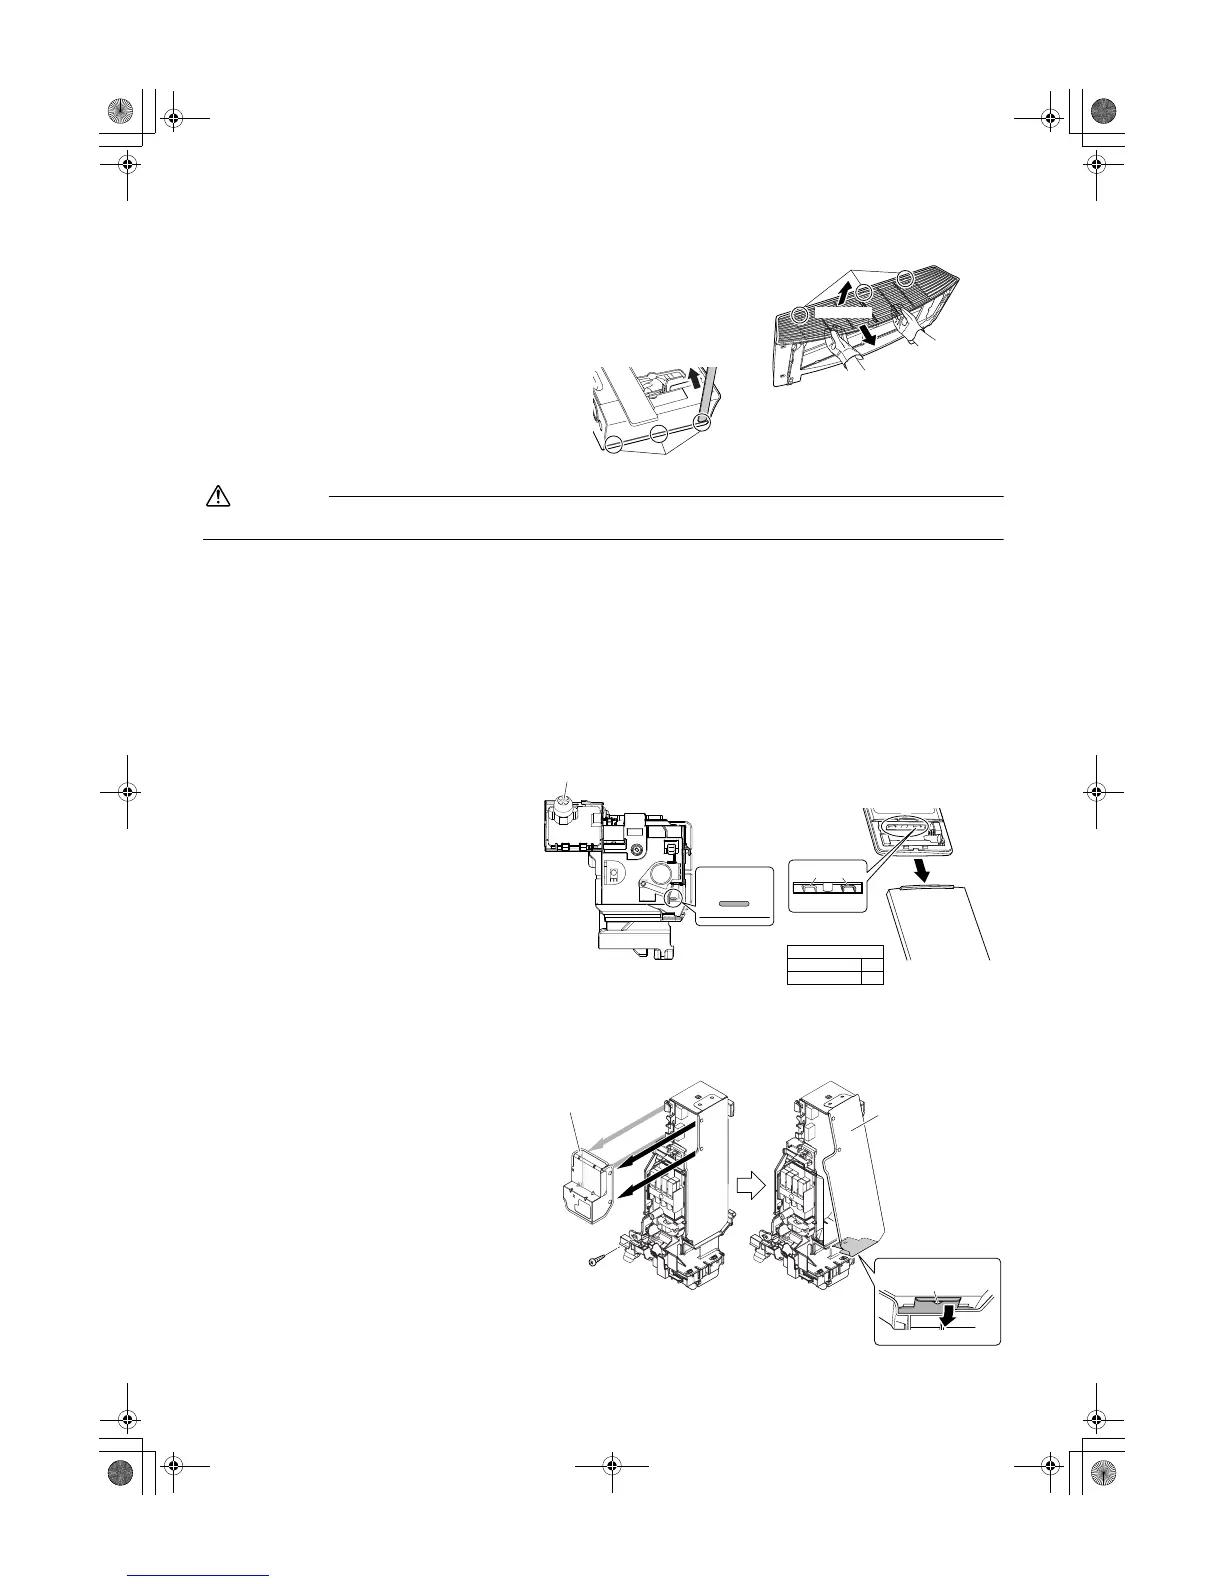
7) Wear protection gloves and insert both hands
under the front grille as shown in the figure.
8) Remove the front grille from the 3 upper hooks
by pushing up the top side of the front grille, pull
the front grille toward you by holding both ends
of the front grille, and dismount the front grille.
• If the grille is hard to remove, insert a long flat
plate* through the gap in the side cover as
shown in the figure, and turn the plate inwards
to disengage the hooks (3 hooks each on the
right and left sides) so that you can remove the
grille easily.
* Such as a ruler wrapped in a cloth
CAUTION
Be sure to wear protection gloves.
• Installation method
1) Install the front grille and firmly engage the upper hooks (3 locations), right and left sides hooks (each 3 locations).
2) Install 4 screws of the front grille, and close the 2 screw covers.
3) Mount the flap (large).
4) Lower the lower front panel to the original position.
5) Attach the wire harnesses to the 2 connectors and secure the wire harnesses with the wire clamp.
6) Install the air filter and then mount the upper front panel.
3.
How to set the different addresses
When two indoor units are installed in one
room, the two wireless remote controllers can
be set for different addresses.
1) Remove the upper front panel and front
grille. (4 screws)
2) Cut the address jumper (JA) on the printed
circuit board.
3) Cut the address jumper (J4) in the remote
controller.
• Be careful not to cut jumper (J8).
4.
When connecting to an HA system
(wired remote controller, central remote controller etc.)
• Removal methods of metal plate
electrical wiring covers
1) Remove the upper front panel and front
grille. (4 screws)
2) Remove the electrical wiring box. (1 screw)
3) Remove the 4 tabs and dismount the metal
plate electrical wiring cover (A).
4) Pull down the hook on the metal plate
electrical wiring cover (B), and remove a
single tab.
5) Remove the 2 tabs on the top part and
dismount the metal plate electrical wiring
cover (B).
Upper hooks
2)Pull toward you.
1)Push up.
Side hooks
1
2
JA
[Indoor unit]
<Bottom of electrical wiring box>
INTELLIGENT EYE sensor
[Remote controller]
Jumper
(J8) (J4)
ADDRESS
EXIST
CUT
ADDRESS : JA
EXIST : 1
CUT : 2
Metal plate electrical
wiring cover (B)
Metal plate electrical
wiring cover (A)
Screw
[From back side]
Single tab
Pull down
01_EN_3P358178-1A.fm Page 5 Monday, December 16, 2013 3:59 PM
 Loading...