EasyManua.ls Logo

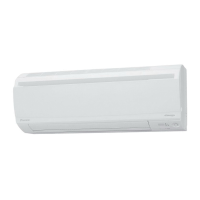
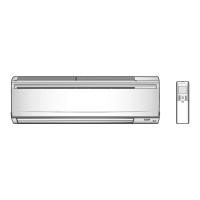
Daikin FTXS60LVMA - Service Manual

Daikin FTXS60LVMA
38 pages
Print Icon
To Next Page IconTo Next Page
Loading...
REMOVAL
PROCEDURE
SERVICE MANUAL
Indoor Unit
Inverter/Non-Inverter
Wall Mounted Type
5.0/6.0/7.1 kW Class
15000/18000/24000/28000 Btu/h Class
Si041144

Other manuals for Daikin FTXS60LVMA

Questions and Answers

  • J
    James TaylorAug 7, 2025
    What to do if my Daikin Air Conditioner operation stopped suddenly and the operation lamp flashes?
    • E
      estradabrittanyAug 7, 2025
      If your Daikin Air Conditioner suddenly stops and the OPERATION lamp flashes, try these steps: Clean the air filters. If that doesn't work, turn the breaker off, remove any obstacles, and then turn the breaker back on. Try operating the air conditioner with the remote controller again. Also, set all indoor units to the same operation mode. If using “AUTO”, switch all indoor units to “COOL” or “HEAT” temporarily to see if the flashing stops.
  • D
    David DoyleAug 14, 2025
    Why doesn't hot air flow out immediately from my Daikin Air Conditioner after starting heating?
    • L
      larry64Aug 14, 2025
      If hot air doesn't flow out immediately when you start the heating operation on your Daikin Air Conditioner, wait for 1 to 4 minutes. The system is designed to start discharging air only after it has reached a certain temperature.
  • L
    Larry RodriguezAug 22, 2025
    Why doesn't the ON/OFF TIMER operate according to the settings on my Daikin Air Conditioner?
    • T
      Tracy PhamAug 22, 2025
      If the ON/OFF TIMER on your Daikin Air Conditioner isn't working as set, change or deactivate the settings in the WEEKLY timer.
  • H
    Henry LaraAug 30, 2025
    Why is the cooling or heating effect poor in my Daikin FTXS60LVMA?
    • J
      jesus15Aug 30, 2025
      If your Daikin Air Conditioner isn't cooling or heating well, several factors could be the cause. First, ensure the air filters are clean. Check if anything is blocking the air inlet or outlet of the indoor and outdoor units. Verify that the temperature setting is appropriate for your needs and that all windows and doors are closed properly. Lastly, confirm that the airflow rate and direction are set correctly for optimal performance.

Summary

Removal of Air Filters and Front Panel

Appearance Features

Overview of the indoor unit's external features and indicators.

Titanium Apatite Photocatalytic Air-Purifying Filters

Procedure for removing the special air-purifying filters.

Front Panel Removal

Steps to detach the main front panel of the indoor unit.

Removal of Front Grille

Service Cover Removal

Procedure for removing the service cover before accessing the front grille.

Front Grille Detachment

Steps to detach the front grille, including removing screws and hooks.

Removal of Electrical Box

Preparation and Part Layout

Initial steps including preparing the unit and identifying parts.

Drip Proof Plate Removal

Procedure for removing the drip proof plate from the indoor heat exchanger.

Earth Wire and Thermistor Release

Disconnecting the earth wire and indoor heat exchanger thermistor.

Electrical Box Detachment

Steps to detach and remove the main electrical box.

Removal of PCBs

Signal Receiver PCB Removal

Procedure for removing the signal receiver PCB.

Intelligent Eye Sensor PCB Removal

Procedure for removing the Intelligent Eye sensor PCB.

Display PCB Removal

Procedure for removing the display PCB.

Control PCB Removal

Steps to detach and remove the main control PCB.

Removal of Horizontal Blades and Swing Motors

Horizontal Blade Removal

Procedure for removing the horizontal air louvers.

Air Outlet Assembly Removal

Steps to detach the air outlet assemblies.

Fan Guard Removal

Procedure for removing the fan guards.

Horizontal Swing Motor Removal

Procedure for removing the motors controlling horizontal blade movement.

Vertical Swing Motor Removal

Procedure for removing the motors controlling vertical blade movement.

Removal of Indoor Heat Exchanger

Refrigerant Piping Disconnection

Steps to safely disconnect the refrigerant piping.

Piping Fixture Removal

Procedure for detaching the piping fixture from the unit.

Indoor Heat Exchanger Detachment

Steps to detach and remove the main indoor heat exchanger unit.

Removal of Fan Motor and Fan Rotor

Right Side Plate Removal

Procedure for removing the right side access panel.

Fan Rotor Detachment

Steps to remove the fan rotor from the motor assembly.

Fan Motor Removal

Procedure for detaching and removing the fan motor unit.

Removal of Vertical Blade Assembly

Vertical Blade Assembly Detachment

Procedure for removing all vertical blade assemblies.

Daikin FTXS60LVMA Specifications

General IconGeneral
Cooling Capacity6.0 kW
Heating Capacity7.0 kW
RefrigerantR32
TypeSplit System
Power Supply220-240 V, 50 Hz

Related product manuals