Procedure to Remove Heat Exchanger Si241306
8 Removal Procedure
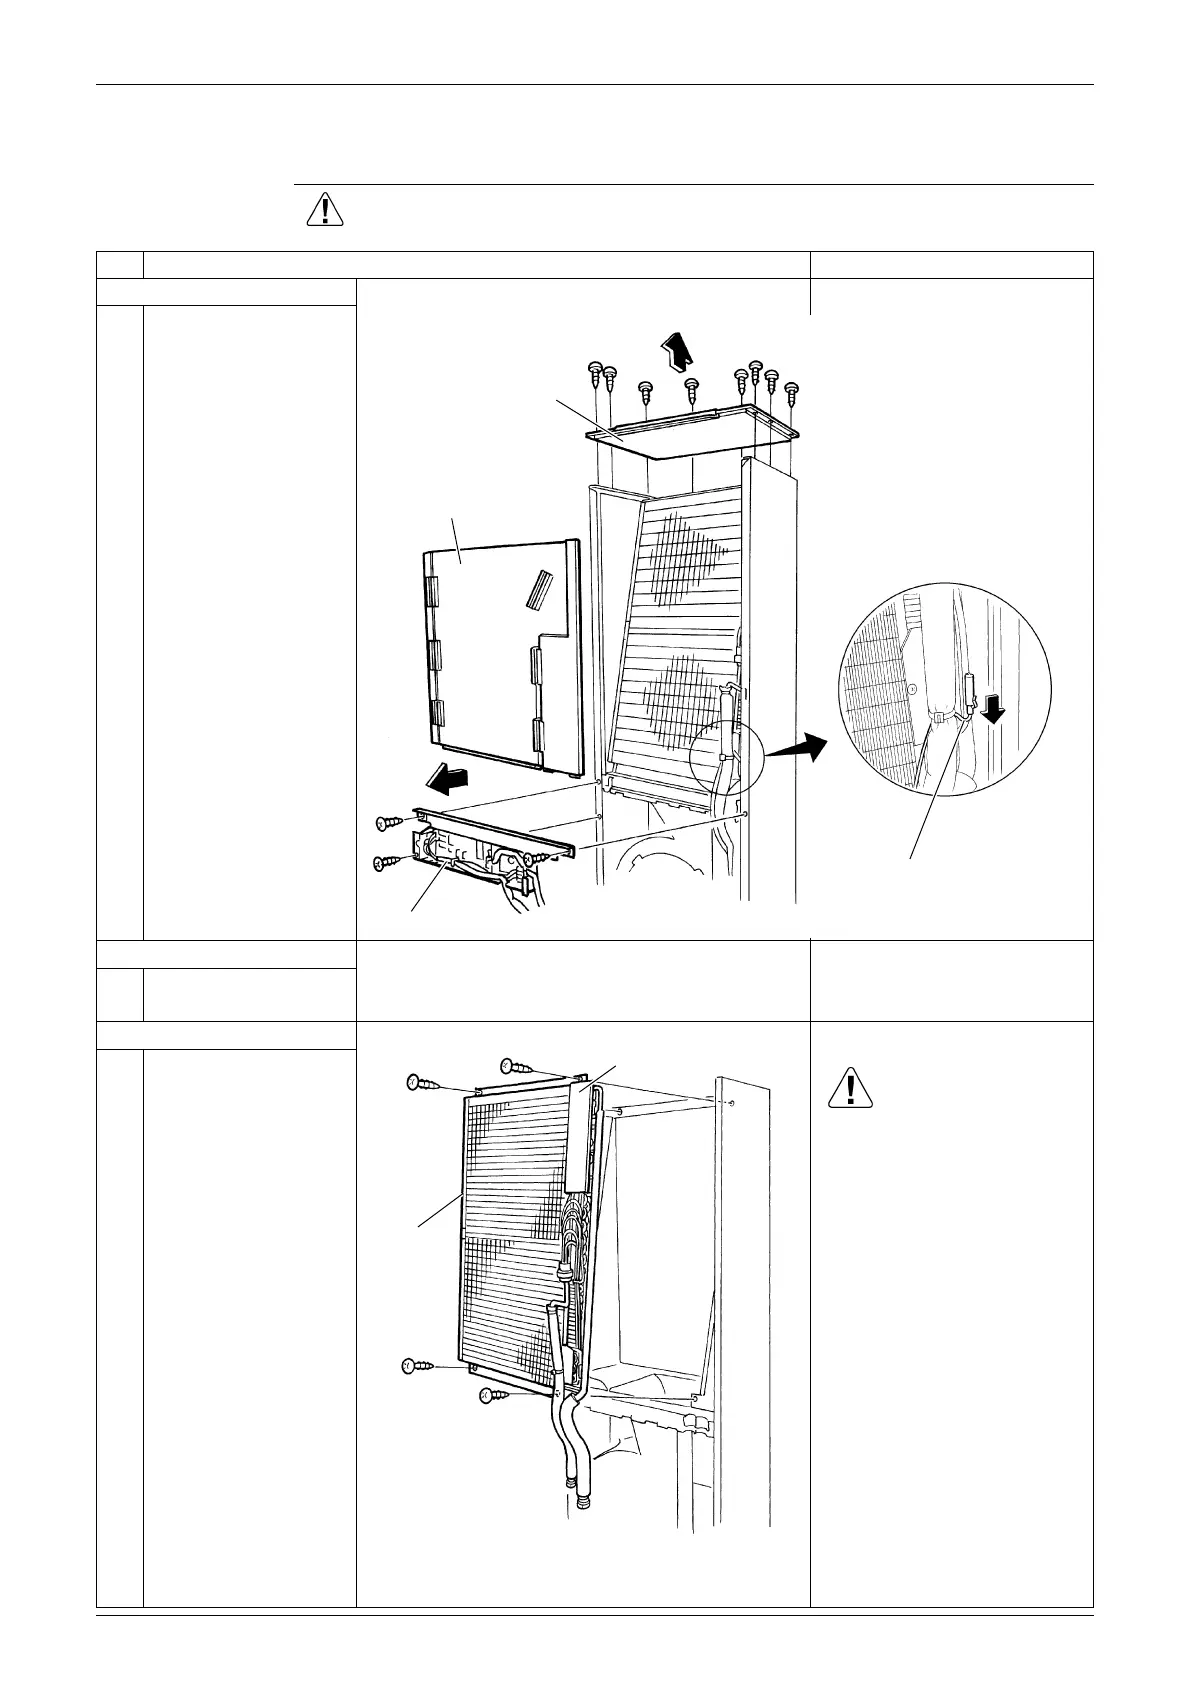
5. Procedure to Remove Heat Exchanger
Procedure Warning Be sure to wait for 10 minutes or more after turning off all power
supplies before disassembling work.
Step
Procedure Points
Removing switch box
1
Disconnect connector
for swing motor and 1
for limit switch.
2
Remove heat
exchanger thermistor
from PCB.
3
Remove 3 mounting
screws to dismount
switch box and air
partition plate.
Removing top panel
1
Remove 8 screws to
dismount top panel.
Removing heat exchanger
1
Remove 4 screws to
dismount heat
exchanger.
Caution
Be sure to remove heat
exchanger before cleaning it.
Top panel
Air partition plate
Switch box
Heat exchanger thermistor
Piping cover
Heat
exchanger