InsTallaTIon
www.DaikinApplied.com 7 IM 1102 • PARALLEL TERMINAL BOX
Controls
CAUTION
Static sensitive components. Can cause equipment
damage.
Discharge any static electrical charge by touching the bare
metal inside the control panel before performing any service
work. Never unplug cables, circuit board terminal blocks, or
power plugs while power is applied to the panel.
Detailed information regarding connection, start-up and
operating procedures for controls provided by Daikin
are available from your local Daikin representative. For
information on controls by other manufacturers, contact that
manufacturer’s local branch or dealer.
IMPORTANT: Units with digital controls, if factory programmed,
incorporate specic communication addresses. Installing the
terminal in a different location than noted on unit label and
building plans may result in excessive start-up labor.
Labeling
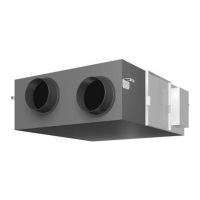
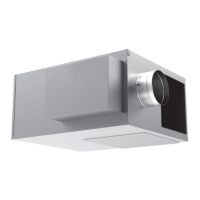
Fan Powered Air Terminals are shipped from the factory with
up to seven different information labels (not all labels pertain
to all fan powered units depending upon the type of insulation
and the nal ship to state).
1. Control Label – afxed to the fan powered terminal
casing or the inside of the control panel cover. Shows
piping/wiring diagram and control sequence number and
fusing (if applicable).
2. Calibration Label – afxed to the fan powered terminal
casing. Shows air ow calibration data and control
settings (if applicable).
3. I.D. Label – afxed to the fan powered terminal casing.
Shows tagging information, customer order number, ETL
Logo, Daikin Logo, etc.
4. ARI Certication Label on Fan Powered Terminal Unit –
identies applicable industry test standard and certies
unit is in compliance.
5. ARI Certication Label on Hot Water Coils – identies
applicable industry test standard and certies hot water
coil compliance (if hot water coils is ordered as an
accessory).
6. Fiberglass Label – identies insulation type for units
shipped to California.
7. Orientation label – identies the proper air ow direction
and the top of the unit.
Flow Sensor
Fan Powered Air Terminals are shipped with a factory installed
pressure differential ow sensor installed. See (Figure 4) for
the calibration curve.
Initial Start-up/Adjustment of Fan
Flow Rate
WARNING
Solid state speed controls cause all electric motors to run
hotter and speed reduction should never be below 700 RPM
for proper lubrication of motor bearings.
1. Check that the discharge duct work is connected. The
minimum recommended discharge static pressure is 0.2
inches of w.g.
2. Make certain that the electrical connection is properly
installed and that all safety covers and access panels are
in place.
3. Inspect the fan box and duct work for the presence of
any packing / foreign materials and remove if found.
4. Motor is shipped from the factory set at full speed.
Allow the motor to warm up for a period greater than
10 minutes prior to adjusting speed control. During this
warm up period, inspect the ductwork for leaks and make
any necessary repairs.
CAUTION: Do not operate the fan box if the downstream
ductwork is not present.
5. Flow adjustment: Turn the speed control
counterclockwise to reduce the fan speed. Clockwise
rotation will increase the fan speed.
6. Set the unit to full heating (maximum induction). Adjust
the downstream balancing dampers (if present). Adjust
the speed control to deliver the desired air ow rate by
measuring the air delivered to the room outlets using a
ow hood or other instruments.
7. Set the unit to full cooling (maximum primary air). (Refer
to controls literature for detailed control installation
information.) The fan may need to be readjusted with the
primary air and ventilation air at maximum set point to
insure that no supply air is discharged at the plenum air
intake port, then recheck full heating.
Fan Maintenance Procedure
The motor is equipped with permanently lubricated bearings.
Inspect the motor, fan and terminal unit for the buildup of dust
or other foreign material. Clean as required by the operating
environment and type of insulation installed.
 Loading...