7 | Piping installation
Installer reference guide
38
4MWXM-A9
R32 Split series
4P708645-1 – 2022.09
Connection examples:
▪ Connecting a Ø9.5mm inter unit pipe to a Ø12.7mm gas pipe connection port
on the outdoor unit
a Reducer 1
b Reducer 2
c Flare nut (on the outdoor unit)
Coat the threaded connection port of the outdoor unit where the flare nut comes
in with refrigeration oil.
Flare nut for (mm) Tightening torque (N•m)
Ø6.4 15~17
Ø9.5 33~39
Ø12.7 50~60
NOTICE
Use an appropriate wrench to avoid damaging the connection thread by
overtightening the flare nut. Be careful NOT to overtighten the nut, or the smaller
pipe may be damaged (about 2/3-1× the normal torque).
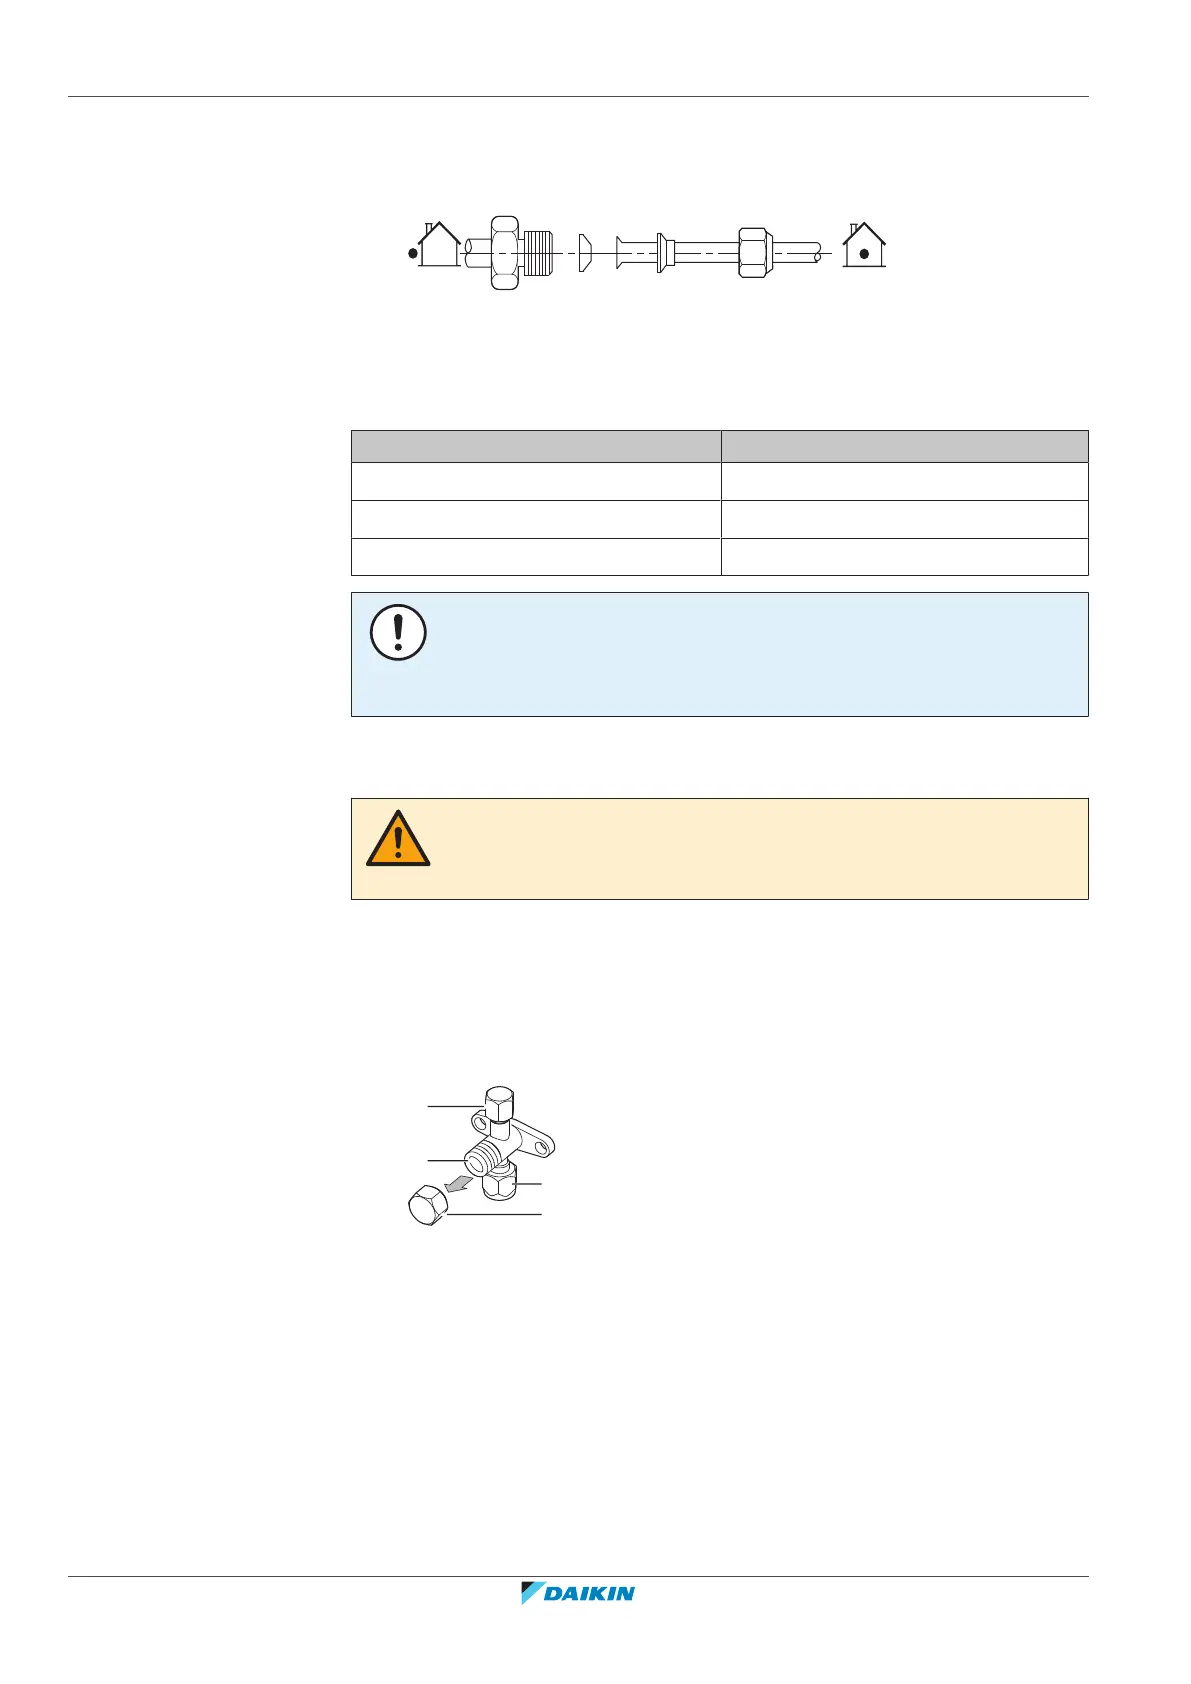
7.2.7 Using the stop valve and service port
CAUTION
Do NOT open the valves before flaring is complete. This would cause refrigerant gas
leakage.
To handle the stop valve
Take the following guidelines into account:
▪ The stop valves are factory closed.
▪ The following figure shows the stop valve parts required when handling the
valve.
a Service port and service port cap
b Valve stem
c Field piping connection
d Stem cap
▪ Keep both stop valves open during operation.
▪ Do NOT apply excessive force to the valve stem. Doing so may break the valve
body.
▪ ALWAYS make sure to secure the stop valve with a spanner, then loosen or
tighten the flare nut with a torque wrench. Do NOT place the spanner on the
stem cap, as this could cause a refrigerant leak.