23 ■English
Trial Operation and Testing
3. How to diagnose for malfunction
• If the air conditioner does not operate normally after installing the air conditioner, a malfunction shown in the table below may
happen.
Wired remote controller display Description
No display
• Power outage, power voltage error or open-phase
• Incorrect wiring (between indoor and outdoor units)
• Indoor PC-board assembly failure
• Remote controller wiring not connected
• Remote controller failure
• Open fuse or tripped circuit breaker (outdoor unit)
“Checking the connection. Please
stand by.” *
• Indoor PC-board assembly failure
• Wrong wiring (between indoor and outdoor units)
* “Checking the connection. Please stand by” will be displayed for up to 90 seconds following the application of power to the indoor
unit. This is normal and does not indicate a malfunction.
Diagnose with the display on the liquid crystal display remote controller.
With the wired remote controller
When the operation stops due to a malfunction, operation lamp blinks, and the malfunction code is indicated on the liquid crystal
display. In such a case, diagnose the fault contents by referring to Error History in the service settings menu.
In the case of group control, the unit No. is displayed so that the indoor unit with the trouble can be identied.
With the wireless remote controller
(Refer also to the operation manual attached to the wireless remote controller)
When the operation stops due to a malfunction the display on the indoor unit blinks. In such a case, diagnose the fault contents with
the error code which can be found by following procedures.
1) Press the INSPECTION/TEST OPERATION button, “
” is displayed and “ 0 ” blinks.
2) Press the TEMPERATURE SETTING button and nd the unit No. which stopped due to trouble.
Number of beeps 3 short beeps .............................
1 short beep ..............................
1 long beep ................................
Perform all the following operations
Perform (3) and (6)
No trouble
3) Press the OPERATION MODE SELECTOR button and upper gure of the error code blinks.
4) Continue pressing the TEMPERATURE SETTING button until it makes 2 short beeps and nd the upper code.
5) Press the OPERATION MODE SELECTOR button and lower gure of the error code blinks.
6) Continue pressing the TEMPERATURE SETTING button until it makes a long beep and nd the lower code.
• A long beep indicate the error code.
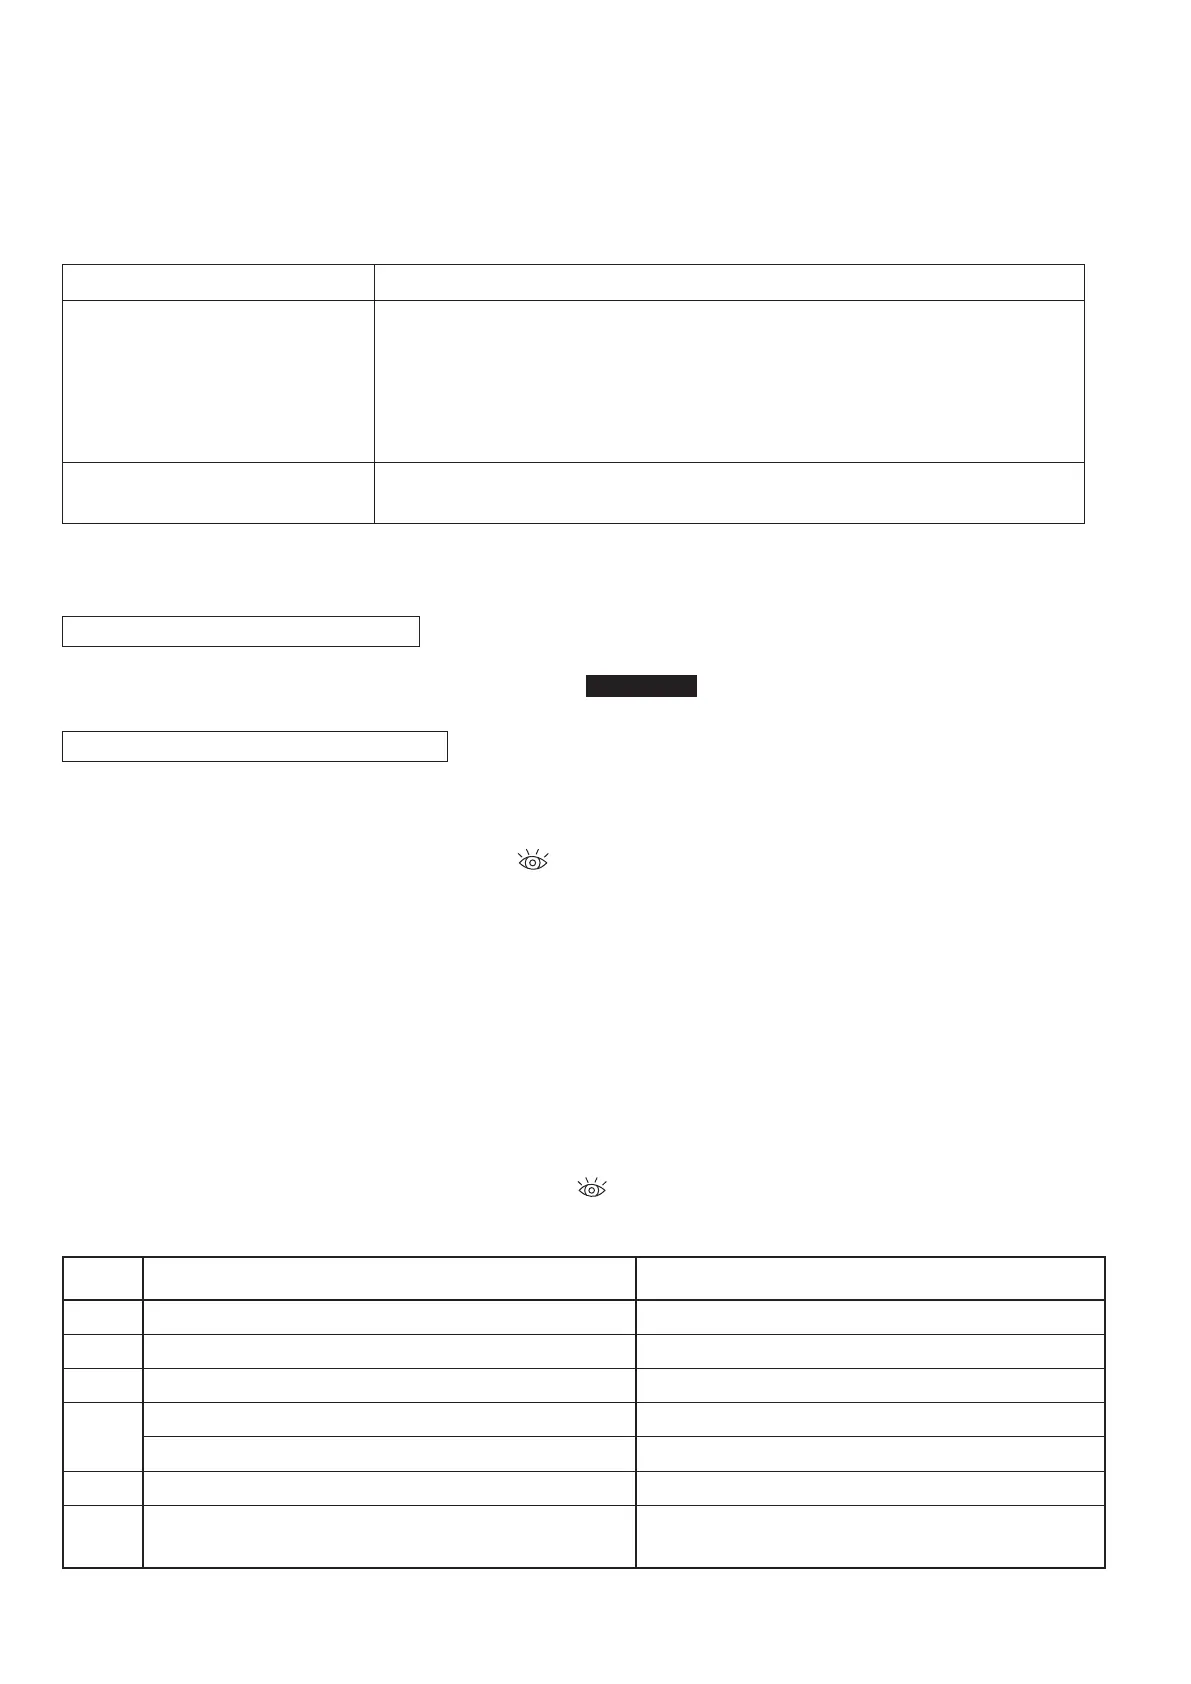
4. Malfunction code
• For places where the malfunction code is written in white, the “ ” indication is not displayed. Though the system continues
operating, be sure to inspect the system and make repairs as necessary.
• Depending on the type of indoor or outdoor unit, the malfunction code may or may not be displayed.
Malfunction
code
Descriptions and measures Remarks
A1 Indoor Printed Circuit Board failure
A3 Drain level abnormal
A5 High pressure control or freeze-up protector
A6
Indoor fan motor overload, over current, lock
Indoor Printed Circuit Board connection failure
A8 Indoor unit power supply voltage abnormal
AJ Capacity setting failure
Capacity setting adapter or capacity data error, or disconnection
of the capacity setting adapter, failure to connect the adapter, or
the capacity is not set to the data-retention IC.
01_EN_3P674701-1B.indd 23 2022/06/02 10:06:29

 Loading...