4■English
Choosing an Installation Site
Hold the unit by the 4 hanger brackets when opening the box and moving it, and do not exert pressure on to any other part, piping
(refrigerant, drain, etc.), and air outlet ange.
If the temperature or humidity inside the ceiling might rise above 86°F (30°C) or RH 80%, respectively, add extra insulation to the
unit.
Use polyethylene foam as insulation and make sure it is at least 3/8 inch (10mm) thick and ts inside the ceiling opening.
• Before choosing the installation site, obtain user approval.
The indoor unit should be positioned in a place where:
1) both the air inlet and air outlet are unobstructed,
2) the unit is not exposed to direct sunlight,
3) the unit is away from the source of heat or steam,
4) there is no source of machine oil vapor (this may shorten the indoor unit service life),
5) cool/warm air is circulated throughout the room,
6) the unit is away from electronic ignition type uorescent lamps (inverter or rapid start type) as they may affect the remote
controller range,
7) no laundry equipment is nearby,
8) drainage can be performed without any problem,
9) the weight of the indoor unit can be adequately supported,
10) the wall and the ceiling's lower surface are not signicantly tilted,
11) room can be left for installation and service work,
12) there is no risk of ammable gas leaking,
13) the required length of indoor-outdoor piping would not exceed the specied maximum length (see the installation manual that
came with the outdoor unit for details).
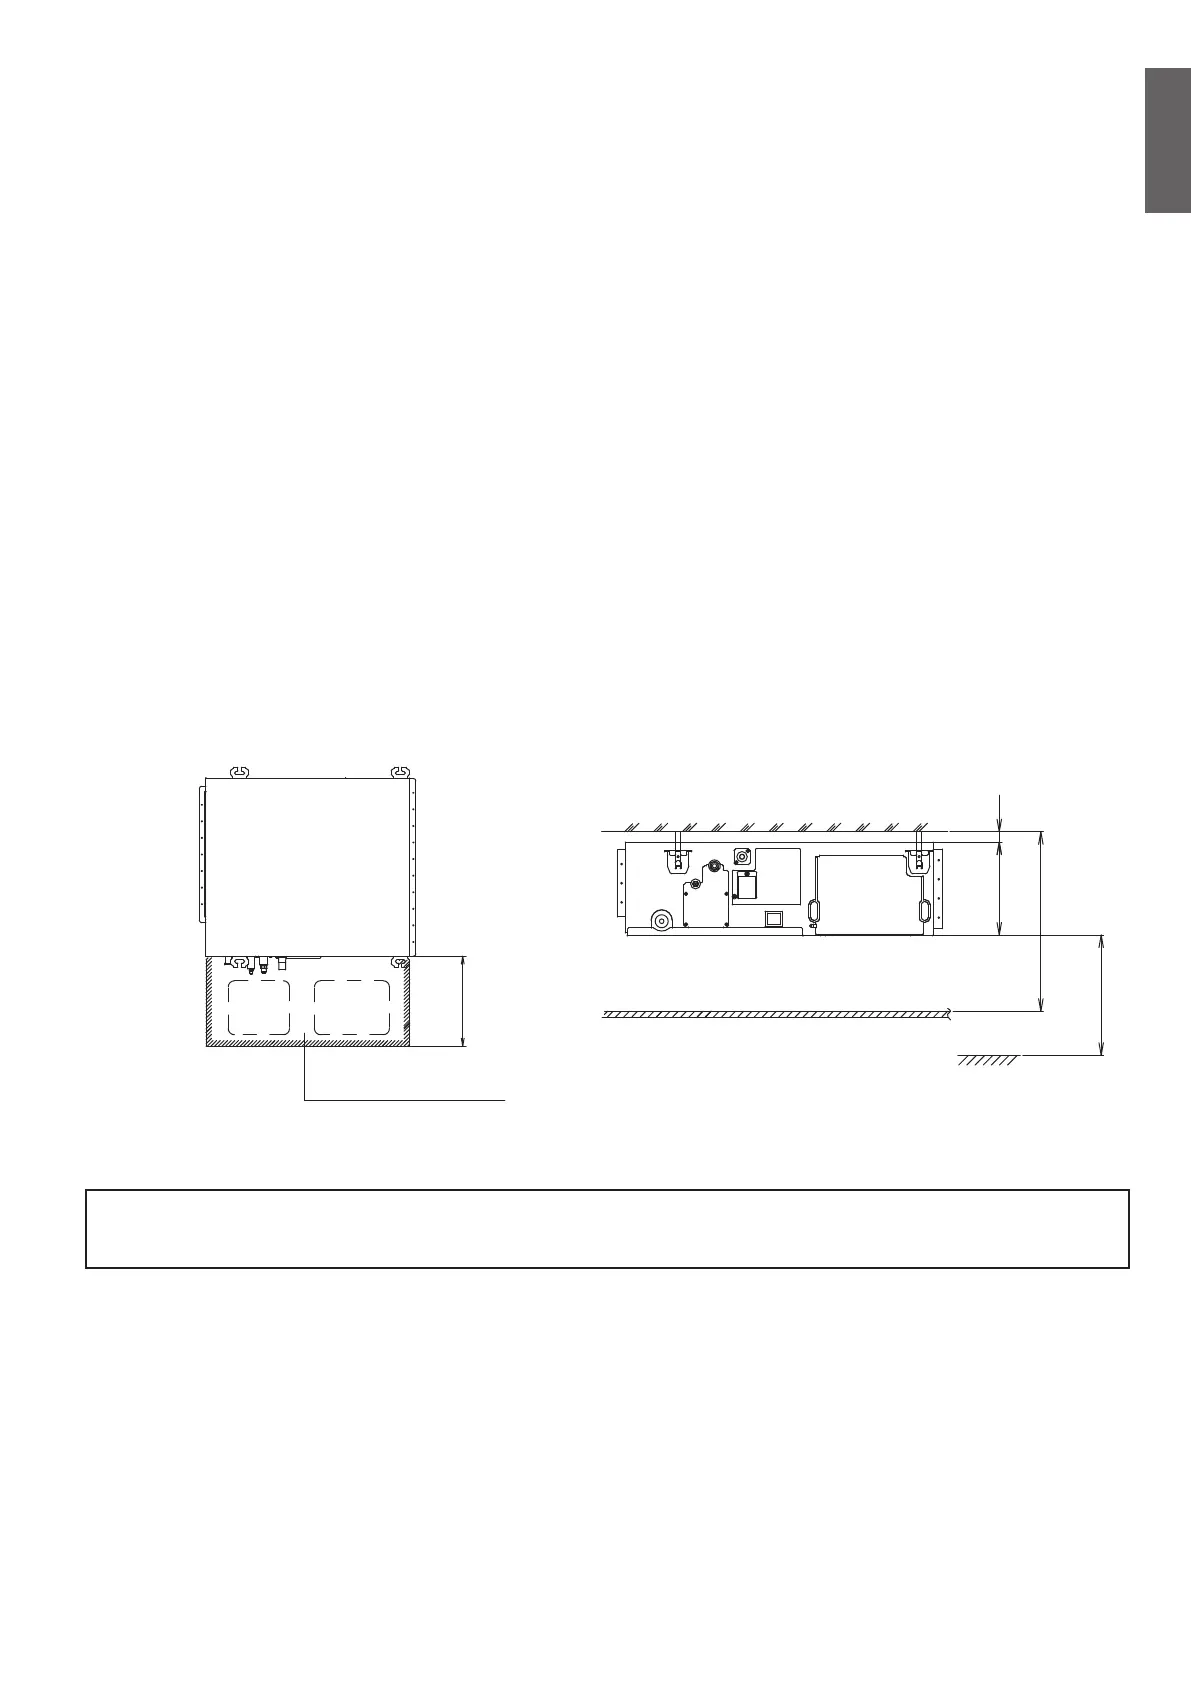
[ Installation Space Requirements ]
Maintenance
space for
drain pan
Maintenance
space for
electrical
components
Secure the maintenance
space for the drain pan and
electrical components.
17-11/16
(450)
or more
Floor
Ceiling
unit: inch (mm)
100 (2500)
or more
H2 or more*
2
13/16
(20)
or more
H1=9-5/8
(245)*
1
*1 Dimension H1 indicates the product height.
*2 Secure a downward slope of at least 1/100 specied in “8. Drain piping work” (page 8) and determine dimension H2.
<Failure example>
If there is an obstacle in the airow path or proper installation space is not provided, the indoor unit will cause air volume reduction
and take in air blown out of the indoor unit, thus resulting in performance degradation or turning the thermostat OFF frequently.
Use suspension bolts for installation. Check whether the ceiling is strong enough to support the
weight of the unit or not. If there is a risk, reinforce the ceiling before installing the unit.
English
01_EN_3P674701-1B.indd 4 2022/06/02 10:06:22

 Loading...