3 ■English
Before Installation
• Leave the unit inside its packaging until you reach the installation site. Where unpacking is unavoidable, use a sling of soft
material or protective plates together with a rope when lifting, this to avoid damage or scratches to the unit.
When unpacking the unit or when moving the unit after unpacking, be sure to lift the unit by holding on to the hanger bracket
without exerting any pressure on other parts, especially on refrigerant piping, drain piping and other resin parts.
• Refer to the installation manual of the outdoor unit for items not described in this manual.
• Caution concerning refrigerant series R410A:
The connectable outdoor units must be designed exclusively for R410A.
Precautions
• Do not install or operate the unit in places mentioned below.
- Places with mineral oil, or lled with oil vapor or spray like in kitchens. (Plastic parts may deteriorate.)
- Where corrosive gas like sulphurous gas exists. (Copper tubing and brazed spots may corrode.)
- Where volatile ammable gas like thinner or gasoline is used.
- Where machines generating electromagnetic waves exist. (Control system may malfunction.)
- Where the air contains high levels of salt such as near the ocean and where voltage uctuates a lot (e.g. in factories). Also
inside vehicles or vessels.
•
Do not install accessories on the casing directly. Drilling holes in the casing may damage electrical wires and consequently cause re.
• Take off static electricity from the body when carrying out wiring and the electrical wiring box cover is removed.
The electric parts may be damaged.
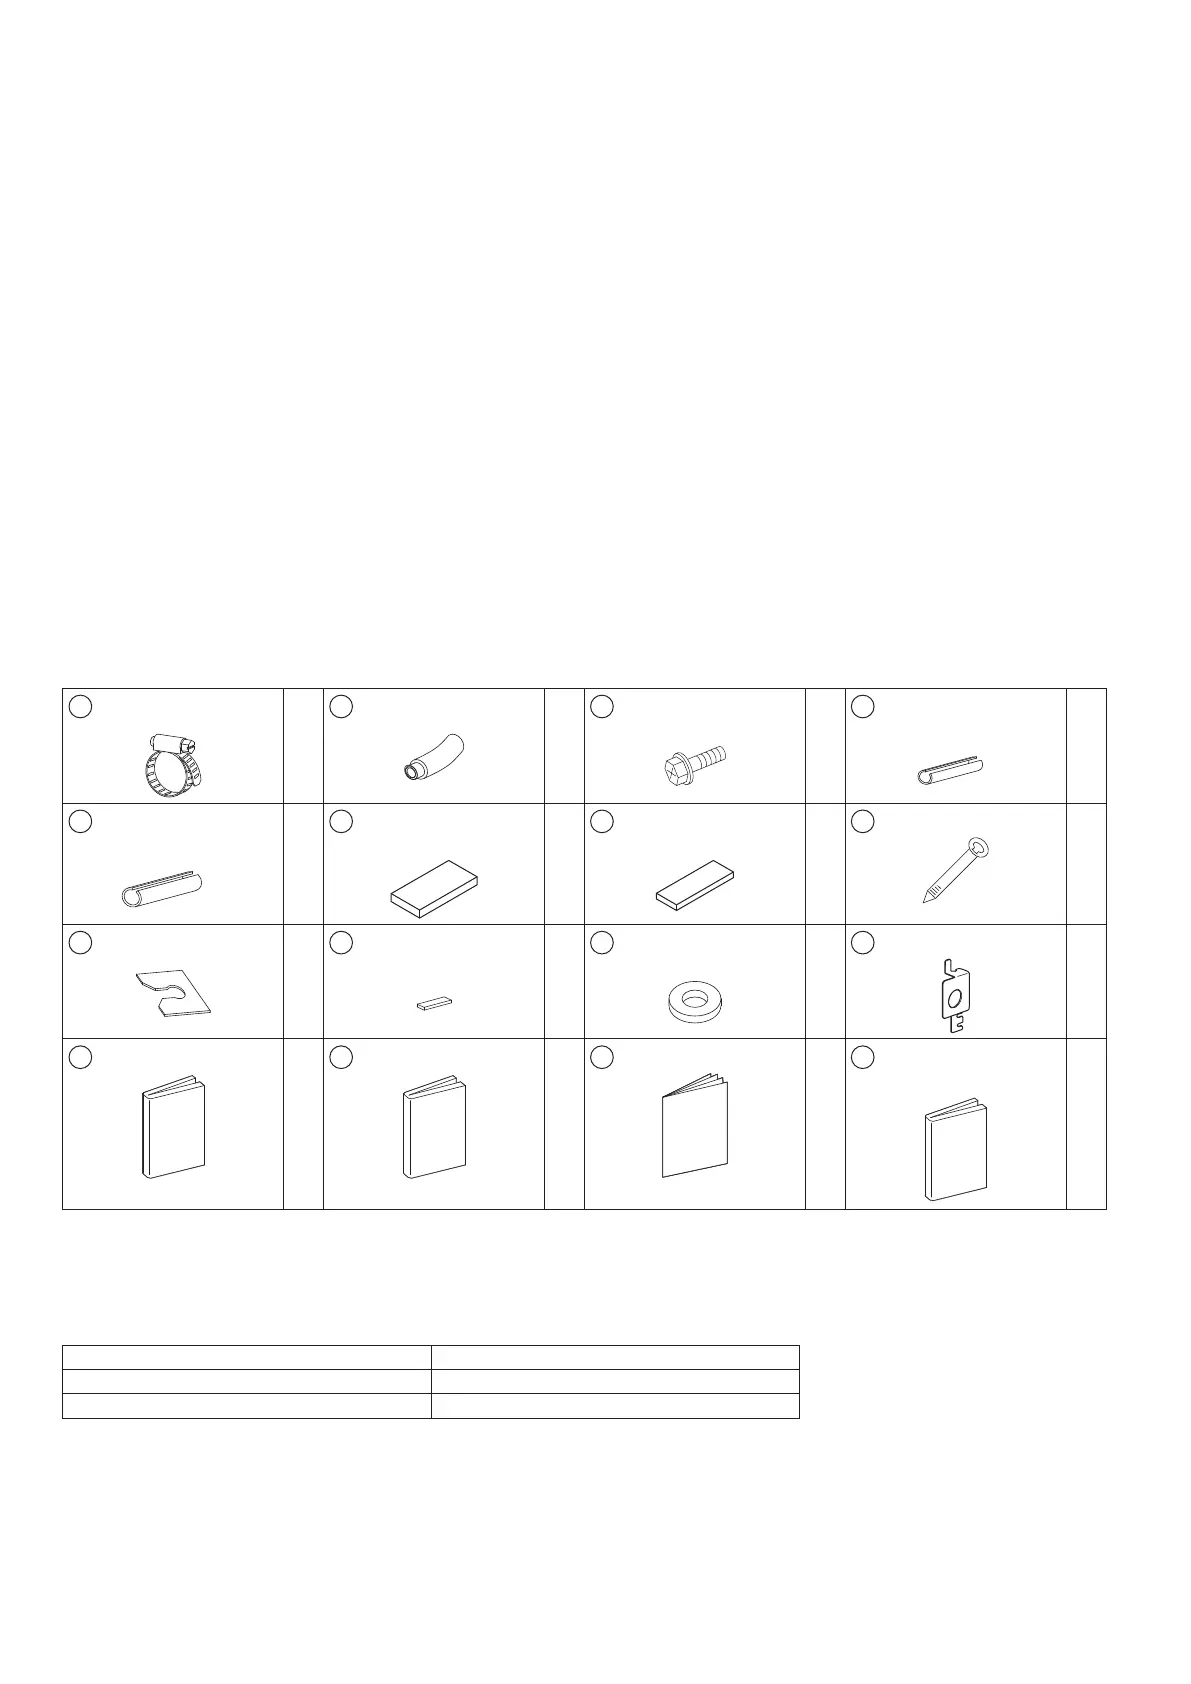
Accessories
A
Clamp metal
1
B
Drain hose
1
C
Duct ange
connection screw
10*
D
Fitting insulation
(for liquid pipe)
1
E
Fitting insulation
(for gas pipe)
1
F
Sealing pad
(large) (Dark gray)
1
G
Sealing pad
(medium) (Dark gray)
2
H
Clamp
8
J
Washer xing plate
4
K
Wire sealing pad
(small) (Gray)
2
L
Washer
(for hanger bracket)
8
M
Conduit mounting plate
1
N
Operation manual
1
P
Installation manual
1
Q
Warranty
1
R
General safety
considerations
1
*The 15/18/24 class models have 18 screws.
Optional Accessories
A remote controller is required for the indoor unit.
• There are 2 types of remote controllers: wired and wireless. Select a remote controller from the table according to user request
and install in an appropriate place.
Remote controller type Model name
Wired type BRC1E73
Wireless type BRC082A43
• If you wish to use a remote controller that is not listed in the table, select a suitable remote controller after consulting catalogs and
technical materials.
• The indoor unit can be switched to lower suction. (Refer to “6. In the case of changing the preset suction to underside
suction, replace the chamber cover and the suction ange.” (page 6))
The side cover plate (KDBD63A160) is required in the case of wiring from the bottom for underside suction.
For installation work, refer to the instruction sheet provided with the side cover plate.
01_EN_3P674701-1B.indd 3 2022/06/02 10:06:22

 Loading...