www.DaikinApplied.com 15 IM 915-13 • VISION - EXTENDED SIZES
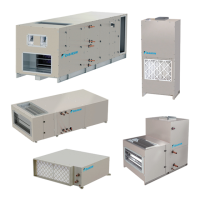
Figure 28: Tighten Cap Screw to 1/4” of the Coupling
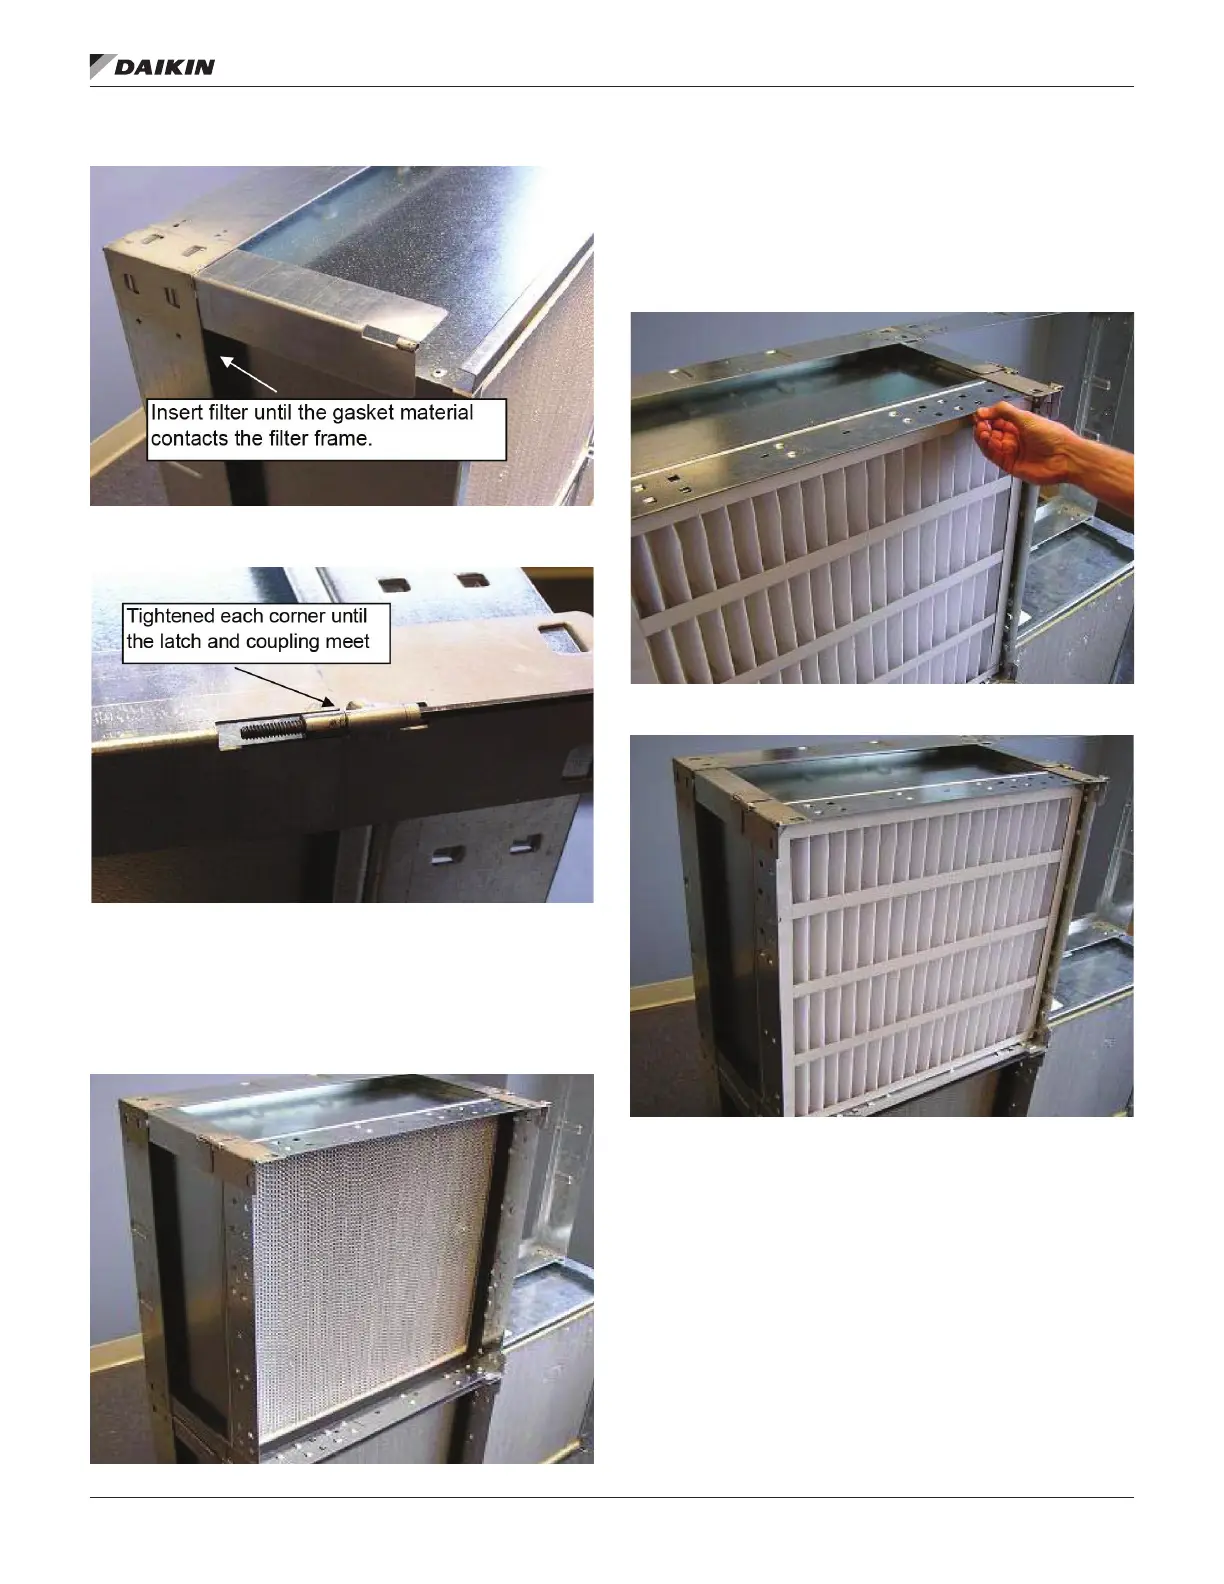
Figure 29: Tighten until Latch and Coupling Meet
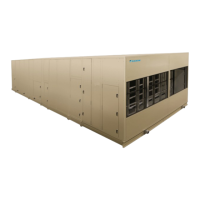
Once all four corners have been tightened the HEPA lter
should now be properly seated and sealed.
Repeat the process with all remaining lters working from the
bottom to the top.
Figure 30: Properly Installed HEPA Filter
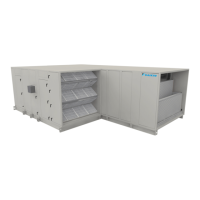
STEP 8: To complete the installation, add the appropriate
prelter latches to the prelter holding frame. Once latches
are installed, place the prelter in the frame, secure with the
latches and the installation is complete.
Repeat with all remaining prelters and frames.
Figure 31: Installation of Prelter into Frame
Figure 32: Completed Assembly