Installation GuideDaintree
®
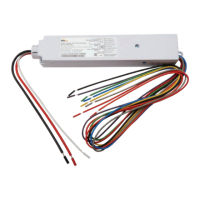
Networked Wireless Adapter (WA100-PM)
14
TestSuite8:
TestSuite9:
Dimming Driver + Photosensor
1.PressandimmediatelyreleasetheblueResetbutton.The
redErrorLEDashesonce,thenpausesandrepeats.
2.Checkthatthelightsconnectedtothedrivercyclefrom
maximumtominimumbrightnessthenturnOff,
then repeat.
3.PressandimmediatelyreleasetheblueResetbuttonagain.
TheredErrorLEDashesthreetimes,thenpauses
and repeats.
4. The light connected to the driver turns On.
5.Increasetheamountoflightatthephotosensorbyshining
abrightlightatit.Thelight’soutputisproportional
totheamountoflightreceivedbythephotosensor.
• Fordimminglights,shineabrightlightatthe
photosensor–thelightgetsbrighter.Coverthe
photosensor – the light gets dim.
• Forswitchedlights,coverthephotosensor–thelight
turnsOff.Shineabrightlightatthephotosensor–the
light turns On.
6. PressandimmediatelyreleasetheResetbuttontoexit
testing.
7. PressandholdtheblueRESETbuttonontheWA100-PM
for3secondstoresettheunit.Releasethebutton
when the green Joined LED and the red Error LEDs
beginashing.
Occupancy Sensor + Photosensor
1.PressandimmediatelyreleasetheblueResetbutton.The
redErrorLEDashestwice,thenpausesandrepeats.
2. Trigger the occupancy sensor. The green Joined LED turns
On. When the sensor times out the Joined LED
turns Off.
3. PressandimmediatelyreleasetheblueResetbuttonagain.
TheredErrorLEDashesthreetimes,thenpauses
and repeats.
4.ThegreenJoinedLEDbeginstoash.Increasetheamount
oflightatthephotosensorbyshiningabrightlight
atit.ThegreenJoinedLEDashesatafasterrate.
5.PressandimmediatelyreleasetheResetbuttontoexit
testing.
6. PressandholdtheblueRESETbuttonontheWA100-PM
for3secondstoresettheunit.Releasethebutton
when the green Joined LED and the red Error LEDs
beginashing.
TestSuite4:Continued
4.Operatetheswitch(es)connectedtotheWA100-PMand
observethatthelightsturnOn,Off,andDimasexpected.
5.PressandimmediatelyreleasetheResetbuttontoexit
testing.
6.PressandholdtheblueRESETbuttonontheWA100-PM
for3secondstoresettheunit.Releasethebutton
when the green Joined LED and the red Error LEDs
beginashing.
TestSuite5:
TestSuite6:
TestSuite7:
Occupancy Sensor Only
1.PressandimmediatelyreleasetheblueResetbutton.
TheredErrorLEDashestwice,thenpausesandrepeats.
2. Trigger the occupancy sensor. The green Joined LED turns
On. When the sensor times out the Joined LED turns Off.
3.PressandimmediatelyreleasetheResetbuttonto
exittesting.
4. PressandholdtheblueRESETbuttonontheWA100-PM
for3secondstoresettheunit.Releasethebutton
when the green Joined LED and the red Error LEDs
beginashing.
Photosensor Only
1.PressandimmediatelyreleasetheblueResetbutton.The
redErrorLEDashesthreetimes,thenpauses
and repeats.
2.ThegreenJoinedLEDbeginstoash.Increasetheamount
oflightatthephotosensorbyshiningabrightlight
atit.ThegreenJoinedLEDashesatafasterrate.
3.PressandimmediatelyreleasetheResetbuttonto
exittesting.
4. PressandholdtheblueRESETbuttonontheWA100-PM
for3secondstoresettheunit.Releasethebutton
when the green Joined LED and the red Error LEDs
beginashing.
Switch Only (On/Off, Dimming, Alternate Switching or Bi-Level)
1. PressandimmediatelyreleasetheblueResetbutton.
TheredErrorLEDashesfourtimes,thenpauses
and repeats.
2. Operate the switch connected to the WA100-PM. The
green Joined LED turns On for the duration of the switch
activation(appliestoOn,Off,andDimfunctions).
3.PressandimmediatelyreleasetheResetbuttontoexit
testing.
4.PressandholdtheblueRESETbuttonontheWA100-PM
for3secondstoresettheunit.Releasethebuttonwhen
thegreenJoinedLEDandtheredErrorLEDsbegin
ashing.
10
Installation Tests Continued

 Loading...