Installation GuideDaintree
®
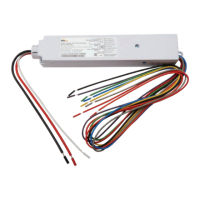
Networked Wireless Adapter (WA100-PM)
13
10
Alllightingdevices,includingwirelessadapters,mustbetested
for proper operation.
AftersettingtheDIPswitchesforyourapplication,mounting,
wiringlowvoltage,wiringlinevoltage,poweringupandresetting
theunit,performtherecommendedInstallationTest.The
InstallationTestmodeautomaticallytimesoutafter5minutes
of no activity.
WhiletheWA100-PMisinInstallationTestmode,thelowvoltage
devices connected to the WA100-PM directly control the lights
wiredtothesameWA100-PM.AfteryouexittheInstallationTest
mode,thelightsturnOnandareNOTcontrolledbythedevices
connected to the WA100-PM. After commissioning the Daintree
Networkedsystem,lightingcontrolisdeterminedbyconguration
settings in the Daintree Controls Software.
IMPORTANT NOTICES
Complete Installation Tests
Successful commissioning is dependent on testing each
wireless-adaptedlightingxtureand/orcontroldeviceatthe
timeofinstallation.Findinginstallationissuesordeviceproblems
earliersavessignicanttimeduringthecommissioningprocess.
Record IEEE Addresses
Ifyouhavenotalreadydoneso,besurethateachWA100-PM’s
IEEEaddress(last4or5digits)isrecordedonthefacilityoor
plan.Youcanusethe4or5digitlabelsuppliedwiththe
WA100-PMoryoucanwritethelast4or5digitsontheoorplan.
Thisinformationwillbeusedduringthecommissioningprocess.
Afterthelightinginstallationiscomplete,amarked-upcopyof
thefacilityoorplanshowingtheidentityandlocationofeach
wirelessadapter(includingassociatedlightxtures,switchesand
sensors)shouldbeavailable.Thiswillsimplifyandexpeditethe
commissioning process.
TestSuite1:
On/Off, Dimming, Alternate Switching or Bi-Level Drivers Only
1.PressandimmediatelyreleasetheblueResetbutton.The
redErrorLEDashesonce,thenpausesandrepeats.
2.CheckthattheconnectedlightscycleOnandOff,orcycle
frommaximumtominimumbrightnessthenturnOffper
theDIPswitchconguration.
3.PressandimmediatelyreleasetheResetbuttontoexit
testing.
4.PressandholdtheblueRESETbuttonontheWA100-PM
for3secondstoresettheunit.Releasethebutton
when the green Joined LED and the red Error LEDs
beginashing.
TestSuite2:
Any Driver + Occupancy Sensor
1. PressandimmediatelyreleasetheblueResetbutton.
TheredErrorLEDashesonce,thenpausesandrepeats.
2.CheckthattheconnectedlightscycleOnandOff,orcycle
frommaximumtominimumbrightnessthenturnOff
pertheDIPswitchconguration.
TestSuite2Continued:
3.PressandimmediatelyreleasetheblueResetbuttonagain.
TheredErrorLEDashestwice,
then pauses and repeats.
4. Trigger the occupancy sensor. The light connected to the
driver turns On. When the sensor
times out the light turns Off.
5.PressandimmediatelyreleasetheResetbuttontoexit
testing.
6. PressandholdtheblueRESETbuttonontheWA100-PM
for3secondstoresettheunit.Releasethebutton
when the green Joined LED and the red Error LEDs
beginashing.
Installation Tests
TestSuite3:
Dimming Driver + Occupancy Sensor + Photosensor
1.PressandimmediatelyreleasetheblueResetbutton.The
redErrorLEDashesonce,thenpausesandrepeats.
2. Checkthatthelightsconnectedtothedrivercyclefrom
maximumtominimumbrightnessthenturnOff,then
repeat.
3.PressandimmediatelyreleasetheblueResetbutton.The
redErrorLEDashestwice,thenpausesandrepeats.
4. Trigger the occupancy sensor. The green Joined LED turns
On and the light connected to the driver turns On.
When the sensor times out the Joined LED and light
turns Off.
5.PressandimmediatelyreleasetheblueResetbuttonagain.
TheredErrorLEDashesthreetimes,thenpauses
and repeats.
6. The light connected to the driver turns On.
7. The light’s output is proportional to the amount of light
receivedbythephotosensor.
•Fordimminglights,shineabrightlightatthe
photosensor–thelightgetsbrighter.
Cover the photosensor – the light gets dim.
•Forswitchedlights,coverthephotosensor–thelight
turnsOff.Shineabrightlightatthephotosensor–the
light turns On.
8.PressandimmediatelyreleasetheResetbuttontoexit
testing.
9. PressandholdtheblueRESETbuttonontheWA100-PM
for3secondstoresettheunit.Releasethebutton
when the green Joined LED and the red Error LEDs
beginashing.
TestSuite4:
Any Switch(es) + Any Matching Light Type(s)
1.PressandimmediatelyreleasetheblueResetbutton.The
redErrorLEDashesonce,thenpausesandrepeats.
2.CheckthattheconnectedlightscycleOnandOff,orcycle
frommaximumtominimumbrightnessthenturnOff
pertheDIPswitchconguration.
3.PressandimmediatelyreleasetheblueResetbuttonagain.
TheredErrorLEDashesfourtimes,thenpauses
and repeats.

 Loading...