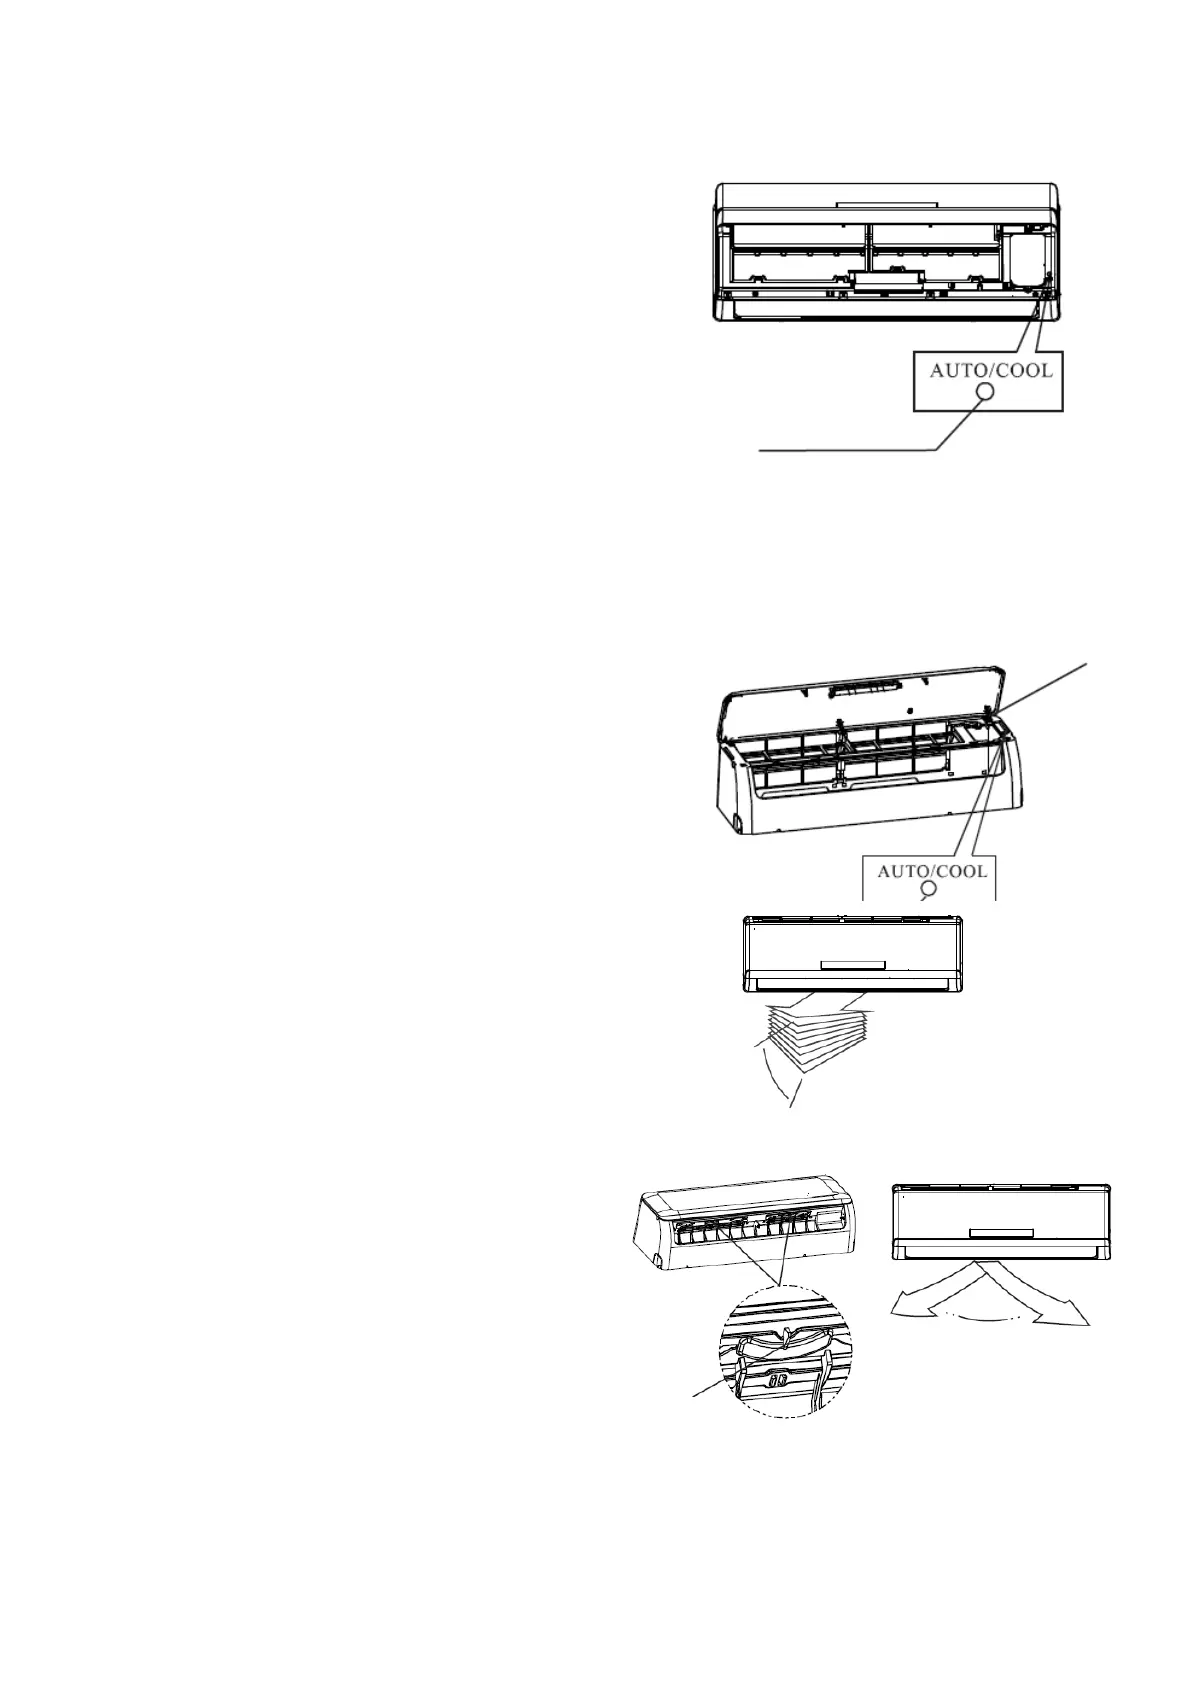
6. Manual control
Manual control is temporarily used in case the
unit remote controller is out of service.
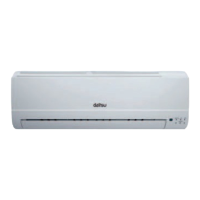
Its functioning is activated through a hidden
button within the indoor unit. To access this
button, open and lift the front cover of the indoor
unit until you hear the adjustment sound, you will
find the operation button on the side of the filter
frame.
Press the button until the AUTO indicator on the
display is illuminated. The unit will function in
forced AUTO mode (the temperature assigned by
default will be 24 C).
Precaution
Press the button to start the forced AUTO mode,
push it again to stop it. If you push the button
twice within five seconds, the units will operate in
forced cool mode. This function is only used for
test purposes, as such do not activate it unless it
is necessary. To re-establish the remote
controller, use it normally.
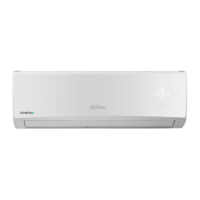
7. Adjusting Airflow
Below, the steps are detailed to correctly
adjust the air supply flow of the indoor
unit.
-Continue to adjust the direction of the
flow vertically: with the unit functioning,
press the DIRECTION/SWING button on
the wireless remote to change the blade
discharge angle by 6º. With every touch,
the blade will turn a certain angle; if you
continue pushing the button, the SWING
function will be activated.
-Proceed to adjust the flow direction
horizontally: with the unit functioning,
manually adjust the vertical deflectors
which are found in the inside of the air
outlet of the indoor unit. Be careful not to
put your fingers in the unit, as both you
and the machine could suffer damage.