24
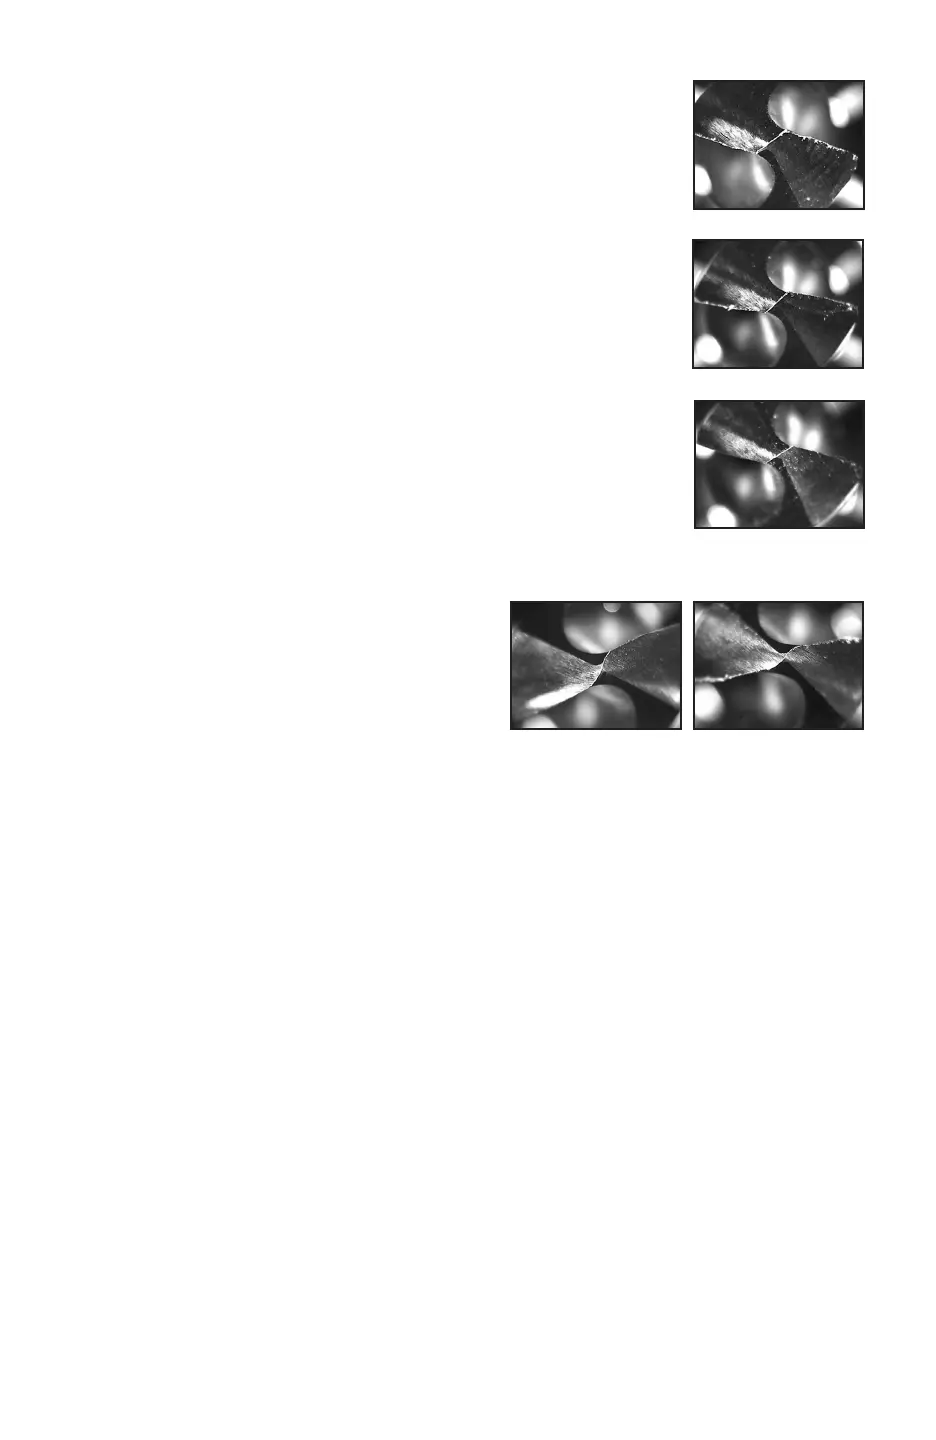
7. Adjust X and/or Z deeper (in the + direction), and look at the drill.
See Figure C-4. In this photo, the secondary cutting edges pro-
duced by the X adjustment are nice, but more material needs to be
removed in Z, so adjust Z in the + direction in the split screen.
8. Figure C-5 is an example of a proper X-Style split drill.
10. Figure C-6 is what the drill looks like after
just changing to the Radial split. If this
looks like the drill being copied, it is done.
If wanting a more pronounced radius, go to
the Web Thickness screen and reduce the
entered web thickness by 10%. Figure C-7
shows the results of the 10% web thickness
reduction.
If making a drill with a RADIUS-style split, continue on as follows:
9. Change the split style to Radius and grind the drill.
Figure C-4
Figure C-5
Figure C-6 Figure C-7
6. If the angles still look good, adjust the X and Z settings to remove
more material (Adjust in the “+” direction), and grind the drill
again. It will look similar to Figure C-3.
Figure C-3