29
Download Details
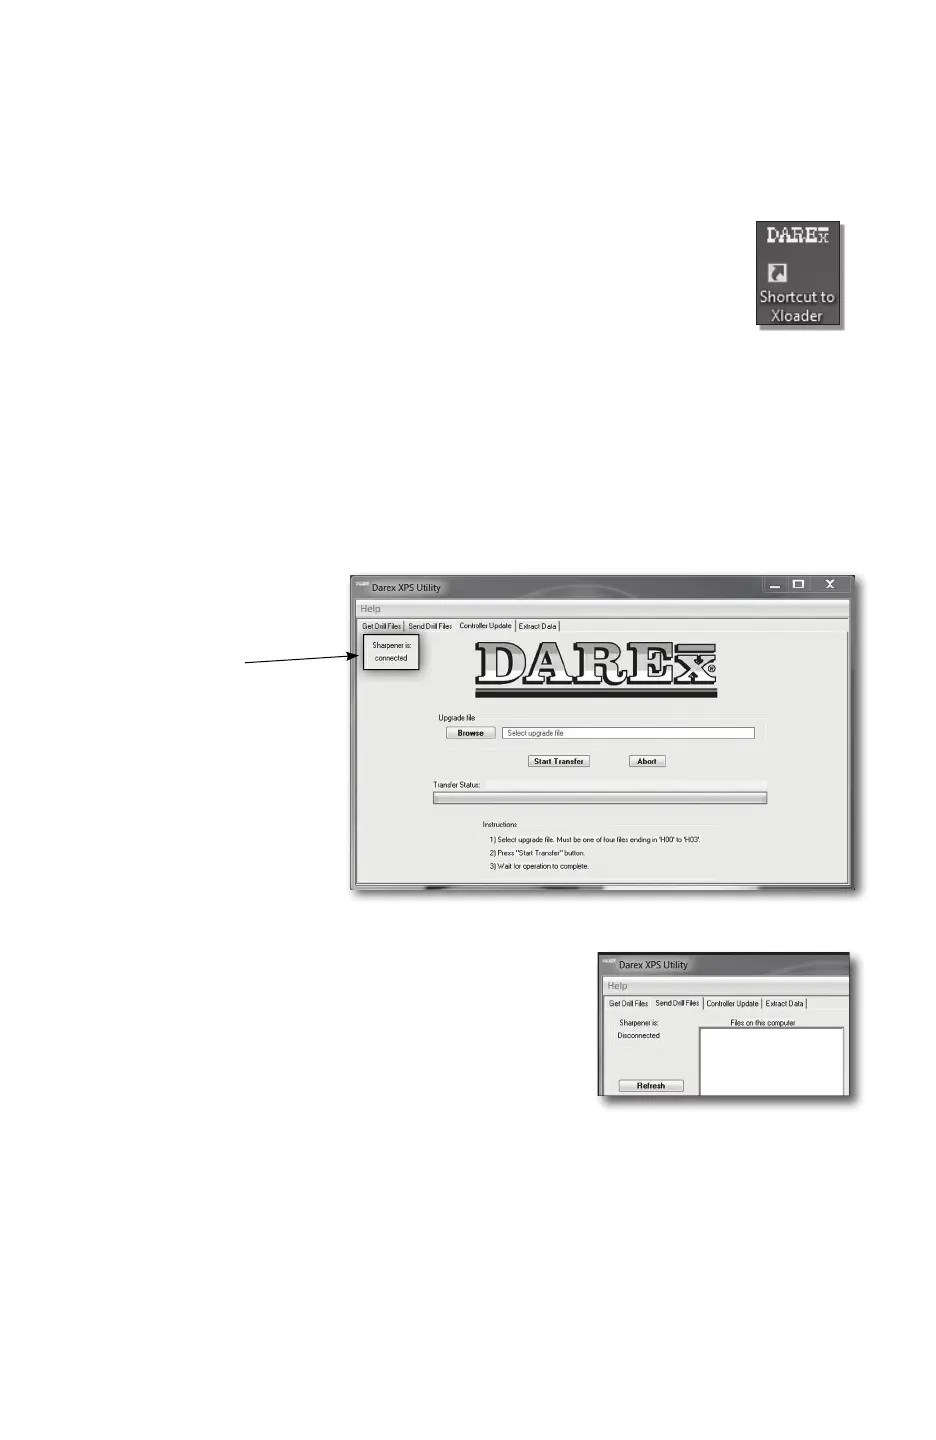
Software Updates And Drill File Saving
PC Software Installation
1. Insert the Darex XPS-16+ thumb drive that was supplied with the new machine into a disk
drive.
2. Double click on the X-Loader zipped le.
3. Double click on the Set-up le.
Once installed there should be a new Icon on your computer desktop.
You are now ready to update controller software or save and retrieve drill les between a PC
and the sharpener. The X-Loader communication software is an easy way to store drill les if
needing more than the existing 100 drill le spaces. The X-Loader is also an easy way to re-
upload the factory calibration settings should the sharpener software crash.
Saving and Retrieving Drill Files
1. Open the Darex shortcut to X-Loader icon on your desktop.
2. Turn on the sharpener.
3. Plug the USB-to-mini-USB cable into a USB port on your PC, and into the upper mini-
USB port under the cover on
the bezel of the display of the
sharpener.
4. With the cable installed,
the X-loader will display in
the upper left hand corner
Connected.
5. Follow instructions at bottom
of X-Loader screen.
6. Click the [BROWSE] button
to create a destination folder to
save the drill les to your PC.
7. Click the [START TRANSFER]
button to save to destination
folder.
8. A pop up window will say File Saved .
Sending Drill Files from PC to Sharpener
1. Click the [SEND DRILL FILES] tab in upper left hand
corner of X-Loader screen.
2. Follow instruction at bottom right of X-Loader screen.
3. Press [BROWSE FOLDERS] button to select the le to
transfer to sharpener.
4. Then select the les within that folder.
5. The le will appear on the left screen of the X-Loader. Either “Select All” or click on the le
to be moved to the screen on the right. The le will be highlighted in blue.
6. Click the [RIGHT ARROW] button to transfer the le from the Files on this computer
screen to the Drill Files to send to the Darex Sharpener screen.
7. Then click the [SEND] button.
Tip: If a le is already on the sharpener, a pop up screen will display that the le already exists.
Choose [YES] to over-write the le or [NO] to not over-write.