25
Creating a Facet-Style Drill, Step-by-Step
It’s best to have a pattern drill, that is, one which can be used for a model without grinding on
it. Mark it with tape so it doesn’t get mistaken for another sample drill.
1. Decide whether or not the drill is grindable. Look for chips on the margin lines, fractures
sending spall lines down the face of the drill, damage to the shank of the drill, etc.
Adjusting Facet Shape
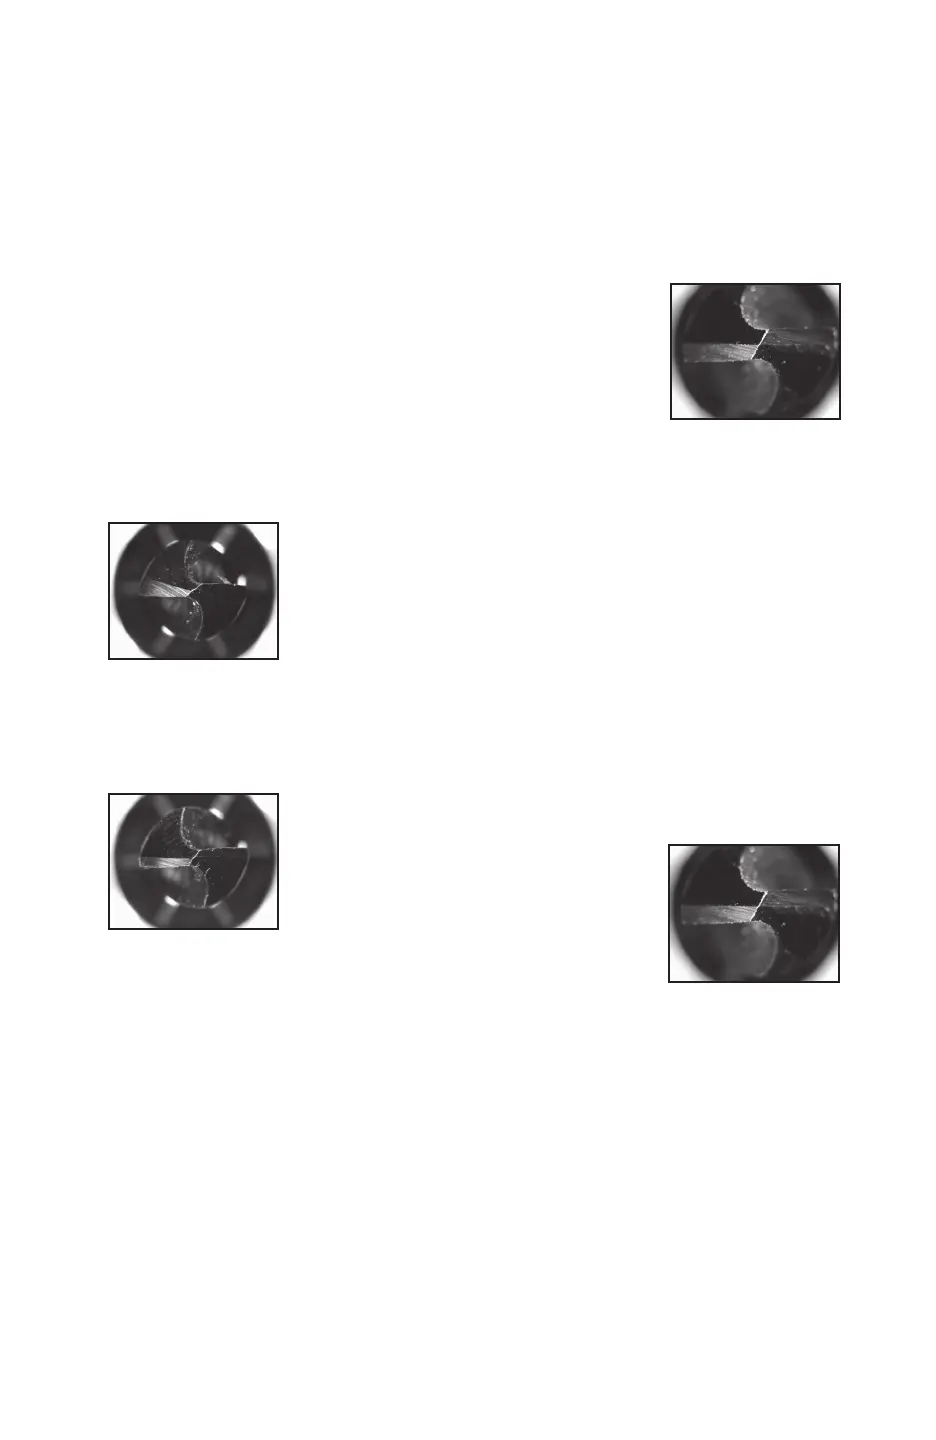
If you start with the Darex le and select “Facet” instead of “Conic”, turn
off the split function, and press the [START] button, the result will be
a drill bit that looks somewhat like the one to the right. The facet lines
will intersect at the centerline of the drill and the facets created will be
rectangular.
In order to compensate for a small drill size or a cutting edge that’s
difcult to locate, enter the web thickness and some advance to engage Single Point
Alignment (SPA), which requires 1° positive or negative advance. But how much do you
enter?
2. Once the advance is correct, turn on the X-Split Function, even if eventually using Radial
splitting (the X-Split produces nice sharp boundaries that can easily use to adjust the split
relationships).
3. Look at the split angles on the pattern drill. The angle between the cutting edge and the
rst split line is the fan angle and it is usually between 45° and 65°. If the pattern drill has
coolant holes, they can be a good reference point, since the fan angle can be increased or
decreased to reveal or conceal more or less of the trailing edge of the coolant hole to match
the pattern drill. If the pattern drill is not coolant fed, attempt to copy the fan angle with
the methods available to you. By making the fan angle a little bigger than expecting how
it will end up, (65° instead of 55°), the process will go faster, because the sample will not
have to be totally reground if the angles are wrong. The angle between the cutting lips and
the secondary cutting edges is called the Split Angle, and is usually between 130° and 160°,
although some carbide and cobalt drills have more angle (up to 170°).
The picture to the left shows what happens when just entering +1°
(enough to engage the advance function). Notice that the facets are
no longer parallel, but are now pie-shaped.
This is because the XPS-16+ is programmed to automatically detect
and grind a facet drill with the proper amount of advance, and single
point alignment resets that number to zero.
Therefore, the answer to the question “How much advance do I enter?” is to start at around
10° and do a test grind. The new picture below shows how the drill looks after adding 10°
of advance. The changes are dramatic, but the facets are still a little bigger on the outside,
next to the margin, so add in a little more advance
Ultimately, it turns out that 13° is just right for this particular drill.
The facets are rectangular, and the drill is ready to split.
TIP: The higher the advance number, the
smaller the outer edge of the facet will be.