∙ 12 ∙
∙ 13 ∙
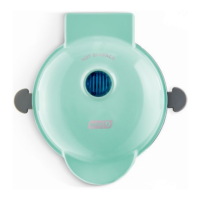
H
FE
G
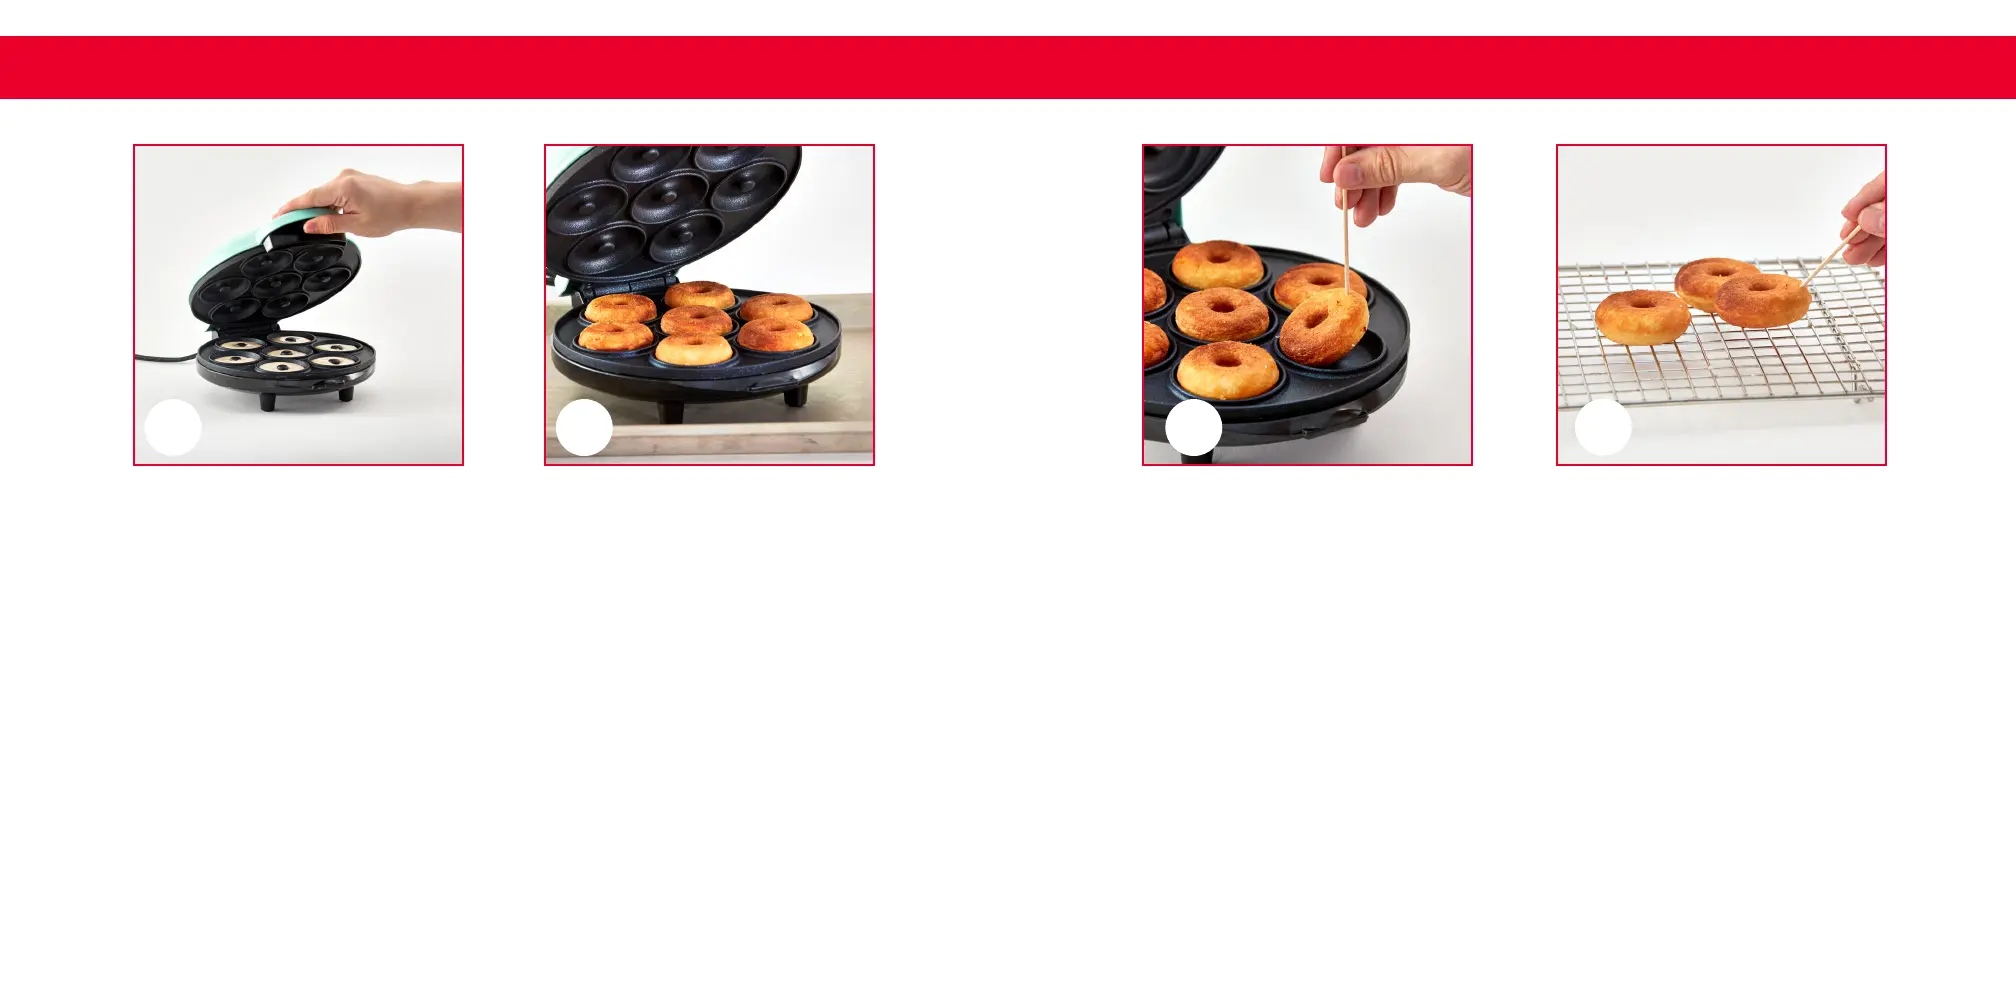
7
Use the Cover Lid Handle to lower the lid until the Maker is closed for
cooking (photo E).
8
Allow donuts to cook following suggested times in the Recipe Guide
(Page 19-33) or to your desired doneness (photo F).
9
Use a toothpick to remove donuts from the molds as they will be hot on
both sides (photo G).
10
Place donuts on a wire rack to cool. Wait until cooled completely before
beginning to decorate. (photo H).
TIP: If frosting donuts, do so on a wire rack over wax paper.
USING the Mini Donut Maker
USING the Mini Donut Maker