10
8. Fit the camera riser screw, item O, with washer
from below the top slot, through the riser blocks
centre hole and into the camera base, so the
camera is secure with prompter block(s) and frame.
9. Decide if the Snood / Hood support wire, item J,
needs to be fitted at this point.
There are three sets of holes in the Glass Frame
for this wire.
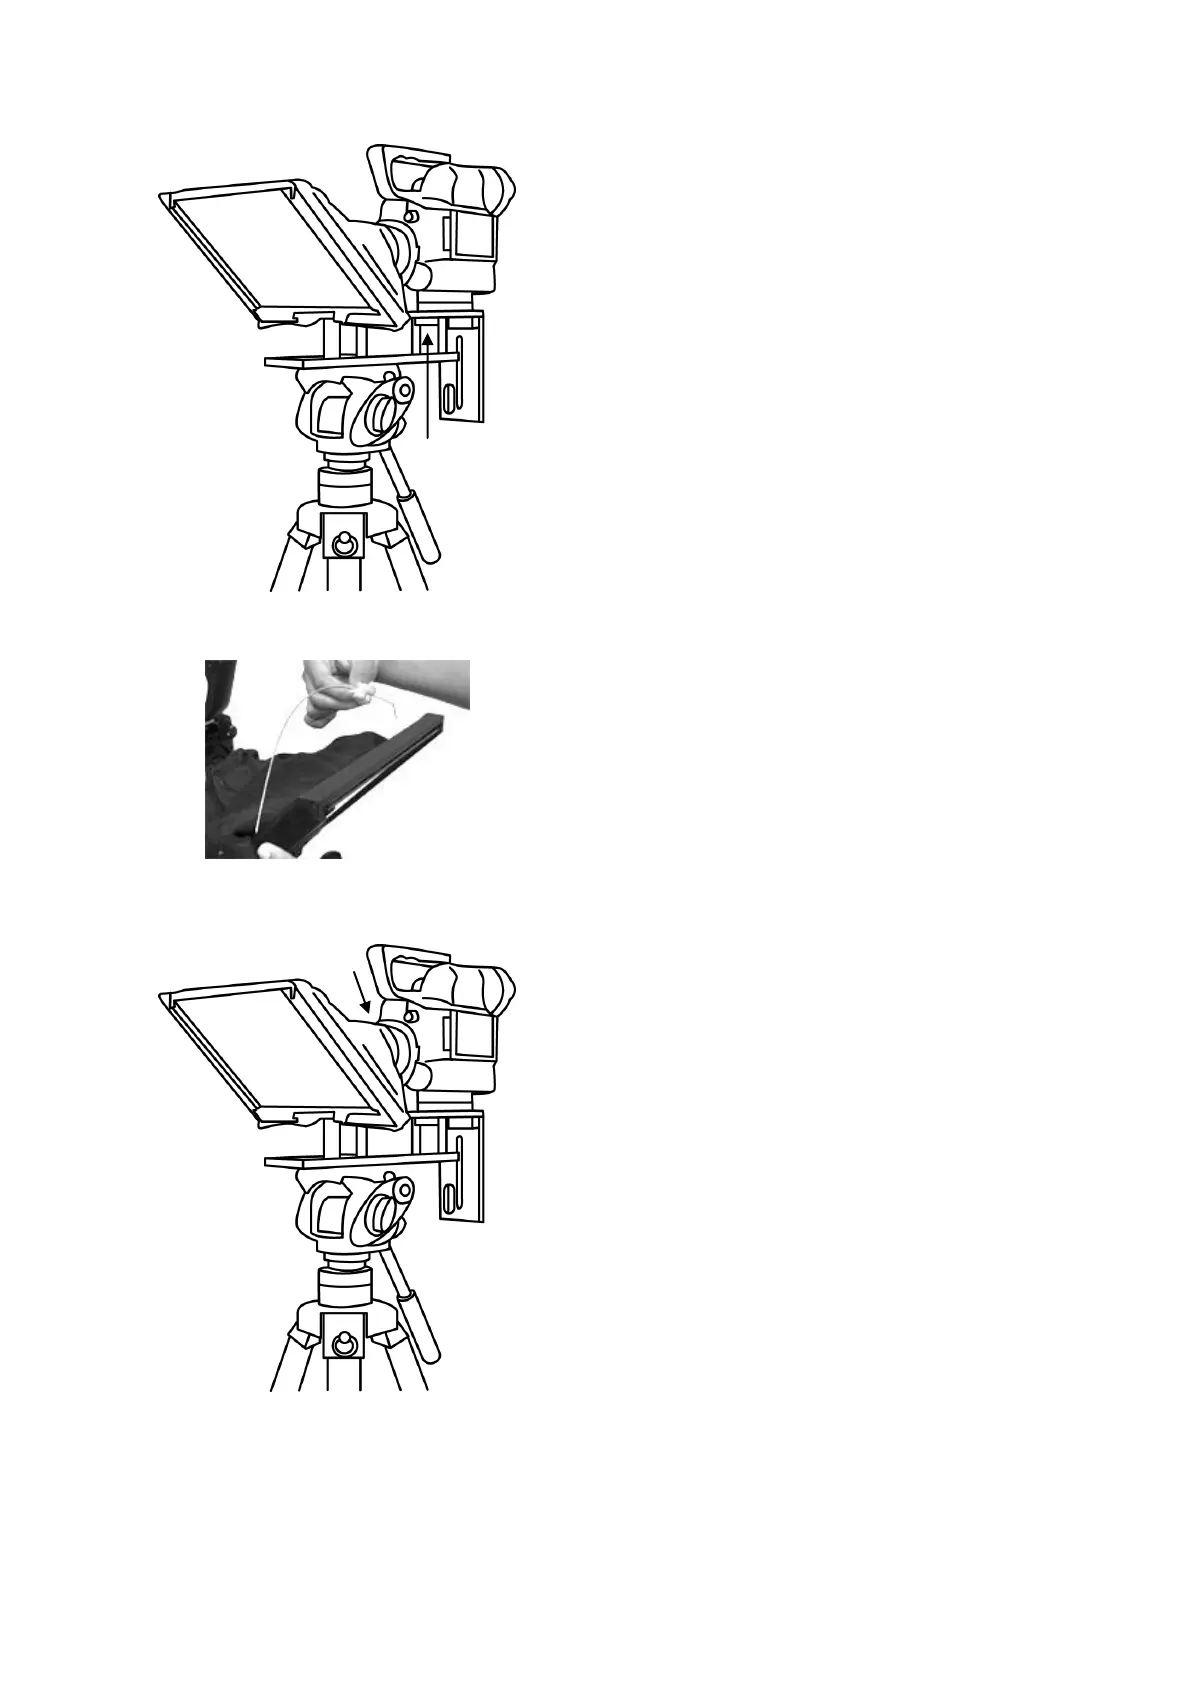
10. Pull the draw cord to secure the black camera
Snood/Hood around the camera lens and to shut
out light from camera side.
 Loading...