22
• Failure to prime the submersible
pump prior to connection of the pump
to RainBank can cause an air lock
that may prevent the pump operating
properly.
The following sections of the Type
1 installation instructions are
applicable to Type 2 installations.
Step 2 – Work out the position of your
RainBank with regard to distance to
power. The float switch lead is not an
issue here.
Step 4 – Align the RainBank for easy
fitting to the plumbing and fit Davey wall
bracket if required.
Step 5 – Connect RainBank to your
submersible pump as per instructions on
page 25.
Step 6 – Connect the RainBank to the
plumbing as for Installation Type 1 on
page 19.
Step 7 – Connect all leads as per
Installation Type 1 on page 20. There is
no float switch lead as this is fitted to the
submersible pump.
Step 8 – Test the unit - page 21.
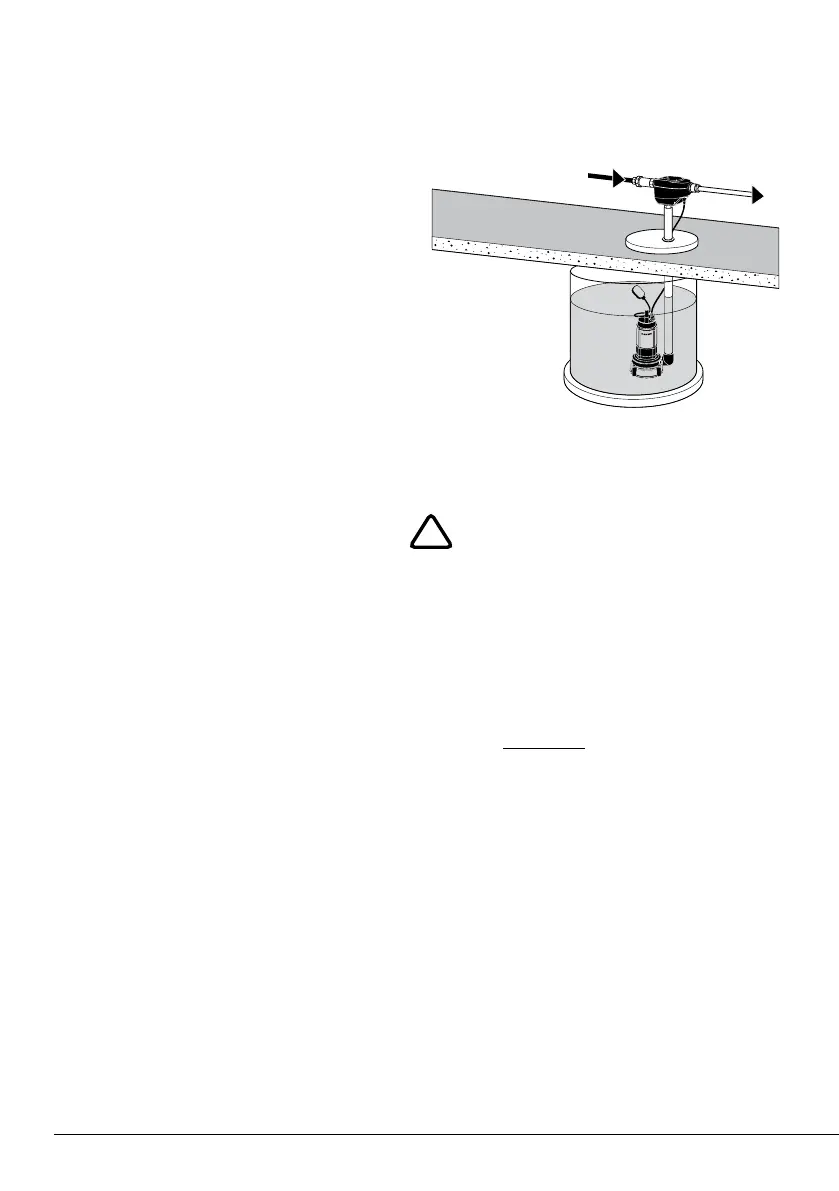
INSTALLATION TYPE 3
Below ground tank with submersible
pump D42A/B & D53A/B
IMPORTANT
• Under AS/NZS 3500.1
collecting/storing rainwater in a
partially buried tank is considered
a medium level hazard. Even though
RainBank has a built-in dual check
back flow valve, you may be required
to fit additional backflow protection
valves to satisfy this requirement –
check with your local council as to
their guidelines on rainwater tank
installation and backflow prevention.
There is no need for a separate float
switch as this comes attached to the
submersible pump and does not plug
into the RainBank unit.
!
 Loading...