Do you have a question about the DAVIS vantage pro 2 and is the answer not in the manual?
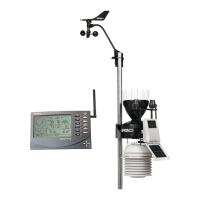
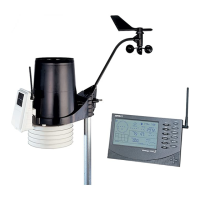
Complete station installation, connect Weatherlink IP to console and internet router.
Create account, add devices, install IP device, and configure station details.
Confirm station is communicating with the Weatherlink website.
Create a free account on the Weather Underground website.
Select 'Connect a Weather Station' and add a new PWS.
Identify location, verify it, and submit required information.
Return to Weatherlink, click Share & Uploads, select Weather Underground.
Enter necessary information and click Upload.
Navigate to Weather Underground to verify station communication.
| Barometric Pressure Range | 16.00 to 32.50 inHg (540 to 1100 hPa) |
|---|---|
| Wind Direction Range | 0 to 360° |
| Wind Direction Resolution | 1° |
| Solar Radiation Sensor Range | 0 to 1800 W/m² |
| UV Index Range | 0 to 16 |
| Rainfall Resolution | 0.01 inch (0.2 mm) |
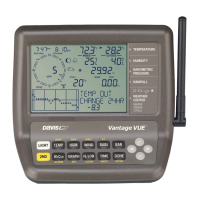
| Console Display | LCD with backlight |
| Wind Direction Accuracy | ±3° |
| Wireless Transmission Range | Up to 1000 feet (300 m) |
| Temperature Range | -40 to 150°F (-40 to 65°C) |
| Humidity Range | 0% to 100% |
| Rain Collector | 0.01" per tip (0.2 mm) |
| Wind Speed Range | 0 to 200 mph (0 to 322 km/h) |
| Update Interval | 2.5 seconds |
| Wind Speed Accuracy | ±5% |
| Temperature Accuracy | ±1°F (±0.5°C) |
| Humidity Accuracy | ±3% |
| Rain Measurement Accuracy | ±4% of total or ±0.01 inch (0.2 mm) per tip |
| Barometric Pressure Accuracy | ±0.03 inHg (±1 hPa) |
| Solar Radiation Sensor Accuracy | ±5% |
| UV Index Accuracy | ±5% |
| Power Supply | Console: 3 C batteries or AC adapter; Integrated Sensor Suite: Solar-powered with battery backup |
| Battery Life | Up to 1 year (with batteries only) |
| Operating Temperature Range | Console: +32° to +140°F (0° to +60°C); Integrated Sensor Suite: -40° to +150°F (-40° to +65°C) |