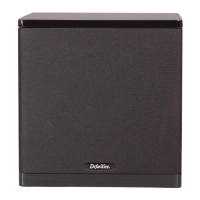
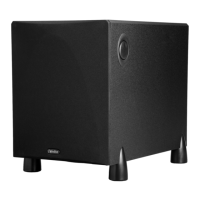
This method is recommended for home theater systems with receivers or audio processors with built-in bass management. Anything that is
attached to a receiver with bass management should have the low-pass filter turned off on the subwoofer by setting it to LFE on the digital
display.
1. Power off the amplifier/receiver and disconnect the subwoofer from the AC socket.
2. Connect a standard RCA cable from the subwoofer/LFE output of your receiver to the LFE input of the subwoofer.
3. Connect the subwoofer to an AC power source and turn it on (see page 12).
4. Start with the default volume, which is set at V20.
5. Increase the Low Pass filter setting on the subwoofer until “LFE” appears on the subwoofer’s display.
6. Turn on the receiver’s power and access the “speaker setup” or “speaker configuration” menu.
7. Set the subwoofer to “Yes” or “On”.
8. Set the main, center, and surround speakers’ lowpass filters to an appropriate frequency (see page 18 for a guide).
9. For further setup, follow the instructions of the audio processing unit, or run an automatic bass management setup on the audio
processor.
2 LINE IN SETUP
This method is best for systems with no LFE/ subwoofer output jack such as 2-channel systems.
1. Power off the amplifier/receiver and disconnect the subwoofer from the AC socket.
2. Connect standard RCA cables from the front left and right pre-out jacks of the receiver.
3. Connect the subwoofer to an AC power source and turn it on (see page 12).
4. Start with the default volume, which is set at V20.
5. Set low-pass filter on the subwoofer to the appropriate frequency (see page 18 for guidance).
3 SPEAKER LEVEL IN SETUP (best for amps/ receivers with no LFE/subwoofer or pre-out jacks)
Note: Speaker Level In is labeled High-Level Input on the back panel of the subwoofer.
1. Power off the amplifier/receiver and disconnect the subwoofer from the AC socket.
2. Connect standard speaker cables from the speaker output terminals of the amplifier/receiver. Most amplifiers and receiver speaker
terminals allow two sets of wires to be connected to one terminal set (one for the main speaker and one for the subwoofer).
IMPORTANT NOTE: One terminal on each channel input is marked with a red band (+) and the other is
marked with a black band (–). Make certain that you connect the wire from the red (+) terminal of your amplifier or receiver to the red
(+) terminal of the subwoofer and the wire from the black (–) terminal of your amplifier or receiver to the black (–) terminal of the
subwoofer. It is essential to connect all speakers in the system to the amplifier in the same way (to the correct polarity.) If you
experience poor bass, one or more of the channels may be connected to the incorrect polarity and may need to be rewired. Pay close
attention and connect positive to positive and negative to negative on all channels.
3. Connect the subwoofer to an AC power source and turn it on (see page 12).
4. Start with the default volume, which is set at V20.
5. Proceed to page 15 for subwoofer adjustment and system tweaking.
OTHER CONNECTIONS:
12 V trigger (optional): In a system utilizing 12V control systems, connect a cable with 3.5! mm tip/ ring male plugs to the 12 V trigger output
of the system’s receiver or preamp/processor for one-button system turn-on.
IR Remote (optional):

 Loading...
