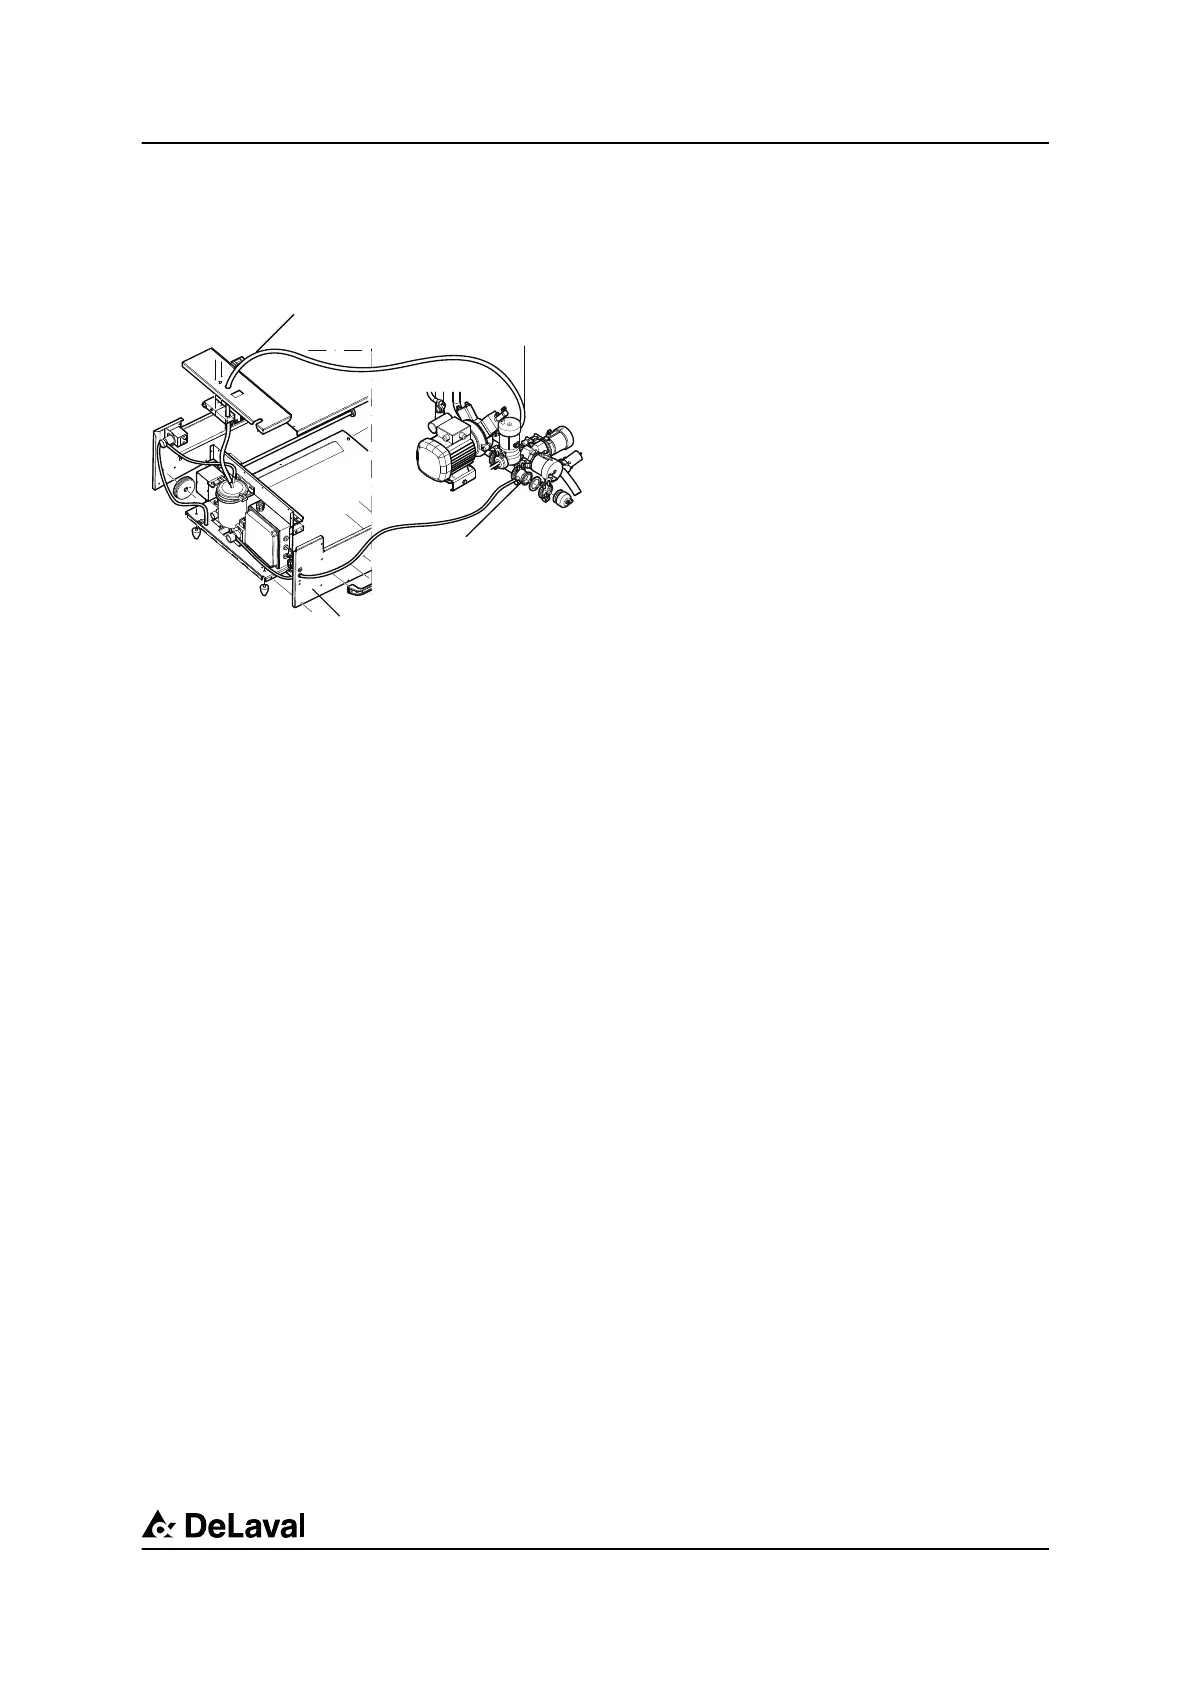
6. Remove the air-purge valve and mount the
return line connection (D).
7. Connect the return line (E) to the return line
connection.
8. Turn on the vacuum to the receiver using
the manual valve.
2.2 Starting a sampling sequence
When the milk sampler has not been used more
than three days it may need to be cleaned before
being used again. That is why the sampling
sequence is normally started just before a system
cleaning.
210229
C Milk pump connection
D Return line connection
E Return line
F To milk sampler milk container
Milk sampler (VMS 2012)
Operation
© DeLaval 2012.
2012-01-10, Version 1 7 (18) 86352801
 Loading...