EasyManuals Logo

Dell EMC PowerEdge R340 Service Manual

Dell EMC PowerEdge R340
116 pages
To Next Page IconTo Next Page
To Previous Page IconTo Previous Page
Page #49 background imageLoading...
Page #49 background image
Steps
1. Slide the drive carrier into the drive slot.
2. Close the drive carrier release handle to lock the drive in place.
Figure 26. Installing the drive carrier
Next steps
1. If removed, install the front bezel.
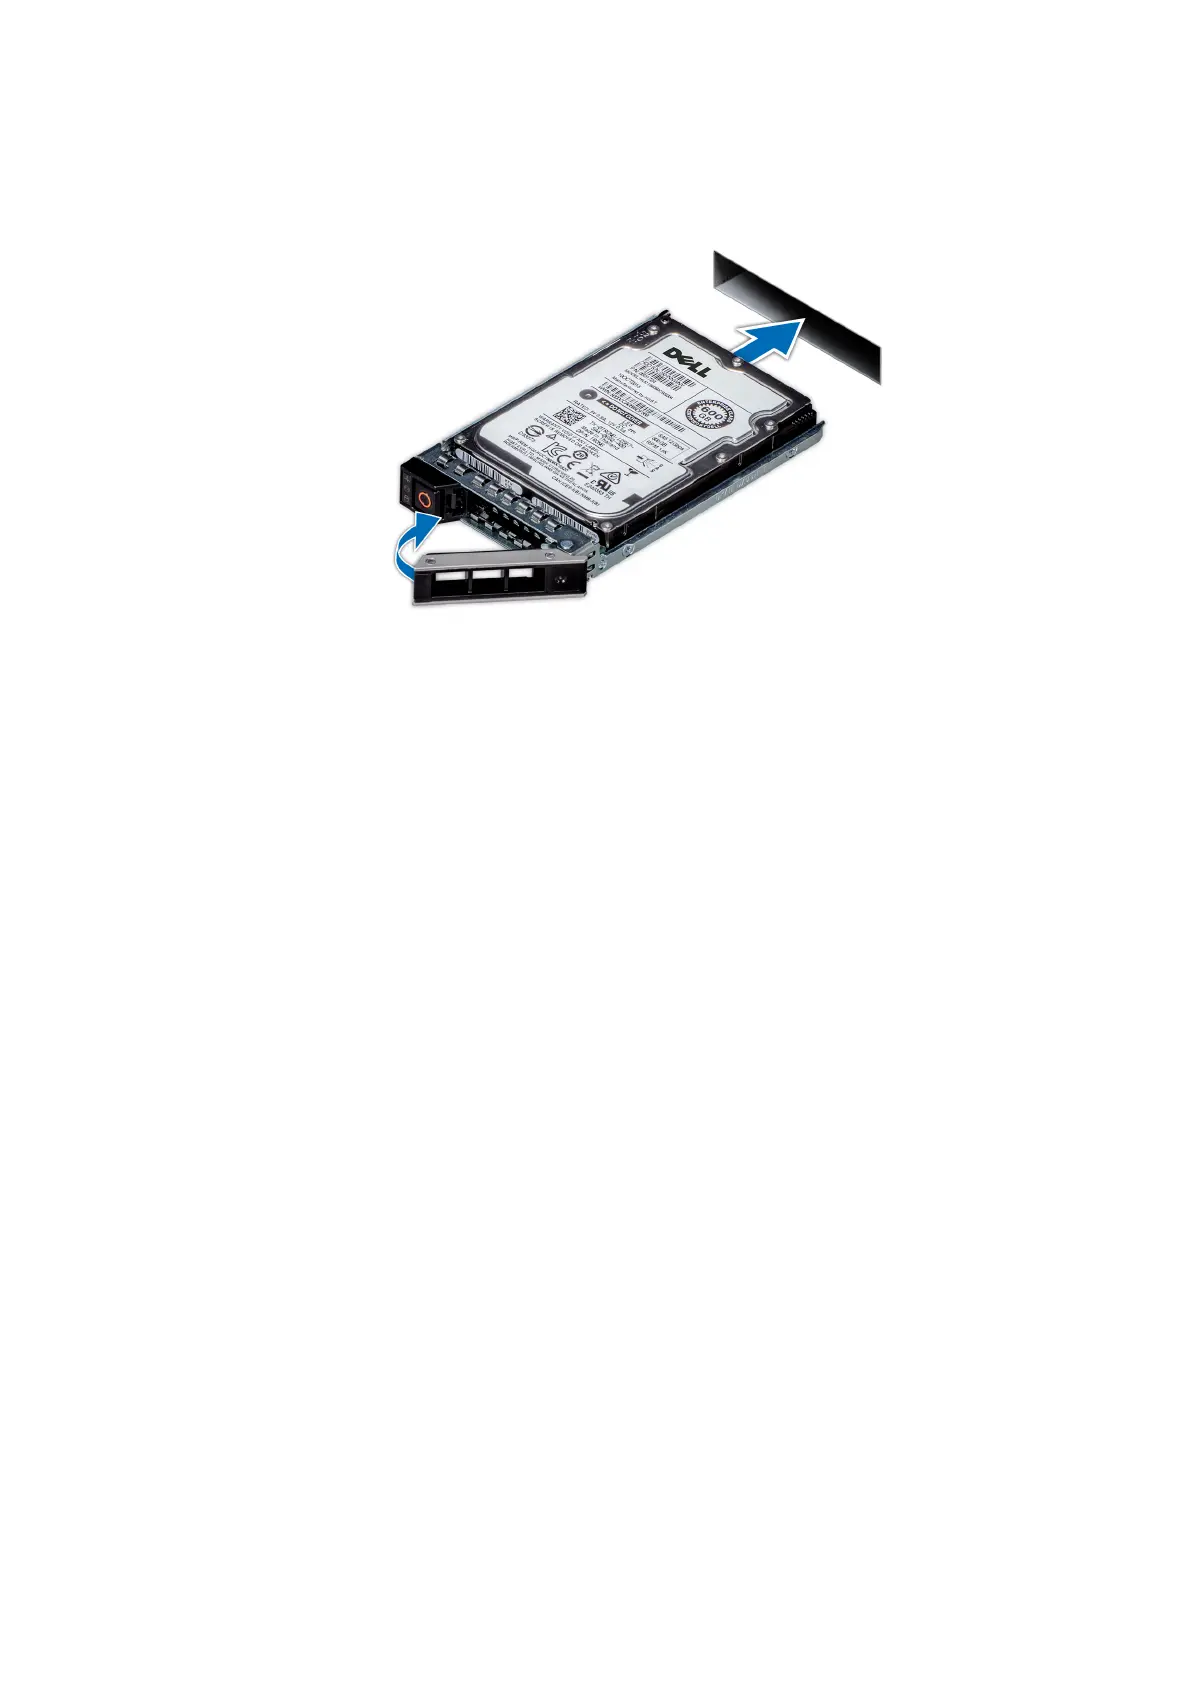
Removing the drive from the drive carrier
Prerequisites
1. Follow the safety guidelines listed in Safety instructions.
2. If installed, remove the front bezel.
3. Remove the drive.
Steps
1. Using a Phillips #1 screwdriver, remove the screws from the slide rails on the drive carrier.
2. Lift the drive out of the drive carrier.
PowerEdge R340 installing and removing system components
49

Table of Contents

Other manuals for Dell EMC PowerEdge R340

Questions and Answers:

Question and Answer IconNeed help?

Do you have a question about the Dell EMC PowerEdge R340 and is the answer not in the manual?

Dell EMC PowerEdge R340 Specifications

General IconGeneral
Form Factor1U Rack
Processor Sockets1
Memory TypeDDR4 ECC UDIMM
Memory Slots4
Maximum Memory64 GB
RAM SpeedUp to 2666 MT/s
ChipsetIntel C246
ProcessorIntel Xeon E-2200
Storage4 x 3.5" or 8 x 2.5" drive bays
Storage ControllerPERC H330
RAID SupportRAID 0, 1, 5, 10
Network Interface2 x 1GbE
Power Supply550W
Operating SystemWindows Server, Red Hat Enterprise Linux, SUSE Linux Enterprise Server

Related product manuals