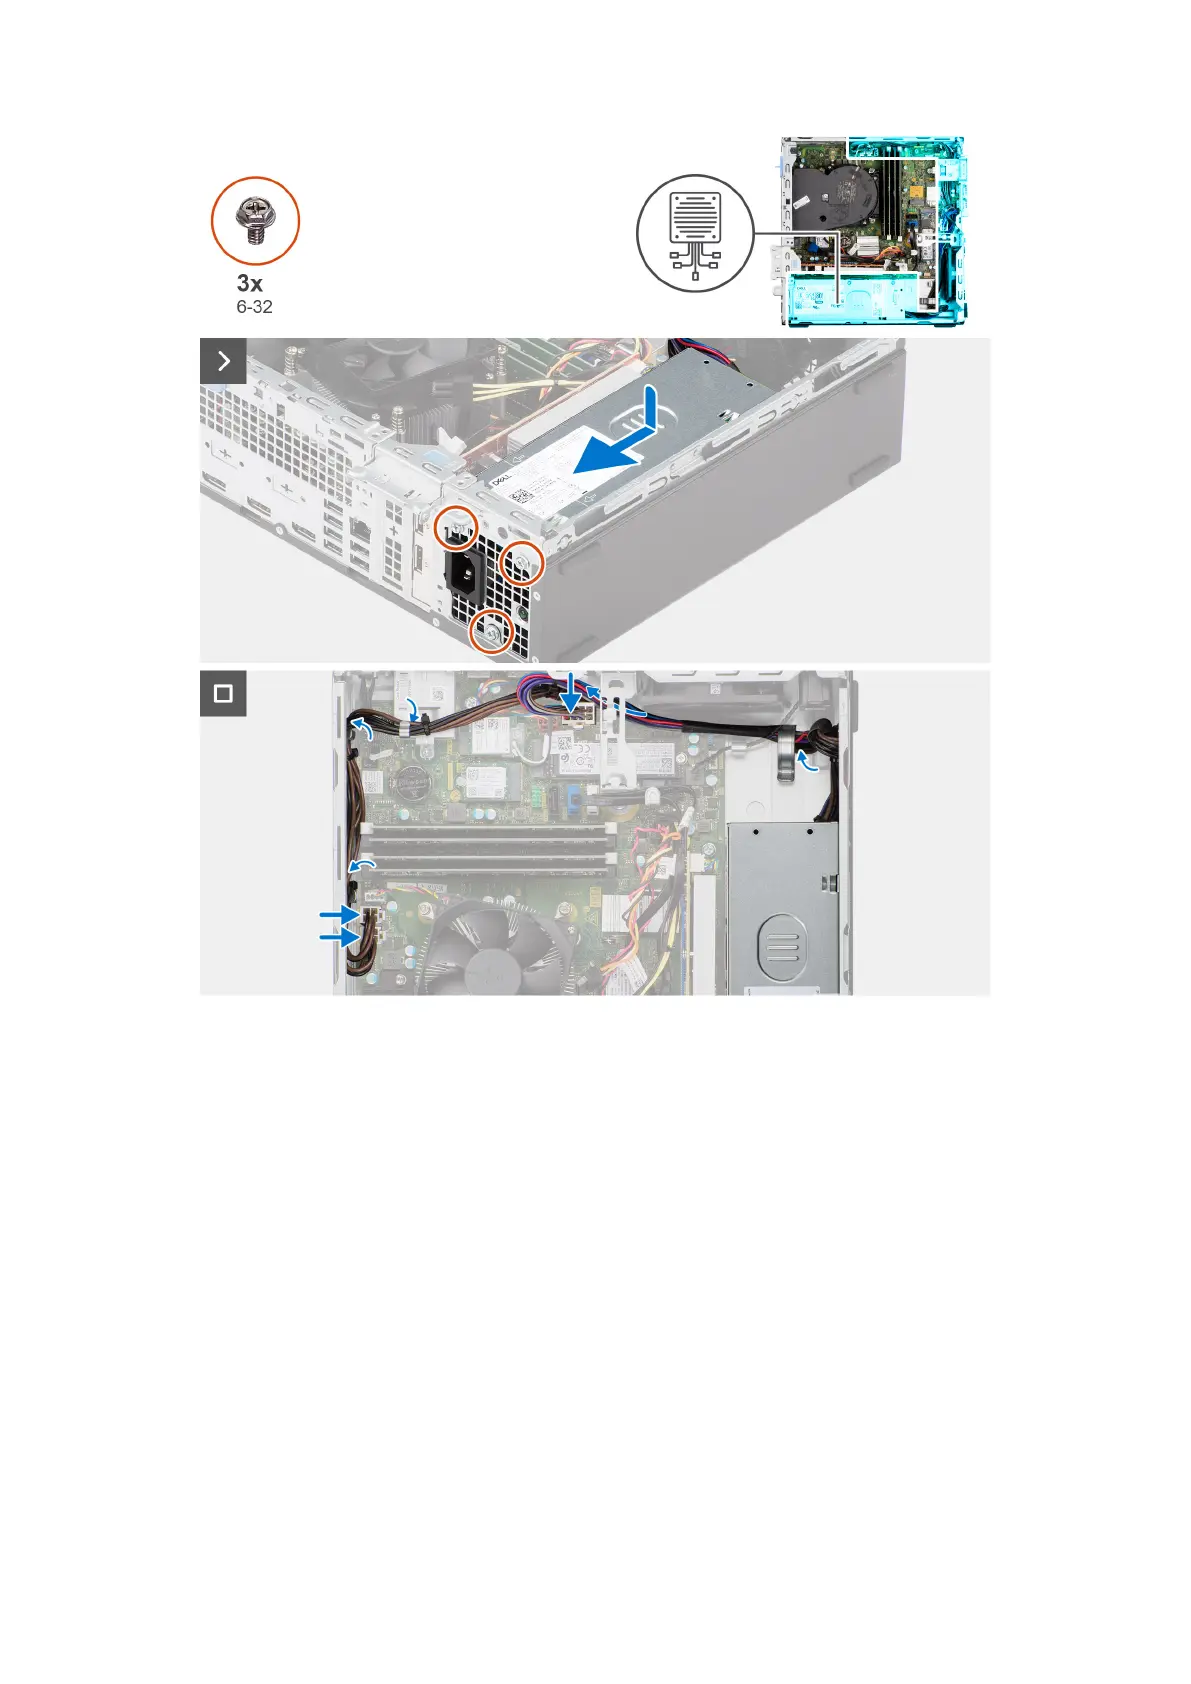
Steps
1. Place the power-supply unit on the chassis and slide it towards the back of the chassis.
2. Replace the three (M6-32) screws to secure the power-supply unit to the chassis.
3. Route the power-supply cables through their routing guides on the chassis.
4. Connect the power-supply cables to their connectors on the system board.
Next steps
1. Install the disk-drive cage.
2. Install the 3.5-inch hard drive if applicable.
3. Install the 2.5-inch hard drive if applicable.
4. Install the front bezel.
5. Install the side cover.
6. Follow the procedure in After working inside your computer.
Rimozione e installazione di unità sostituibili sul campo (FRU)
81