Features
Table 1. Features and functionality of your PN7522W
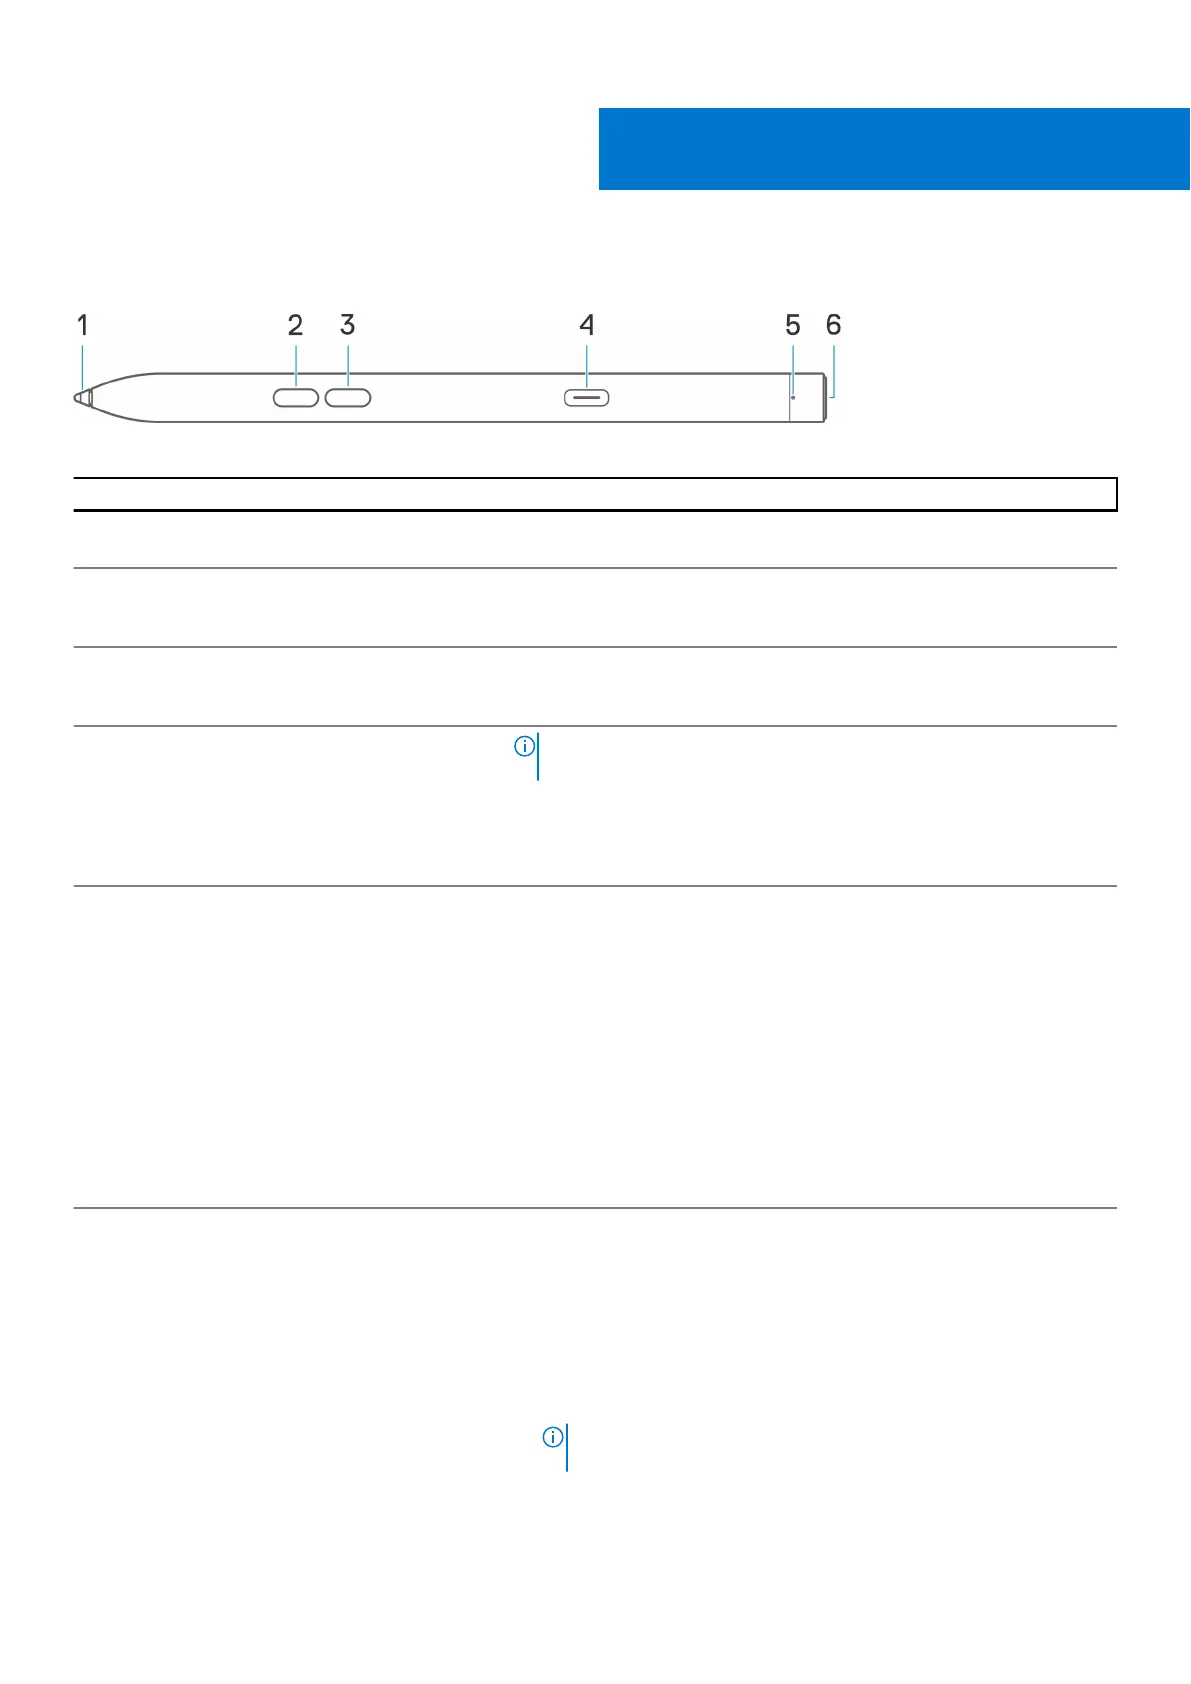
Feature Functionality
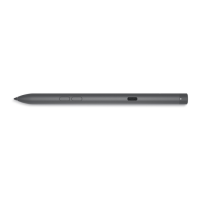
1 Tip Move the tip over a touchscreen to move the pointer. Enables you to
write, draw, and select objects.
2 Bottom barrel button Press and hold the bottom barrel button and move the tip over the area
you want to erase. To change the functionality of this button, see Dell
Peripheral Manager.
3 Top barrel button Press the top barrel button to open the context menu or perform a
right-click. To change the functionality of this button, see Dell Peripheral
Manager.
4 USB Type-C charging port
NOTE: Ensure that your laptop is connected to Internet before
connecting the USB-C cable to your laptop and pen.
Connect the USB-C cable to the USB-C port on your pen and your laptop
to charge your PN7522W and to establish Bluetooth pairing with your
laptop, if not yet paired. After your pen is paired with your laptop through
Bluetooth, Dell Peripheral Manager is downloaded automatically.
5 LED indicator
Blue
● Blinking - Bluetooth pairing enabled
● Solid (for three seconds) - Bluetooth succesfully paired
White
● Blinking - Updating pen firmware
● Solid - Pen is charging
Amber
Blinking - Pen battery is low
Green
Blinking - Tile is locating the pen
6 Top button
Before pairing your PN7522W with your laptop, press and hold for three
seconds to enable pairing mode.
After pairing your PN7522W with your laptop:
● Single press — Launch pen menu
● Double press — Take a screenshot
● Long press (1.5s) — Launch Sticky Notes
● Press and hold or press twice in succession to wake your Bluetooth
paired laptop from sleep.
NOTE: This feature is available only on computers that support
Modern Standby mode.
2
6 Features