Do you have a question about the Dell D1918H and is the answer not in the manual?
Lists all components included with the Dell monitor for user verification.
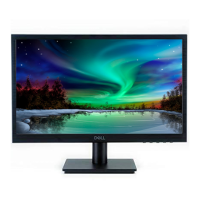
Details the LCD panel, resolution, connectivity, dimensions, and weight of the monitor.
Explains monitor power saving features and associated consumption levels.
Lists compatible display resolutions and refresh rates for optimal performance.
Step-by-step instructions for physically attaching the monitor stand.
Instructions on how to safely detach the monitor stand.
Guide for connecting video, audio, and power cables to the monitor.
Identifies and explains the buttons and indicators on the monitor's front.
Identifies and explains the input ports and power connectors on the monitor's back.
Overview of the monitor's main OSD menu structure and navigation.
Details on image, color, audio, and input adjustments via OSD.
Options for fine-tuning screen position, clock, sharpness, and aspect ratio.
Settings for language, OSD position, timeout, background, and memory recall.
Recommendations for cleaning and protecting the monitor from damage.
Solutions for common monitor issues like no power or display problems.
Information on how to contact Dell for sales, technical support, or customer service.
This document is a user's guide for the Dell D1918H monitor, providing essential information for setup, operation, and maintenance. It begins with important safety instructions, emphasizing proper power source usage, authorized servicing, and precautions against electric shock, physical damage, and environmental factors. Users are advised to place the monitor on a flat, clean surface, keep it away from magnetic objects, and avoid placing heavy objects on cables. Cleaning should only be done after disconnecting from the electrical outlet, using a soft cloth dampened with water or a non-ammonia based cleaner. For VESA wall mounts, it's crucial to ensure they are UL-listed and installed by a qualified service technician.
The guide then details the package contents, ensuring users have all necessary components like the monitor, neck, base, power cable, HDMI cable, VGA cable, drivers and documentation media, quick setup guide, and safety and regulatory information. If any component is missing, users are instructed to contact Dell.
Setting up the monitor involves attaching the stand by placing the monitor face down on a flat, clean surface and inserting the stand riser and base. Removing the stand follows a similar process, by pushing a release button and pulling the stand away. Connecting the monitor involves several steps: first, connecting the video cable (HDMI or VGA) from the computer to the monitor, ensuring both devices are turned off. Second, connecting an earphone to the earphone output terminal if desired (earphone not supplied). Third, connecting the power cord to a properly-grounded AC outlet and then to the monitor. Finally, turning on the monitor by pressing the power button and setting the resolution and refresh rate in Microsoft Windows, with specific instructions provided for Windows 7, 8/8.1, and 10.
The document provides a comprehensive overview of the monitor's parts and controls, illustrating both front and back views. The front panel features buttons for AUTO (Input Select/Exit from OSD Menu), scroll down/decrease/contrast/brightness, scroll up/increase/color vision mode, MENU (OSD Menu On/Off/Confirm Select), and Power On/Off. The back panel includes an LED indicator, HDMI input, VGA input, earphone jack, and power input.
A significant portion of the guide is dedicated to using the On Screen Display (OSD) Functions. It explains how each button interacts with the OSD menu. For instance, the AUTO button selects manual adjust mode for VGA/HDMI and exits the main menu. The arrow buttons select desired items, directly enter Color Vision Mode or Contrast/Brightness menu when not in OSD, and recall Contrast and Brightness. There are also functions for Power Lock and OSD Lock, activated by pressing AUTO + or AUTO + for 10 seconds.
The main menu of the OSD offers various adjustments:
Finally, the guide outlines maintenance guidelines, advising users to avoid direct sunlight or heat sources, ensure good ventilation, not place heavy objects on the monitor, keep it in a clean and moisture-free area, and keep it away from magnets, motors, transformers, speakers, and TV sets.
Troubleshooting tips are provided for common issues:
| Screen Size | 18.5 inches |
|---|---|
| Resolution | 1366 x 768 |
| Panel Type | TN |
| Refresh Rate | 60 Hz |
| Aspect Ratio | 16:9 |
| Brightness | 200 cd/m² |
| Response Time | 5 ms |
| Viewing Angle | 90° (H) / 65° (V) |
| Contrast Ratio | 600:1 |
| Ports | VGA |
| Power Consumption | 10W (typical) |