Next steps
1. Install the air shroud.
2. Follow the procedure that is listed in After working inside your system.
Drives
Removing a drive blank
Prerequisites
1. Follow the safety guidelines listed in Safety instructions.
2. Follow the procedure listed in Before working inside your system.
3. Remove the front bezel.
CAUTION: To maintain proper system cooling, drive blanks must be installed in all empty drive slots.
CAUTION: Mixing drive blanks from previous generations of PowerEdge servers is not supported.
Steps
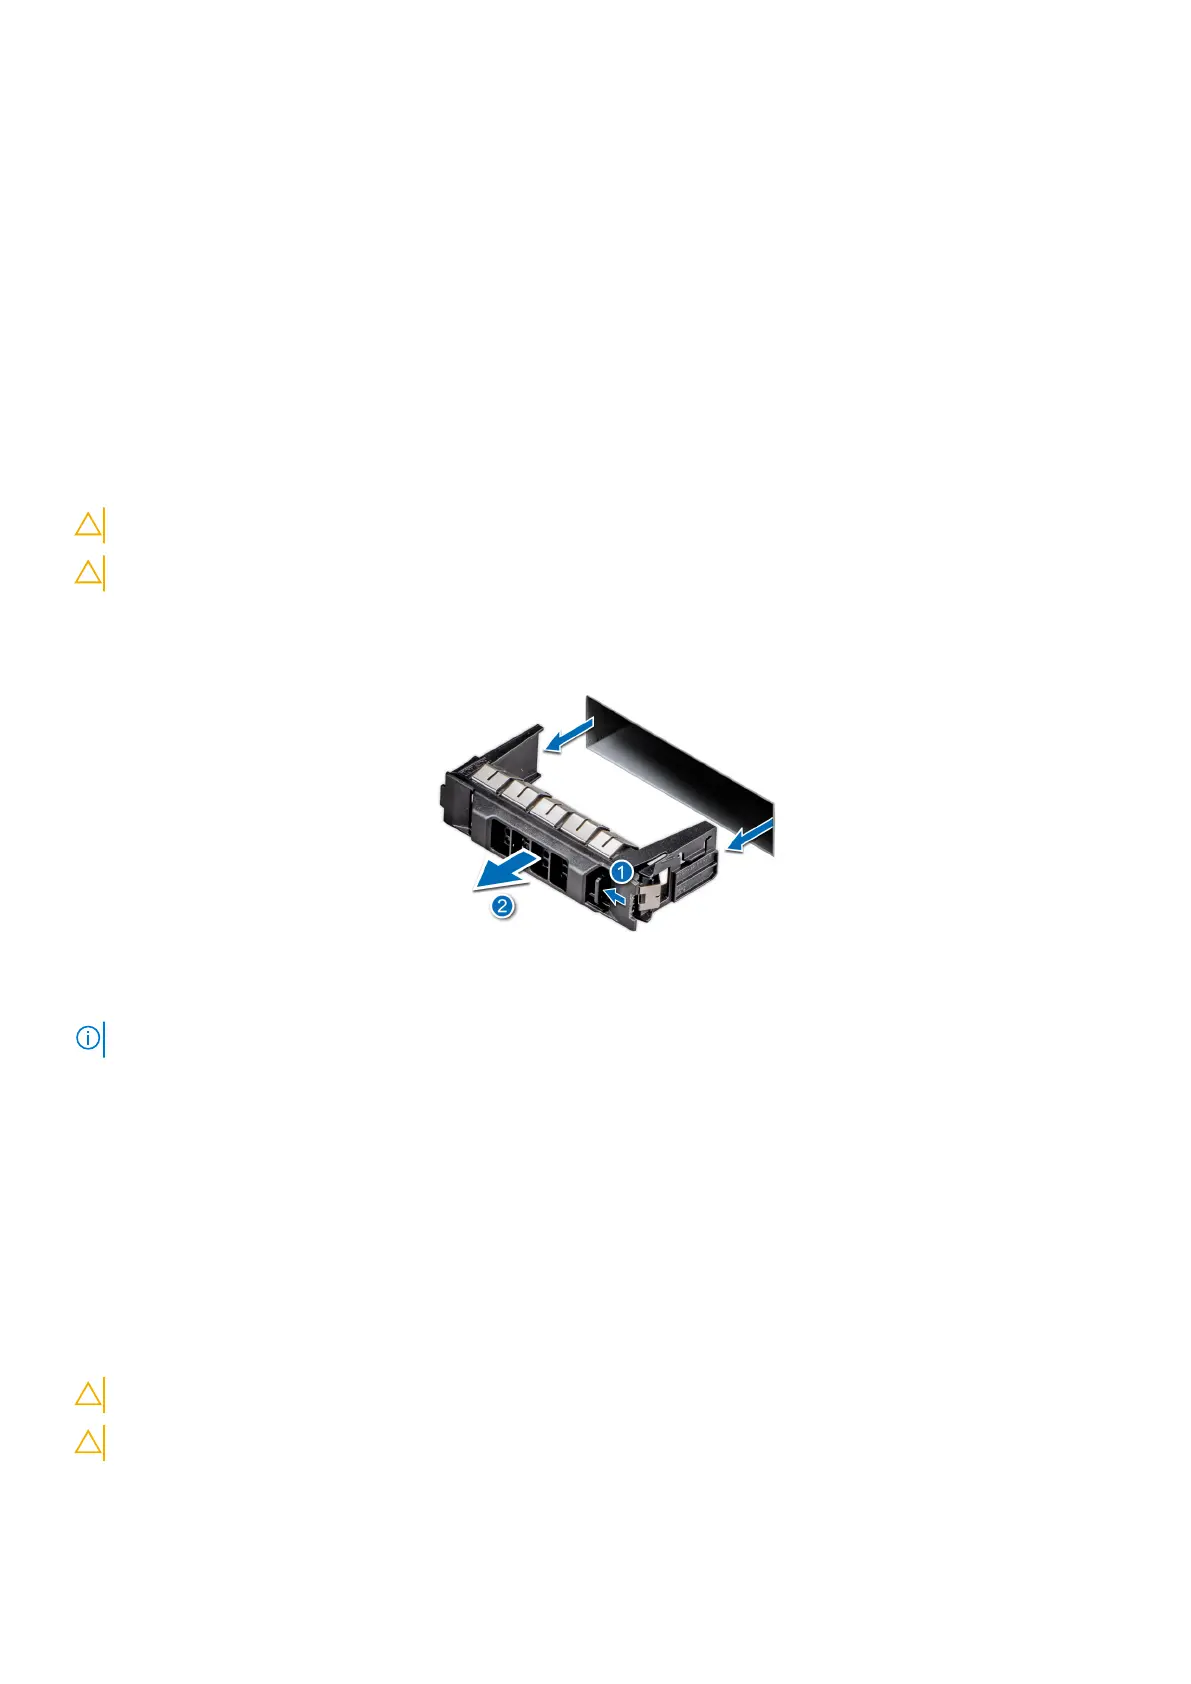
Press the release tab, and slide the drive blank out.
Figure 28. Removing a drive blank
NOTE: The procedure to remove a 2.5-inch or a 3.5-inch drive blank is the same.
Next steps
1. Replace the drive or a drive blank.
Installing a drive blank
Prerequisites
1. Follow the safety guidelines listed in Safety instructions.
2. Follow the procedure in Before working inside your system.
3. Remove the front bezel.
CAUTION: To maintain proper system cooling, drive blanks must be installed in all empty drive slots.
CAUTION: Mixing drive blanks from previous generations of PowerEdge servers is not supported.
52 Installing and removing system components


 To Next Page