PS4000 Hardware Maintenance Maintaining Control Modules
3–13
Return the failed control module in the packaging in which the replacement
module was shipped. Contact your PS Series support provider for information
about returning hardware.
Installing a Control Module
You can install a control module without shutting down the array.
Caution: Do not mix control module types in an array.
Before installing a control module, make sure the firmware on the control module
matches the firmware running on the functioning control module. See
Maintaining Control Module Firmware on page 3-4.
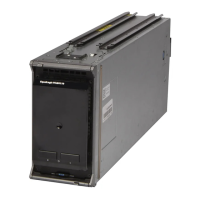
Control modules are installed vertically in the array, with the latch mechanism
facing the adjacent power supply and cooling module. See Figure 3-8.
Figure 3-8: Correct Control Module Orientation
Caution: Wear electrostatic protection when handling a control module. See
Using an Electrostatic Wrist Strap on page 1-5.
To install a control module:
1. Open the control module latches by squeezing together the release mechanism
for each latch and then rotating each latch outwards. See Figure 3-6.
2. Correctly orient the control module with the latch mechanism facing the
adjacent power supply and cooling module.
3. Hold the latches and slide the control module into the slot until you feel
resistance.
4. Rotate each latch inward, while pushing the control module completely into
the slot. The latches will snap into place (Figure 3-9).
 Loading...
