Setting up the monitor │ 53
Connecting your monitor
WARNING: Before you begin any of the procedures in this section,
follow the Safety instructions.
NOTE: Dell monitors are designed to work optimally
with the Dell-
supplied cables inside the box. Dell does not guarantee the video quality
and performance if non-Dell cables are used.
NOTE: Route the cables through the cable-management slot before
connecting them.
NOTE: Do not connect all the cables to the computer at the same time.
NOTE: The images are for the purpose of illustration only. The
appearance of the computer may vary.
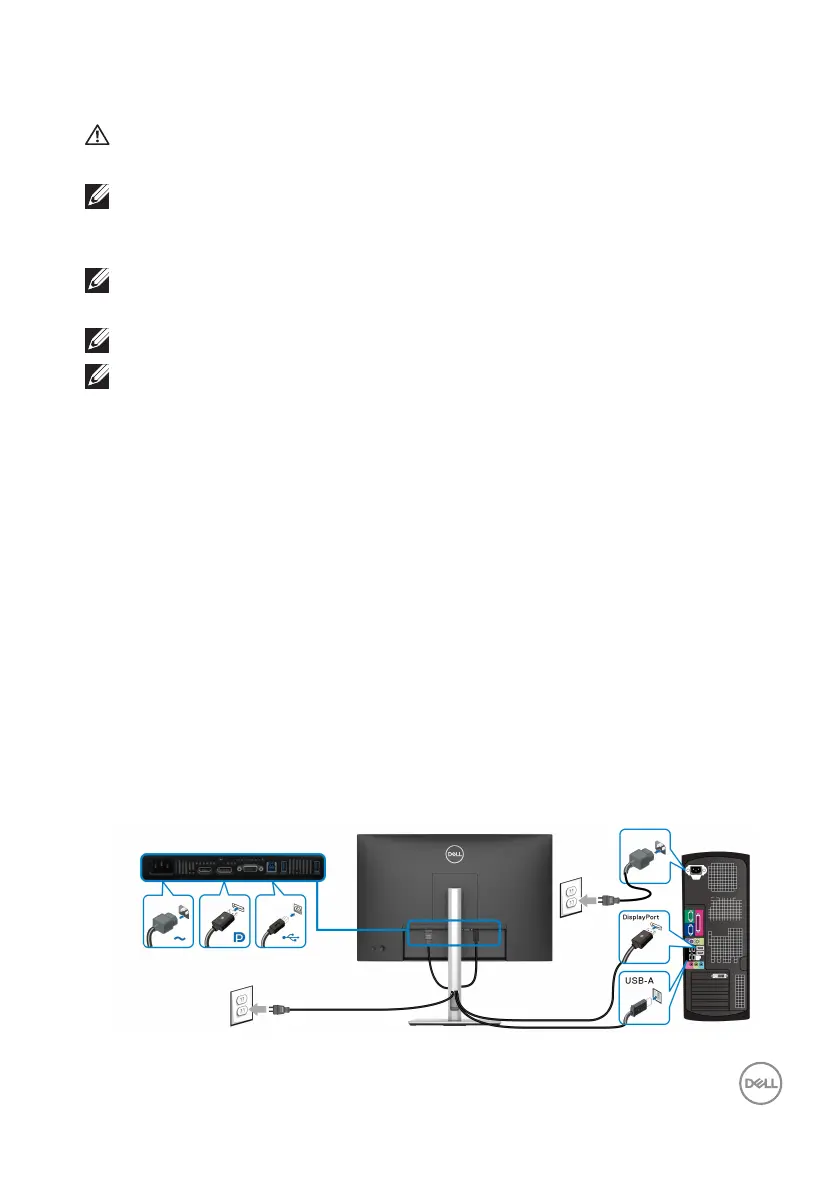
To connect your monitor to the computer:
1. T
urn off your computer and disconnect the power cable.
2. C
onnect the DisplayPort, HDMI, or VGA cable from your monitor to the
computer.
3. Conne
ct the USB 3.2 Gen1 upstream port on the monitor and an appropriate
USB 3.2 Gen1 port on your computer with the supplied USB cable (see Rear
and bottom view for details).
4. Conne
ct the USB peripherals to the USB 3.2 Gen1 downstream ports on the
monitor.
5. Pl
ug the power cables for your computer and monitor into a nearby outlet.
6. T
urn on the monitor and the computer.
If your monitor displays an image, installation is
complete. If it does not display an
image, see Common problems.
Connecting the DisplayPort (DP to DP) cable
 Loading...