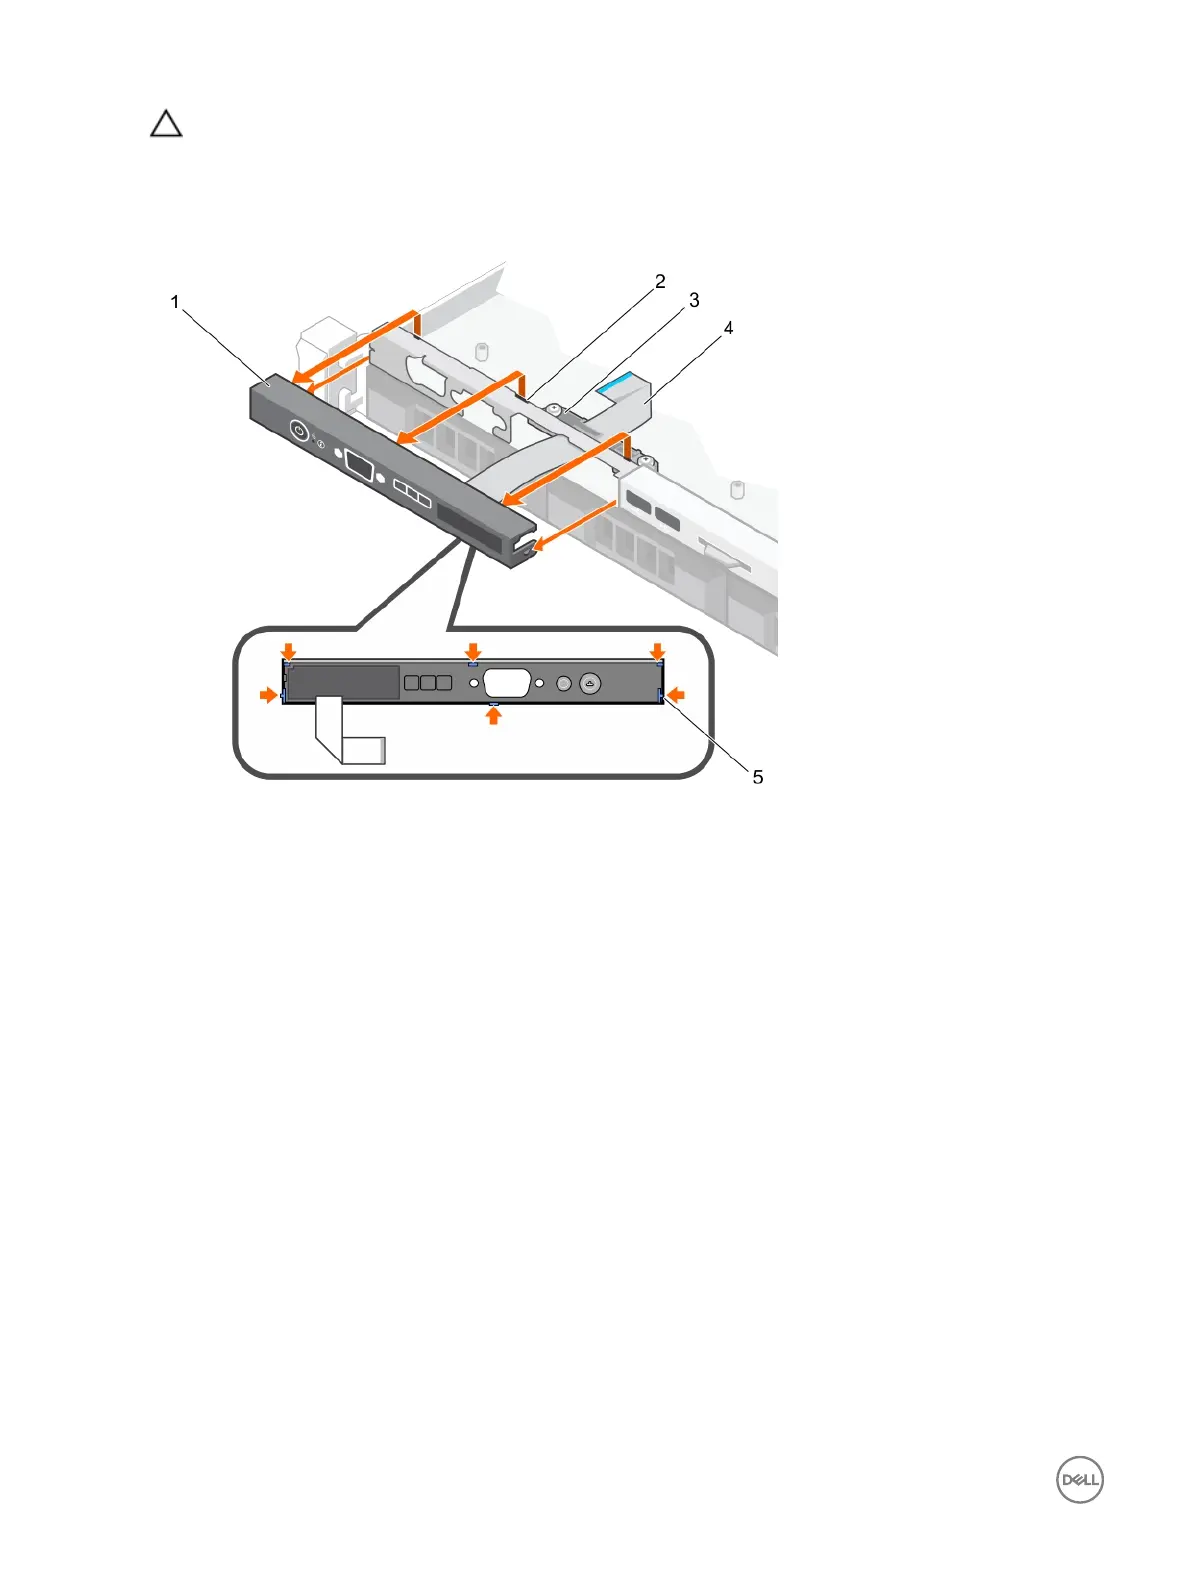
CAUTION: Do not use excessive force when removing the control panel as it can damage the connectors.
2. Hold the top edge of the LCD control panel at the corners and pull upward until the LCD control panel tabs are released.
3. Pull the control panel away from the chassis.
4. Remove the screws securing the LCD control panel board.
5. Lift the LCD control panel board away from the chassis.
Figure 94. Removing the LCD control panel—four 3.5-inch hot swappable hard drive chassis
1.
LCD control panel 2. notches (6)
3. display module cable retention clip 4. display module cable
5. tabs on the LCD control panel (6)
132

 Loading...