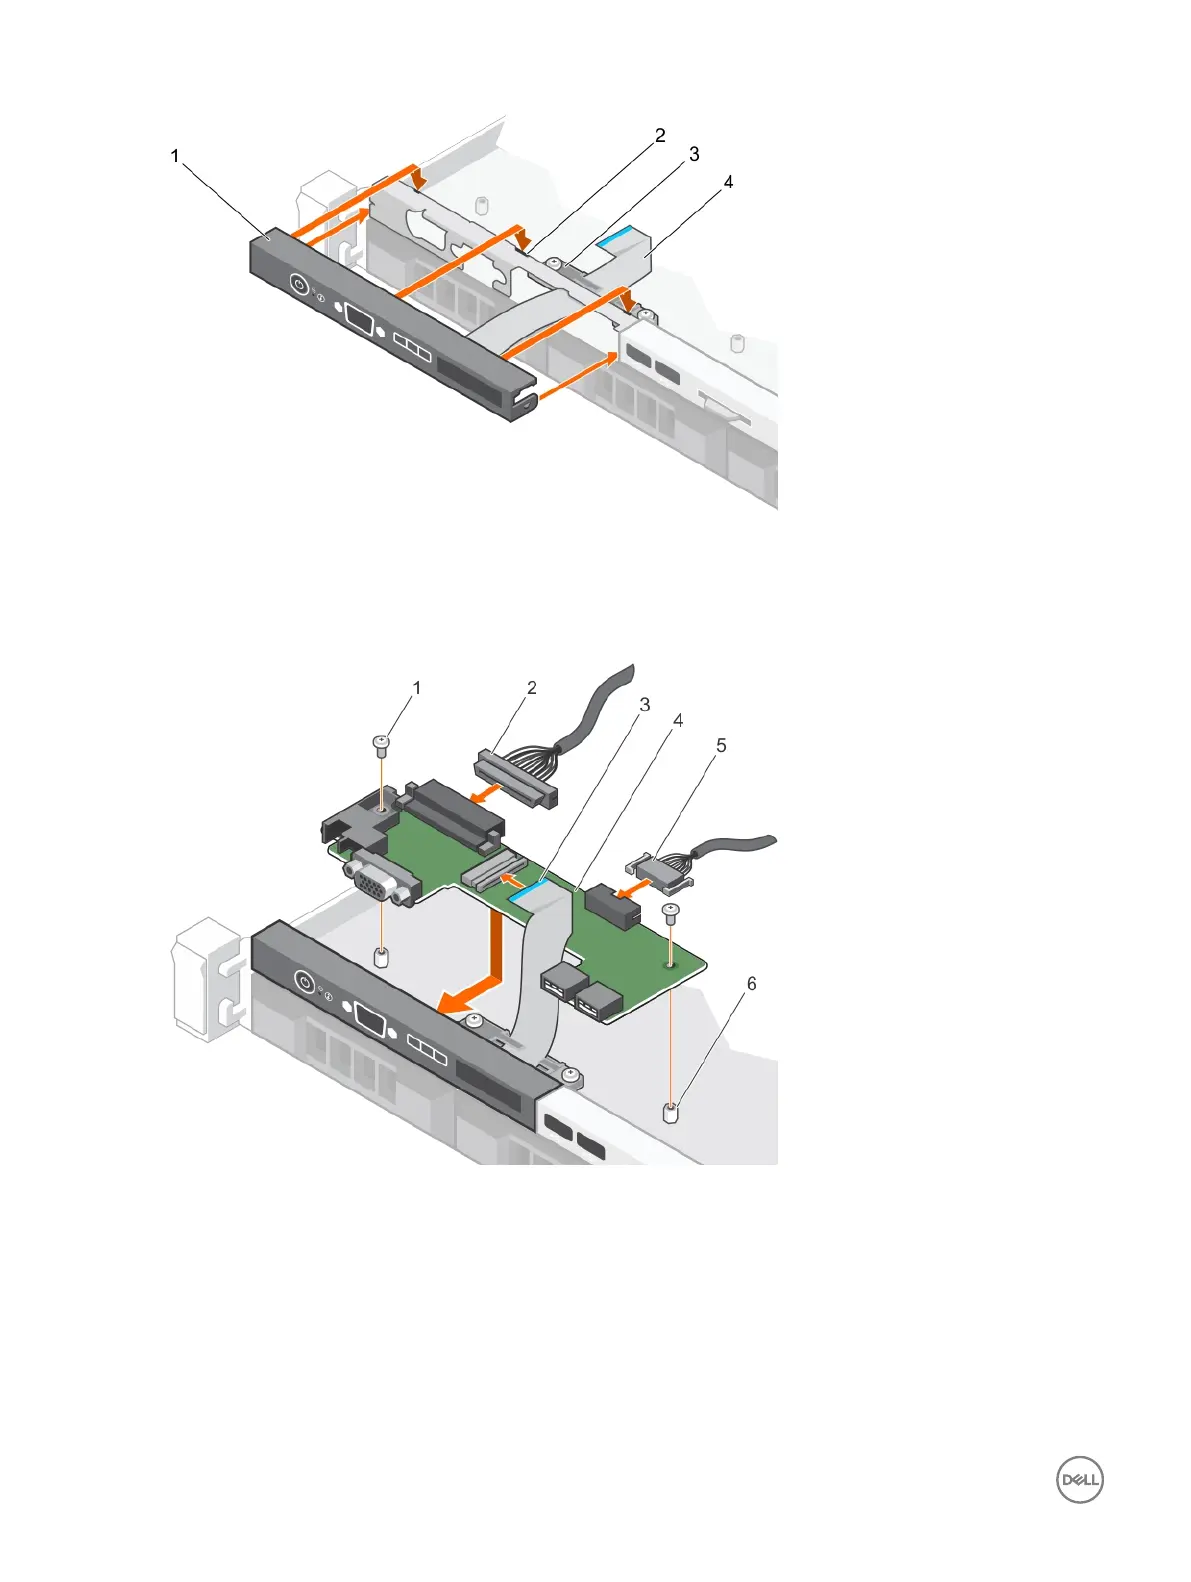
Figure 96. Installing the LCD control panel—four 3.5-inch hot swappable hard drive chassis
1. LCD control panel 2. notches (6)
3. display module cable retention clip 4. display module cable
5. tabs on the LCD control panel (6)
Figure 97. Installing the LCD control panel board—four hard drive chassis
1.
screw (2) 2. control panel connector cable
3. display module cable 4. LCD control panel board
5. USB connector cable 6. stando on the chassis (2)
Next steps
Follow the procedure listed in the After working inside your system section.
134

 Loading...