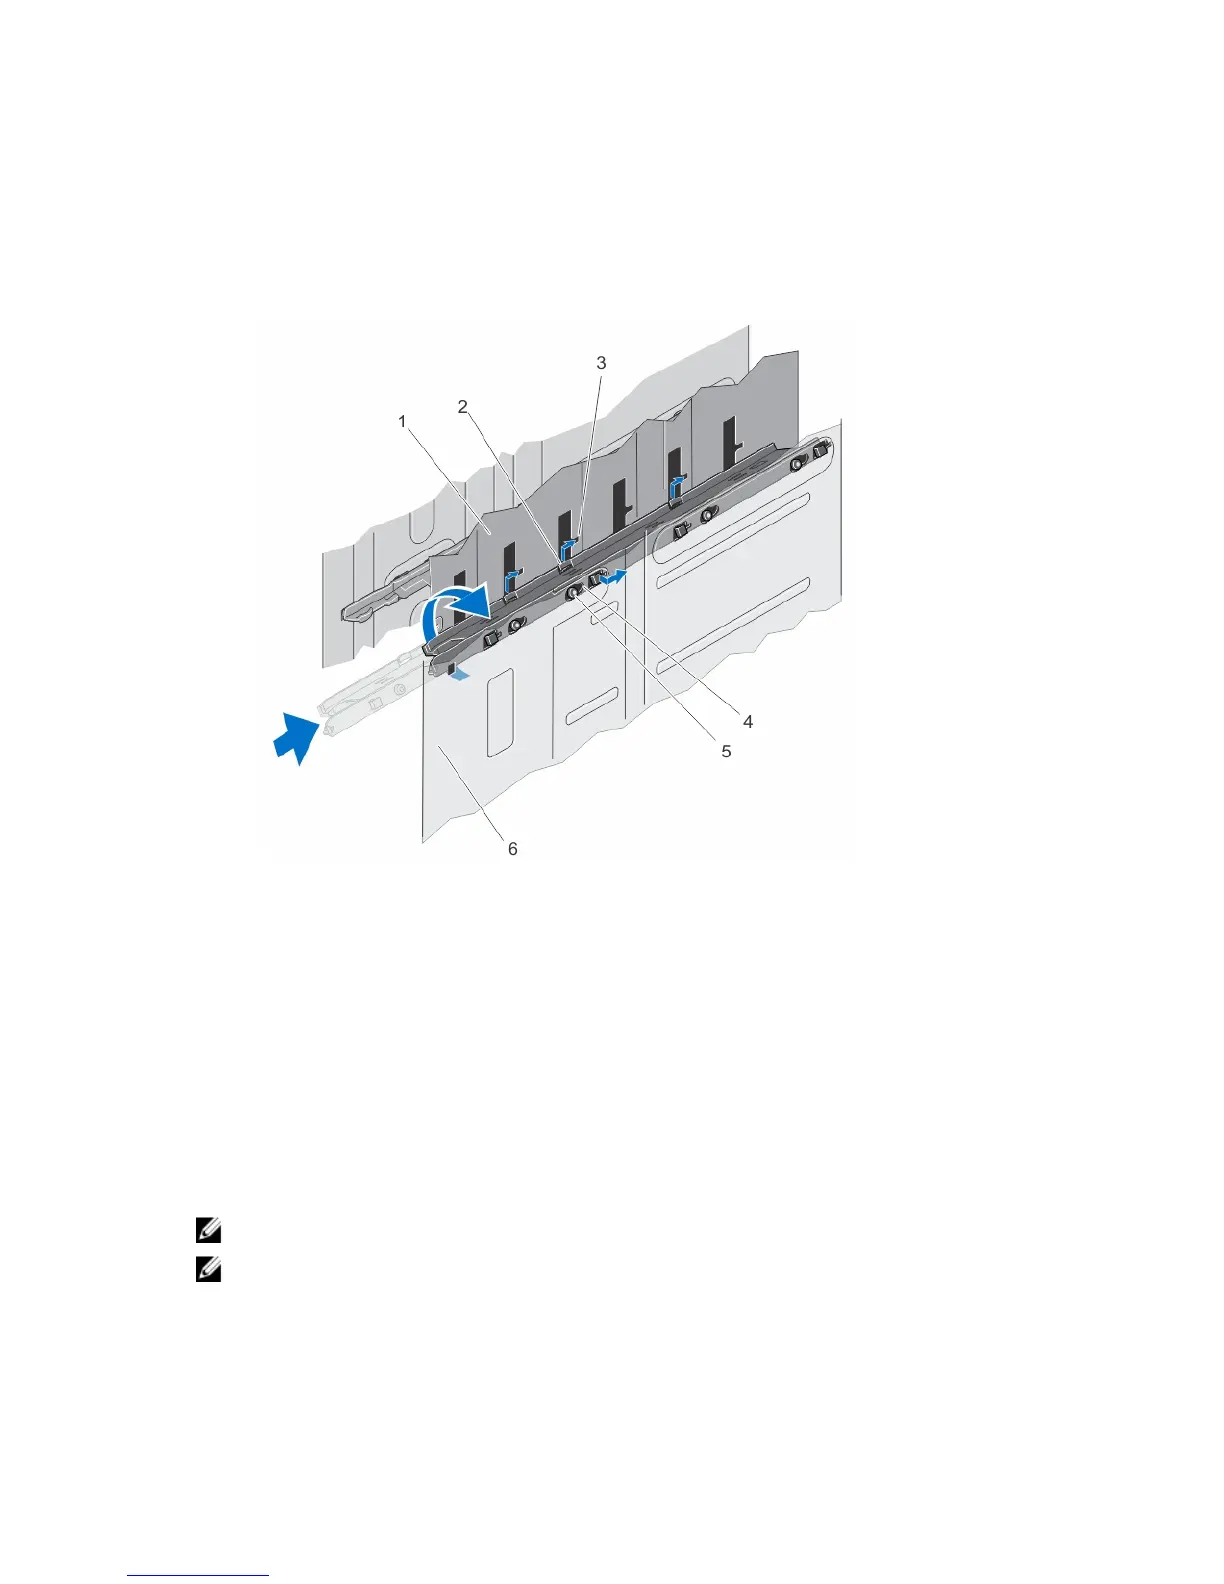
6. To install the server module partition between Slots 2 and 4:
a) Angle the partition and slide it into the chassis.
b) Align the tabs on the partition with the slots on the inner chassis wall and insert the tabs into the slots.
c) Rotate the partition upward in the clockwise direction until the tabs on the other side of the partition engage
with the slots on the metal partition.
d) Slide the partition toward the back of the system until the release tab on the partition engages with the slot on
the chassis wall.
Figure 42. Installing the Server Module Partition Between Slots 2 and 4
1. metal partition 2. tabs on server module partition
3. slots on the metal partition 4. slots on the inner chassis wall
5. tabs on the server module partition 6. inner chassis wall
7. Install the server modules.
8. Reconnect the enclosure to its electrical outlet and turn the enclosure on, including any attached peripherals.
9. Turn on the server modules using the operating system commands or the CMC.
10. If applicable, install the front bezel.
Power Supplies
Your system supports up to four 1100 W AC power supplies in 1+1, 2+1, 3+1, and 2+2 redundant configurations.
NOTE: All power supplies must be of the same type and have the same maximum output power.
NOTE: In the 2+2 redundant configuration, PSU1 and PSU2 are connected to one grid, and PSU3 and PSU4 are
connected to another grid.
63