Removing and Installing Parts 139
4
Disconnect the fan cable from the FAN_HDD connector on the system board (see "System Board
Components" on page 89).
5
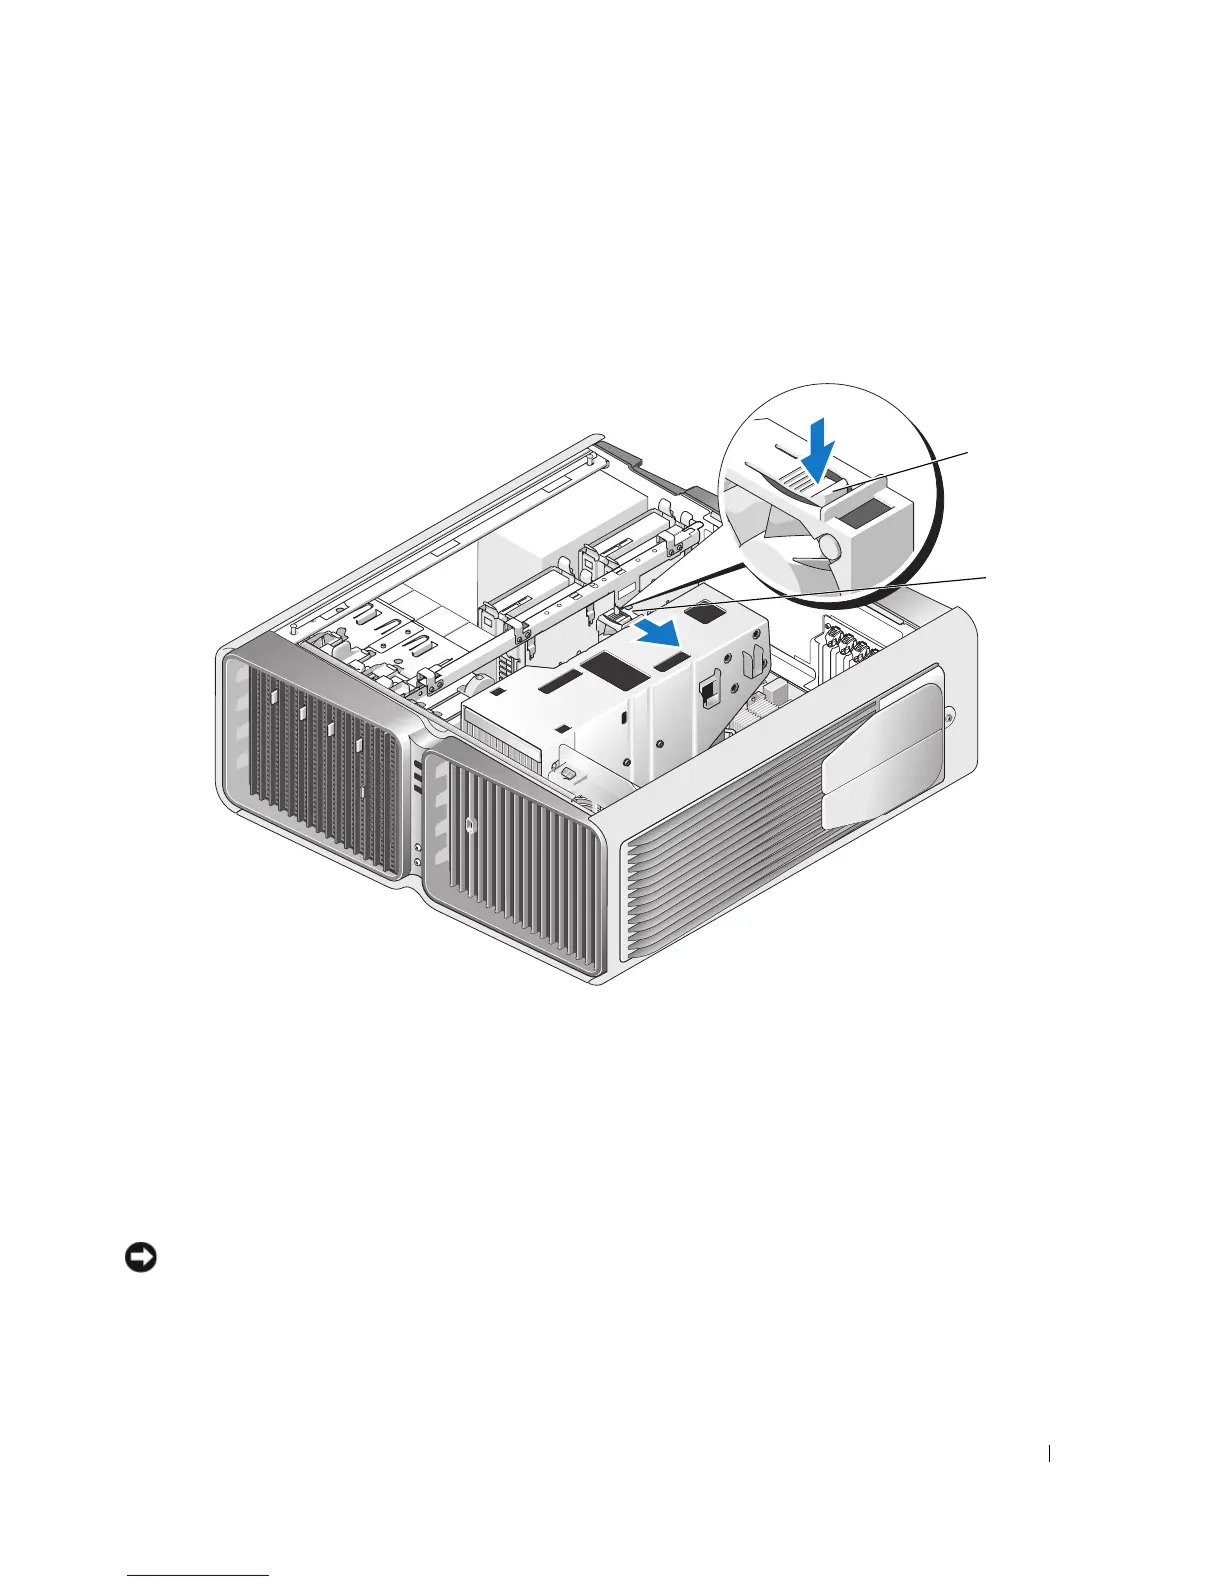
Press the release latch on the hard drive fan and slide it out from between the hard drive bays, then lift
it from the computer.
Installing the Optional Hard Drive Fan
1
Slide the fan between the hard drive bays until it snaps into place.
2
Connect the fan cable to the FAN_HDD connector on the system board (see "System Board
Components" on page 89).
3
Replace the computer cover (see "Replacing the Computer Cover" on page 160).
NOTICE: To connect a network cable, first plug the cable into the network port or device and then plug it into your
computer.
4
Connect your computer and devices to electrical outlets, and then turn them on.
1 hard-drive fan release latch 2 hard drive fan
2
1

 Loading...