Removing and Installing Parts 141
NOTICE: If you are replacing the system board, visually compare the replacement system board to the existing
system board to make sure that you have the correct part.
8
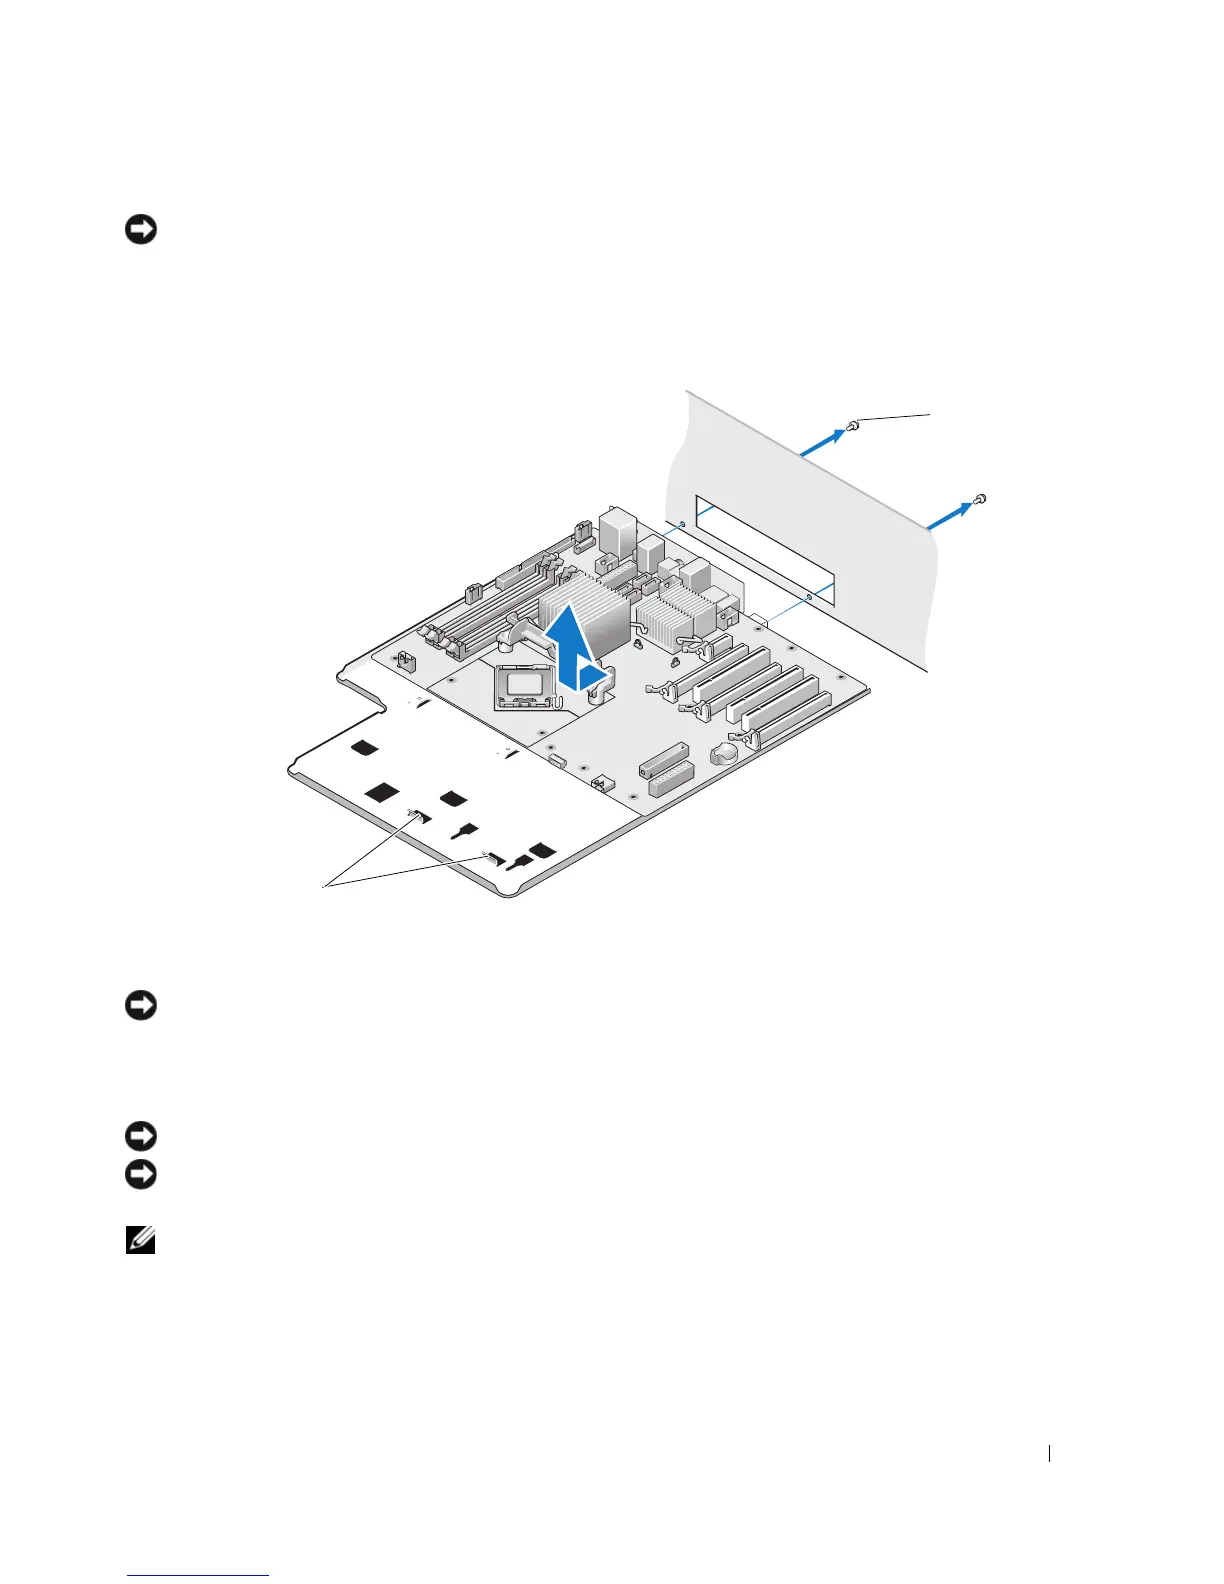
Remove the two screws securing the system board assembly to the chassis, then pull on the two tabs to
slide the system board assembly towards the front of the computer.
NOTICE: The system board and metal tray are connected and are removed as one piece.
9
Carefully, lift the system board assembly up and out of the computer.
Installing the System Board
NOTICE: The system board and metal tray are connected and are installed as one piece.
NOTICE: If you are replacing the system board, visually compare the replacement system board to the existing
system board to make sure that you have the correct part.
NOTE: Some components and connectors on replacement system boards may be in different locations than
corresponding connectors on the existing system board.
1 screw (2) 2 tabs
1
2

 Loading...