9
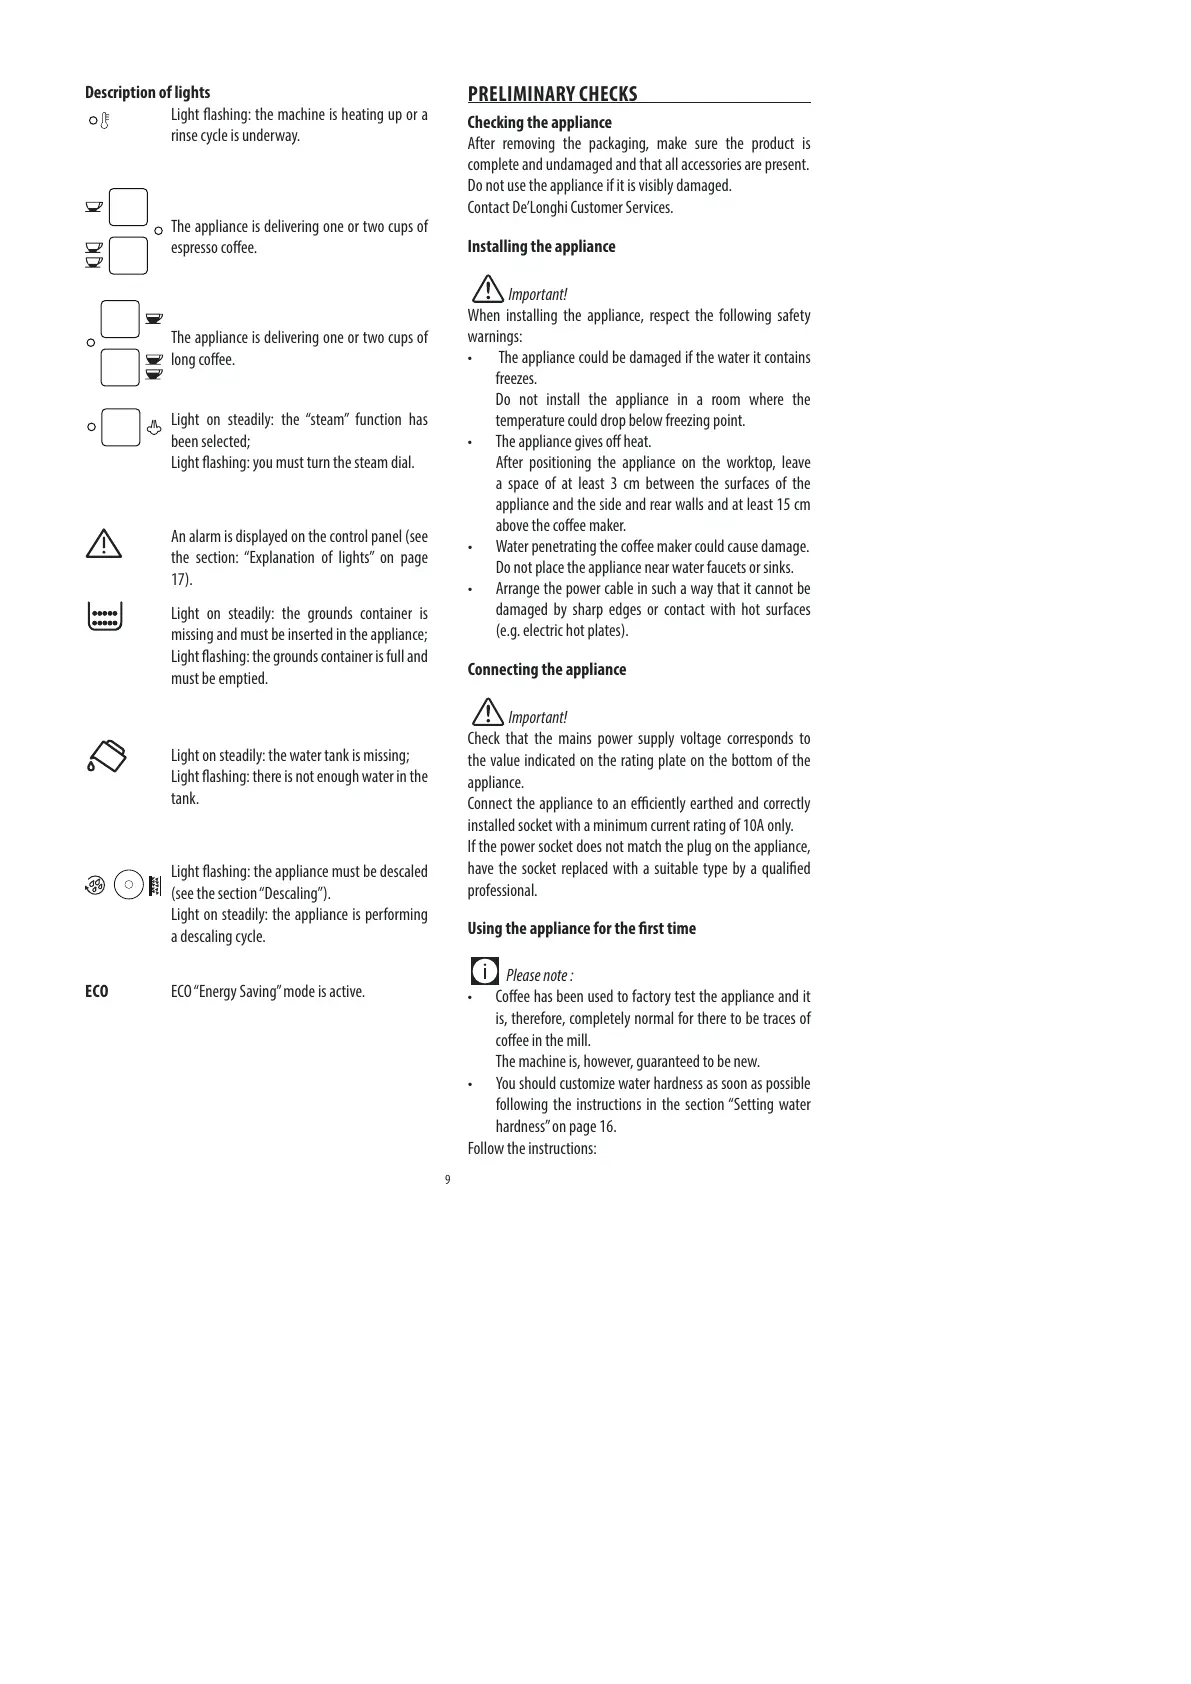
Description of lights
Light ashing: the machine is heating up or a
rinse cycle is underway�
The appliance is delivering one or two cups of
espresso coee�
The appliance is delivering one or two cups of
long coee�
Light on steadily: the “steam” function has
been selected;
Light ashing: you must turn the steam dial�
An alarm is displayed on the control panel (see
the section: “Explanation of lights” on page
17)�
Light on steadily: the grounds container is
missing and must be inserted in the appliance;
Light ashing: the grounds container is full and
must be emptied�
Light on steadily: the water tank is missing;
Light ashing: there is not enough water in the
tank�
Light ashing: the appliance must be descaled
(see the section “Descaling”)�
Light on steadily: the appliance is performing
a descaling cycle�
ECO ECO “Energy Saving” mode is active�
PRELIMINARY CHECKS
Checking the appliance
After removing the packaging, make sure the product is
complete and undamaged and that all accessories are present�
Do not use the appliance if it is visibly damaged�
Contact De’Longhi Customer Services�
Installing the appliance
Important!
When installing the appliance, respect the following safety
warnings:
• The appliance could be damaged if the water it contains
freezes�
Do not install the appliance in a room where the
temperature could drop below freezing point�
• The appliance gives o heat�
After positioning the appliance on the worktop, leave
a space of at least 3 cm between the surfaces of the
appliance and the side and rear walls and at least 15 cm
above the coee maker�
• Water penetrating the coee maker could cause damage�
Do not place the appliance near water faucets or sinks�
• Arrange the power cable in such a way that it cannot be
damaged by sharp edges or contact with hot surfaces
(e�g� electric hot plates)�
Connecting the appliance
Important!
Check that the mains power supply voltage corresponds to
the value indicated on the rating plate on the bottom of the
appliance�
Connect the appliance to an eciently earthed and correctly
installed socket with a minimum current rating of 10A only�
If the power socket does not match the plug on the appliance,
have the socket replaced with a suitable type by a qualied
professional�
Using the appliance for the rst time
Please note :
• Coee has been used to factory test the appliance and it
is, therefore, completely normal for there to be traces of
coee in the mill�
The machine is, however, guaranteed to be new�
• You should customize water hardness as soon as possible
following the instructions in the section “Setting water
hardness” on page 16�
Follow the instructions:
 Loading...