5
INTRODUCTION
ThanyouforchoosingaDe’Longhiproduct.Pleasetaeafew
momentstoreadtheinstructionstoavoidrissordamagetothe
appliance.
DESCRIPTION
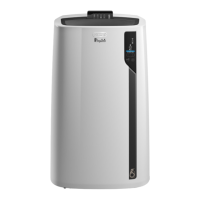
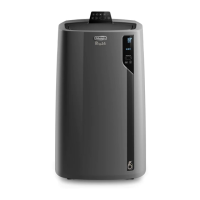
Description of the appliance (See page 3 - A)
A1 Airoutletap
A2 Controlpanel
A3 Handles
A4 Wheels
A5 Remotecontrolsignalreceiver
A6 Remotecontrolstorage
A7 Filter
A8 Airintaegrille
A9 Airexhausthosehousing
A10Airintaegrille
A11Drainagehosewithcap
A12 Powersupplycable
Description of accessories (See page 3 - B)
B1 Wallangewithcap
B2 Airexhausthose
B3 Windowoutlet
B4 Windowbracetwithpins
B5 Additionalwindowbracetwithpins
B6 Waterdrainhosewithcap
B7 Remotecontrol
B8 Endofseasondustcover
B9 Endofseasonaccessoriesbag
Electrical connection
Beforepluggingtheapplianceintotheoutlet,checthat:
• Theoutlet’spowersupplycorrespondstothevalue
indicatedontheratinglabelonthebacoftheappliance;
• Theoutletandelectricalcircuitareadequateforthe
appliance;
• Theoutletisa3-holegroundedoutlet
.Ifthisisnot
thecase,youmustchooseanotheroutlet.Failuretofollow
theseimportantsafetyinstructionsabsolvesthemanufac-
turerofallliability.
If it becomes necessary, the power cable must be re-
placed by a qualied professional only.
Theinstructionsbelowwillenableyoutoprepareyourair
conditionerforoperationasecientlyaspossible.Beforeuse,
maesuretheairintaeandoutletgrillesareunobstructed.
USE
Note: This appliance features an auto evaporative
function to remove excess condensate water
during cooling and dehumidiying modes.
CONDITIONING WITH INSTALLATION
For optimal results set-up your appliance in this way:
• FittheassembledairexhausthoseB2inthehousingatthe
bacoftheappliance.Insertitasshowningure1.
1
• Respectthedistancesgiveningure2.
2
min. 11.8 in
min. 30 cm
min. 11.8 in
min. 30 cm
Proceedasfollows:
• Drillahole5,25inches(134mm)inanoutsidewallor
throughawoodenicboard.Respectthedimensionsand
heightoftheholegiveningure3and4.
 Loading...