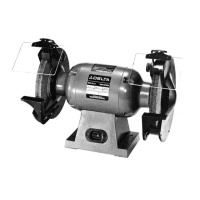
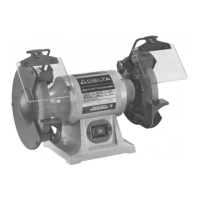
This document describes the 6" Bench Grinder, Model 23-589, manufactured by Delta Machinery. It serves as an instruction manual, providing details on assembly, operation, safety, and maintenance.
Function Description
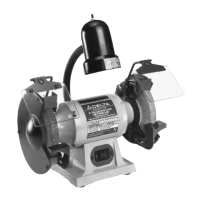
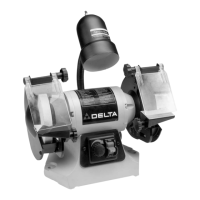
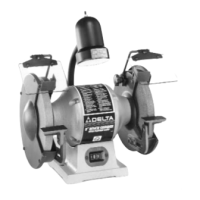
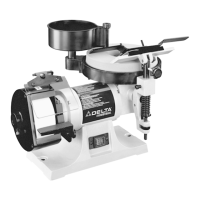
The 6" Bench Grinder is a power tool designed for various grinding tasks. Its primary function is to sharpen tools, remove material, and shape workpieces using abrasive grinding wheels. The grinder is equipped with two grinding wheels, a flexible lamp for illumination, and safety features such as spark guards and eye shields to protect the operator. It is intended for use in woodworking, home shop, and building trades applications. The machine is designed to be securely fastened to a supporting surface to prevent tipping or movement during operation.
Important Technical Specifications
- Model: 23-589
- Power Source: 120 volt, 60 HZ alternating current
- No-Load Speed: 3450 RPM
- Grinding Wheels:
- Diameter: 6 inches
- Arbor Hole: 1/2 inch
- Rated Speed: 3600 RPM or higher
- Supplied Grits: One 36 grit (coarse) and one 60 grit (fine) aluminum oxide wheel
- Flexible Lamp: Uses a 40 watt or less, 120 volt, reflector track type light bulb (not supplied). The bulb should not extend below the lamp shade.
- Electrical Circuit Recommendation: A separate #12 wire circuit, protected with a 20 Amp time lag fuse, is recommended.
- Extension Cords: Requires 3-wire extension cords with 3-prong grounding type plugs and 3-hole receptacles. The manual provides a detailed table for minimum gauge extension cord based on ampere rating and total length. For 10-12 Ampere rating, up to 25 feet requires 16 AWG, 25-50 feet requires 16 AWG, 50-100 feet requires 14 AWG, and 100-150 feet requires 12 AWG. Greater than 50 feet is not recommended for 12-16 Ampere rating.
- Grounding: The tool must be grounded during use to protect the operator from electric shock. It is equipped with an equipment-grounding conductor and a grounding plug.
Usage Features
- Tool Rests: Two tool rests are provided: a V-grooved tool rest for the right wheel and a flat-surfaced tool rest for the left wheel. These are adjustable to maintain a distance of 1/8" or less from the grinding wheel, providing maximum support for the workpiece. The tool rests should be positioned slightly below the center of the wheel for general work. Free-hand grinding without the tool rest should be done on the lower quarter of the wheel.
- Spark Guards: Adjustable spark guards are mounted to the side of each wheel guard to prevent sparks from striking the operator's hand. They should be adjusted close to the grinding wheel and re-adjusted as the wheel wears.
- Eye Shields: Two eye shields are supplied for operator protection and should always be worn. They are assembled onto the spark guards.
- Flexible Lamp: Operates independently of the grinder, controlled by a rotary switch. Provides illumination for the work area.
- Starting and Stopping: The grinder is turned "ON" by pushing the left-hand portion of the switch and "OFF" by pushing the right-hand portion.
- Grinding Technique: Always grind on the face of the wheel only, never on the side. Avoid forcing work against a cold wheel. The grinder should run at idle speed for one full minute before applying work.
- Workpiece Cooling: Do not apply coolant directly to the grinding wheel. Instead, dip the workpiece into water to cool it.
- Safety Precautions:
- Always wear eye protection (safety glasses conforming to ANSI Z87.1).
- Keep guards in place and in working order.
- Remove adjusting keys and wrenches before turning on the tool.
- Maintain a clean and well-lighted work area.
- Keep children and visitors away.
- Do not force the tool.
- Wear proper apparel (no loose clothing, jewelry).
- Secure work with clamps or a vise.
- Maintain proper footing and balance.
- Disconnect tools before servicing or changing accessories.
- Ensure the switch is in the "OFF" position before plugging in the power cord.
- Never stand on the tool.
- Check for damaged parts before use.
- Feed work against the direction of rotation of the blade/cutter.
- Never leave the tool running unattended.
- Do not operate under the influence of drugs, alcohol, or medication.
- Ensure the tool is disconnected from the power supply when mounting or connecting the motor.
- Operate in well-ventilated areas and use dust collection systems when possible, as dust from certain materials can be hazardous.
Maintenance Features
- Tool Condition: Keep tools sharp and clean for best and safest performance. Follow instructions for lubricating and changing accessories.
- Wheel Dressing: Grinding wheels should be kept properly dressed to maintain good balance and optimal grinding results. Use a silicon carbide stick type dresser on the face of the wheel, moving it back and forth until the face is clean and the corners are square.
- Changing Grinding Wheels:
- Disconnect the machine from the power source.
- Remove screws attaching side covers.
- To prevent shaft rotation, place a wedge between the grinding wheel and the tool rest.
- For the left wheel, turn the arbor nut clockwise to loosen; counterclockwise to tighten.
- For the right wheel, turn the arbor nut counterclockwise to loosen; clockwise to tighten.
- Ensure blotters and wheel flanges are used.
- Do not overtighten wheel nuts; tighten enough to drive the wheel and prevent slippage.
- Save the arbor bushing if the replacement wheel does not use it.
- Damaged Parts: If any part is missing, damaged, or fails, shut off the switch, remove the plug, and replace the parts before resuming operation.
- Cord Maintenance: Repair or replace damaged or worn power cords immediately.
- Vibrating Wheels: If a wheel vibrates, dress it, replace it, or replace the shaft bearings if worn.
- Heat Management: Grinding creates heat; do not touch the workpiece until it has cooled sufficiently.