8
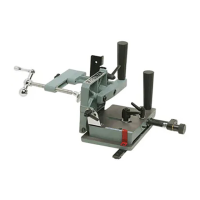
ASSEMBLING FENCE
TO SHAPER TABLE
Place the fence assembly (A) Fig. 11, on the shaper table
and fasten it to the table using the two long threaded
locking rods (B) and 11/32" flat washers (C), as shown.
Fig. 11
Fig. 12
Fig. 13
Fig. 15
Fig. 14
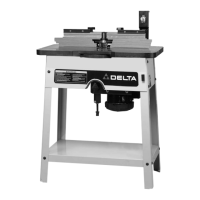
ASSEMBLING
TABLE INSERTS
Two table inserts (A) Fig. 12, are provided for use with
various size cutters. The largest insert is pressed into the
spindle opening in the table and the smallest insert,
when used, is pressed into the opening of the largest
insert.
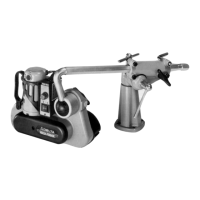
ASSEMBLING CUTTER AND
SPINDLE GUARD
A 4-1/2" diameter shaper spindle guard (A) Fig. 13, is
supplied with your machine and should always be used
with shaper cutters up to 3-1/2" in diameter. The guard
(A) is provided with a 1/2" bushing which enables it to be
used with both the 1/2" and 3/4" spindle.
For larger cutters up to 4-1/2" in diameter an accessory
43-441, 6-1/2" diameter shaper spindle guard is
available and should always be used.
To assemble the cutter and spindle guard, proceed as
follows:
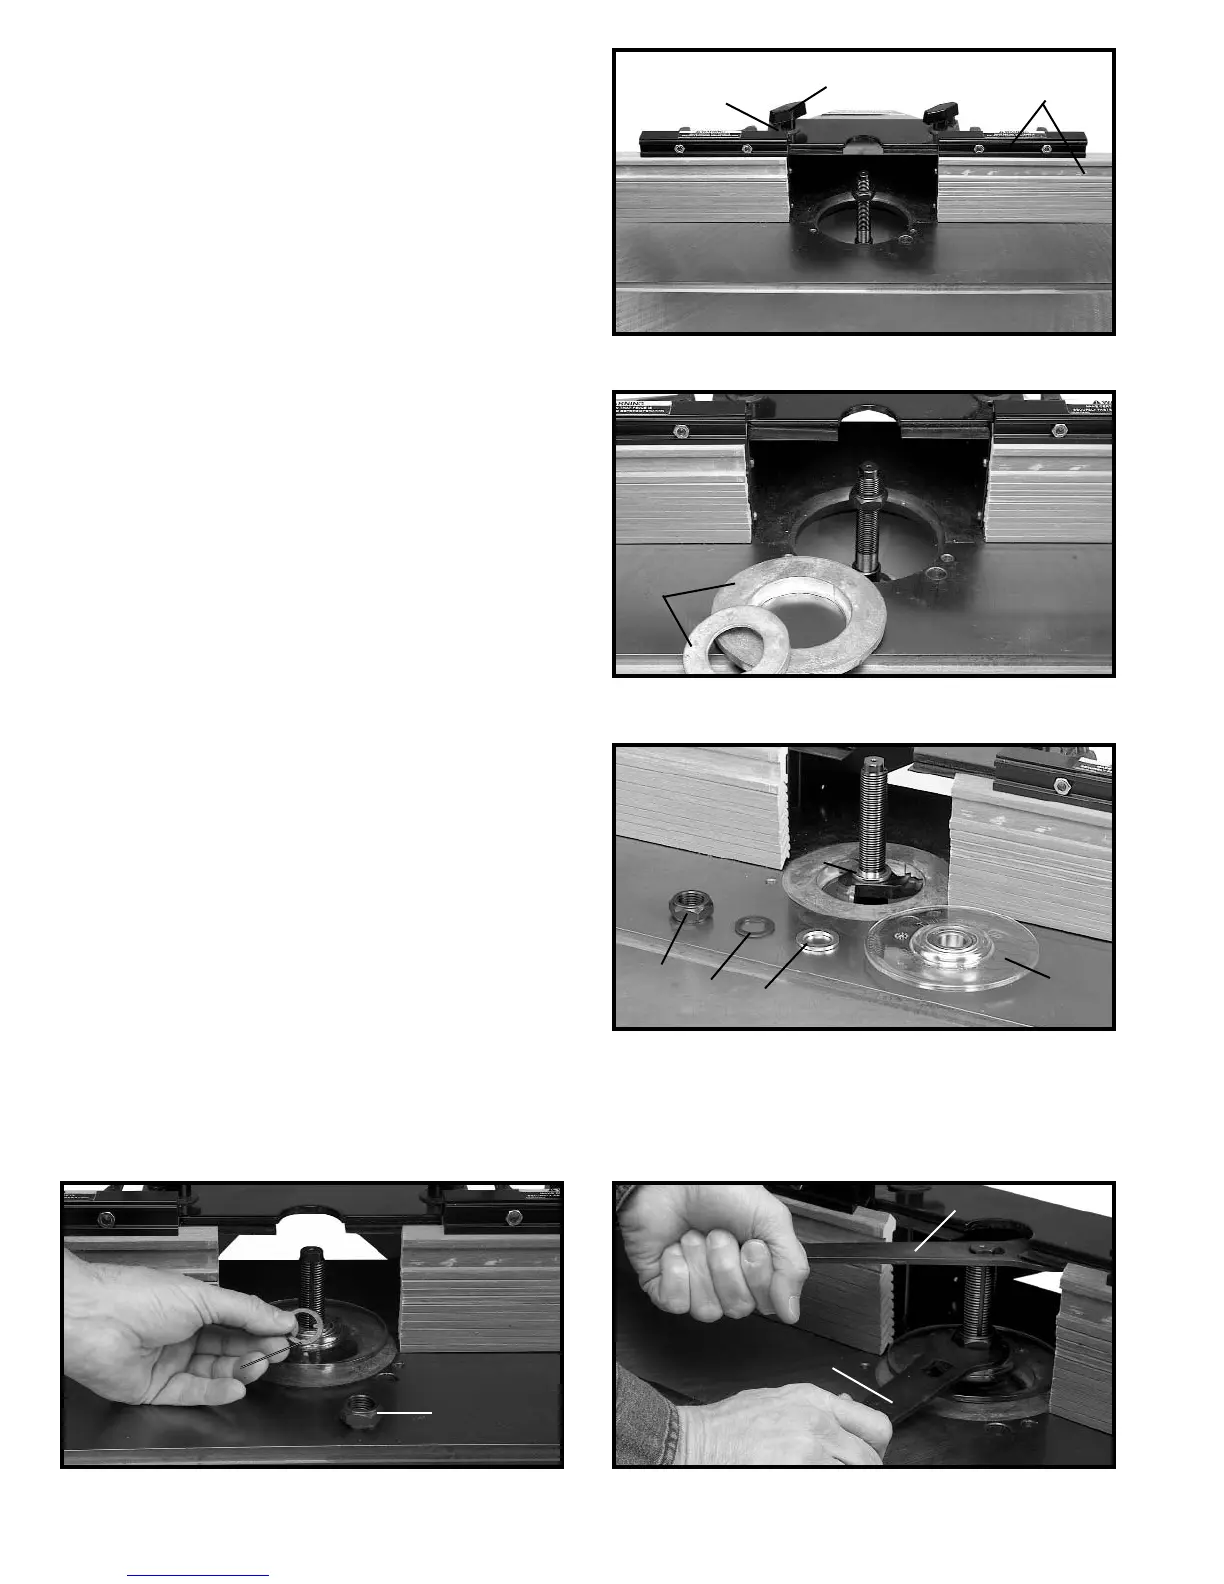
1. Two 1/2" ID. and two 3/4" I.D. washers are supplied
with the spindle guard to accommodate the 1/2" or 3/4"
spindle. The washers are to be placed directly above
and below the spindle guard. Place one of the washers
(B) Fig. 13, on the spindle, over either the cutter or collar,
as shown.
2. Place the spindle guard (A) Fig. 13, on the spindle.
Washer (C) is placed on the spindle directly Over the
spindle guard (A).
3. IMPORTANT: Always place "keyed" washer (D)
Figs. 13 and 14, on spindle before screwing on nut (E).
The "keyed" washer (D), prevents the nut (E) from
loosening when the spindle is turning counterclockwise.
Screw on nut (E) as far as possible by hand.
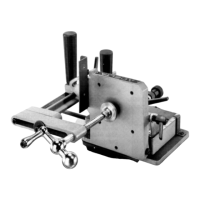
4. With wrench (F) Fig. 15, on spindle nut, place wrench
(G) on flats on top of spindle to hold spindle steady.
Then tighten spindle nut with wrench (F).
B
C
A
A
B
A
C
D
E
D
E
G
F