14
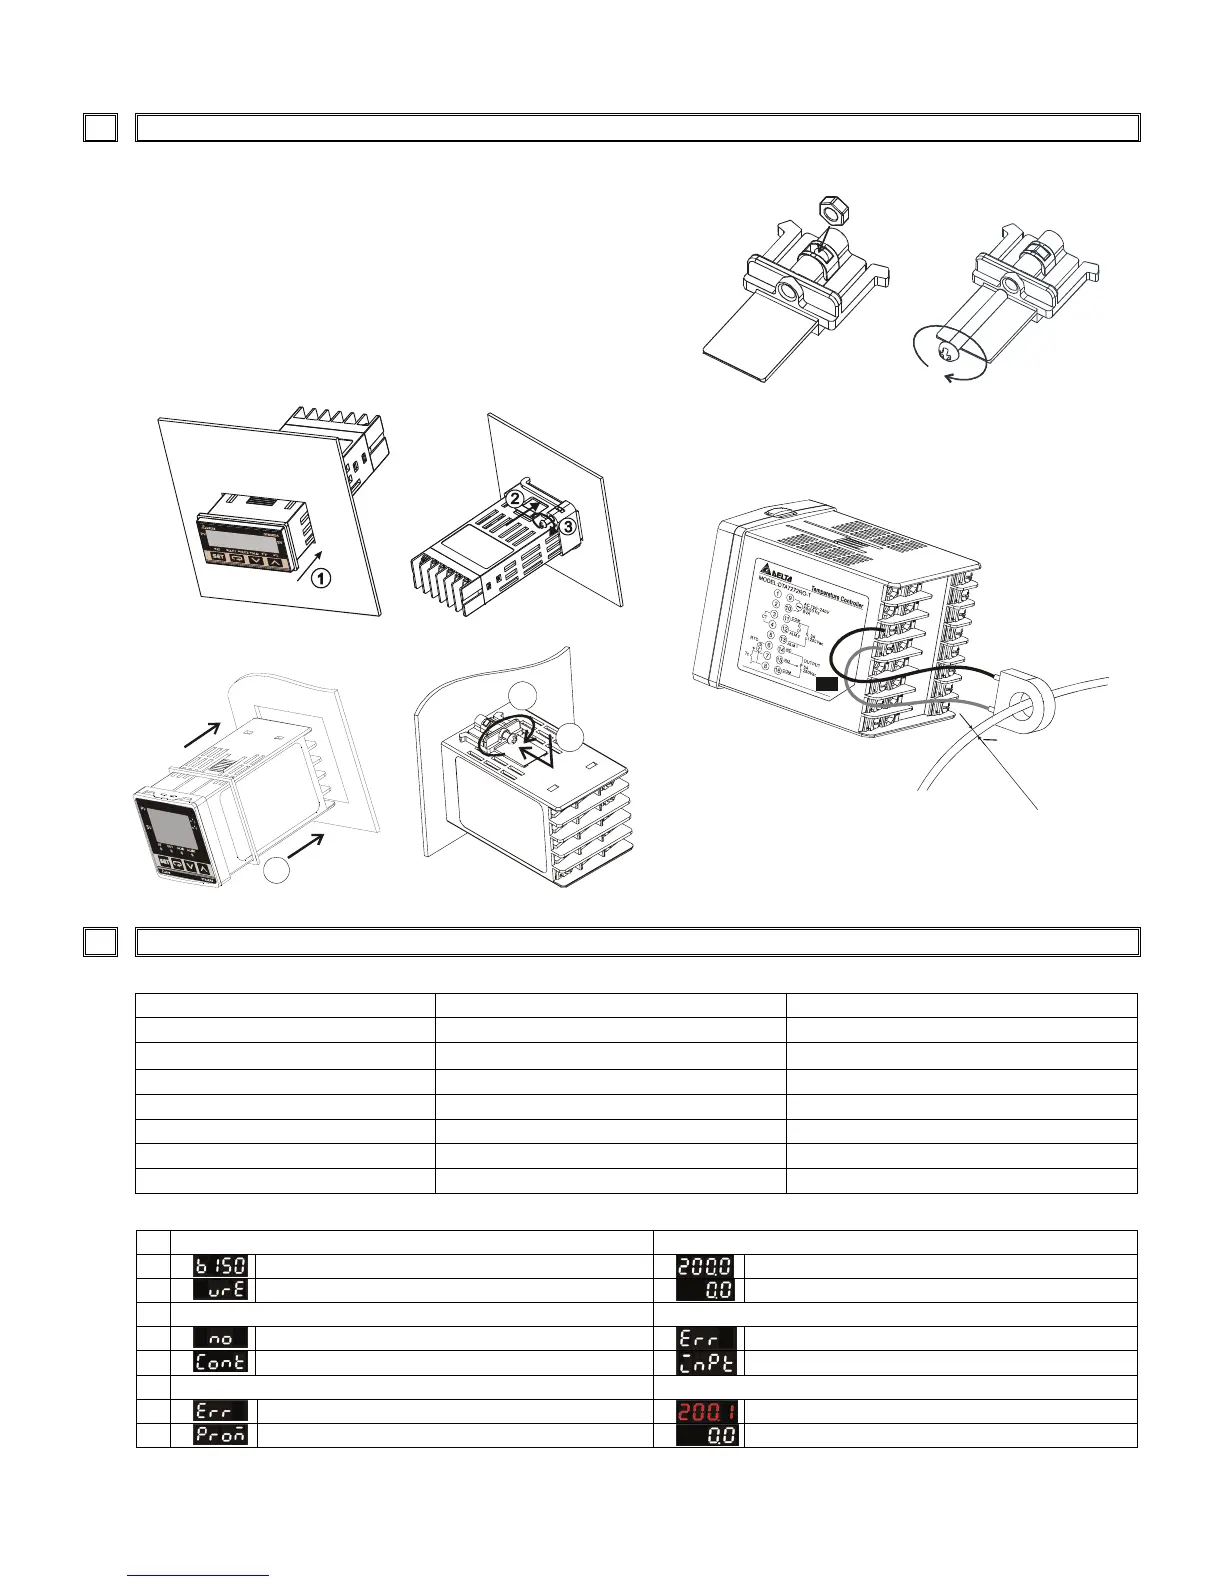
16 Mounting
Mounting Method Mounting Bracket Installation
CT Wirin
Method
if CT function is
Step 1 : Insert the controller through the panel cutout.
Step 2 : Insert the mounting bracket into the mounting groove
at the top and bottom of the controller
Step 3 : Push the mounting bracket forward until the bracket
stops at panel wall.
Step 4 : Insert and tighten screws on bracket to secure the
controller in place. (The screw torque should be
0.8kgf-cm to 1.5kgf-cm)
DTB4824 Mounting Method:
DTB4848/4896/9696 Mounting Method:
1
3
2
0
6
.
8
m
m
M
a
x
.
17
Error Acknowledge and Display
Communication error code response description:
Error status 102EH/4750H PV read back 1000H/4700H Error status
0001H N/A PV unstable
0002H 8002H
Re-initial,No temperature at this time
0003H 8003H Input sensor did not connect
0004H 8004H Input signal error
0005H N/A Over input range
0006H 8006H ADC fail
0007H N/A EEPROM read/write error
Display message:
Power ON Normal display
PV
DTB series, Firmware V1.50
Present value
SV
Output VR type with Event option
Set value
Sensor didn’t connect Input error
PV
No
Error
SV
Connect
Input
EEPROM error Input over range
PV
Error
PV flash when over
SV
EEPROM
 Loading...