Battery Operated Surface Mount Box Installation / Installation de boîtier de piles
monté en surface
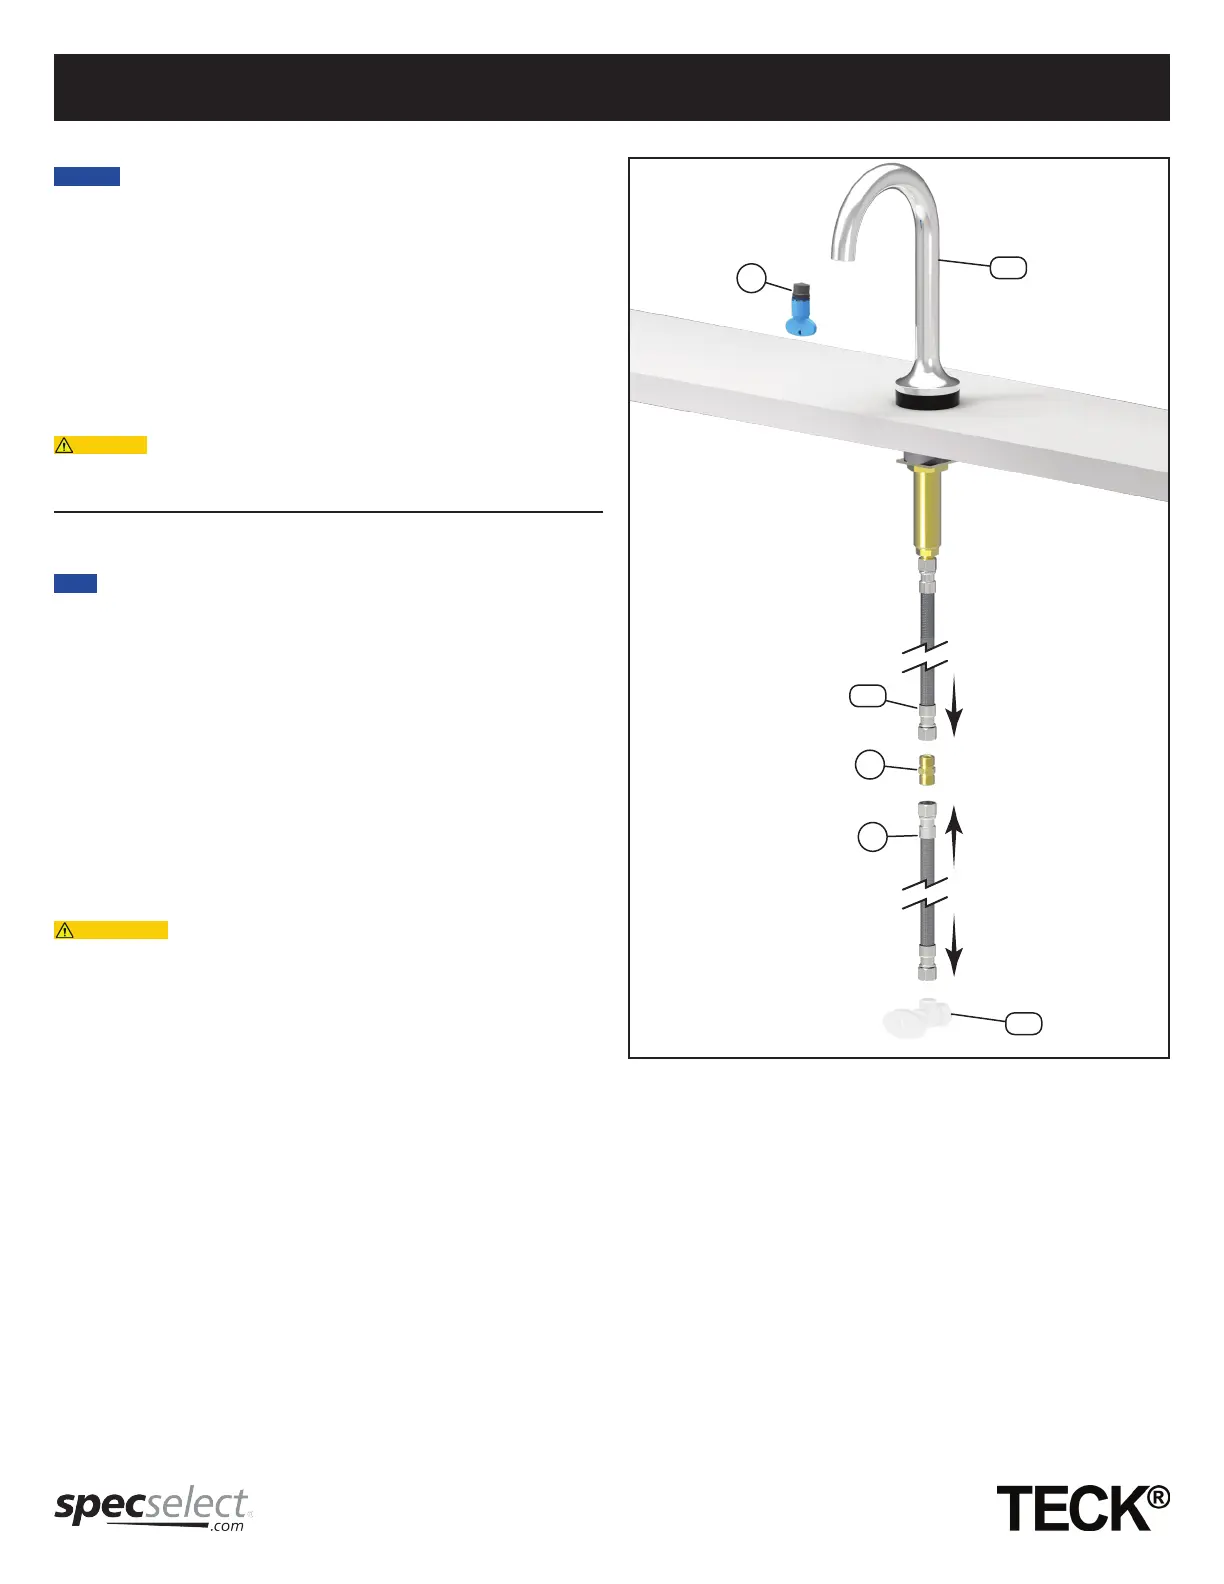
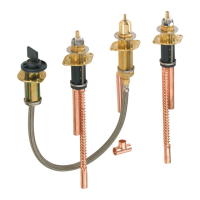
STEP 1 - FLUSH WATER SUPPLY LINES (see Figure 1)
• Generic faucet trim shown for illustration purposes.
• Generic outlet and outlet tool shown for illustration purposes.
• Components may vary as shown.
• A Polymer braided hose must be used to connect to the water supply
stop (ZC**) for proper faucet function.
1. Install the polymer braided hose (L) to the water supply (ZC**).
2. Connect the other end of the polymer braided hose (L) to the a” Union (O).
3. Connect the end of the polymer braided hose (ZB*) from the faucet (ZA*)
to the a” Union (O).
4. Turn “ON” the water supply stop (ZC**) and flush the lines for 1 minute.
5. Turn “OFF” the water supply stop (ZC**).
6. Install the outlet (J).
When installing the outlet (J) ensure it is secured tightly.
7. Turn “ON” the water supply stop (ZC**) and check for leaks at the outlet.
8. Turn “OFF” the water supply stop (ZC**) and remove the 3/8” union (O).
ÉTAPE 1 - RINCER LES LIGNES D’ALIMENTATION
EN EAU (voir la Figure 1)
• Les garnitures de robinet génériques sont montrées à titre
d’illustration.
• La prise générique et l’outil de sortie sont illustrés à des fins
d’illustration.
• Les composants peuvent varier comme indiqué.
• Un tuyau en polymère tressé doit être utilisé pour connecter à l’arrêt
d’alimentation en eau (ZC**) pour le bon fonctionnement du robinet.
1. Installer le tuyau en polymère tressé (G) pour l’alimentation en eau (ZC**).
2. Connecter l’autre extrémité du tuyau en polymère tressé (L) à l’union de
3/8 po (O).
3. Connecter l’autre extrémité du tuyau en polymère tressé (ZB*) du robinet
(ZA*) à l’union de 3/8 po (O).
4. Ouvrir l’arrêt de l’alimentation en eau (ZC **) « ON » et rincez les lignes
pendant 1 minute.
5. Fermez l’arrêt d’alimentation en eau (« OFF ») (ZC**).
6. 6. Installez la prise (J).
Lors de l’installation de la sortie (J), assurez-vous qu’elle est
solidement fixée.
7. Mettez en marche l’arrêt d’alimentation en eau (ZC**) et vérifiez qu’il n’y a
pas de fuites à la sortie.
8. Couper l’alimentation en eau (ZC**) et retirer le raccord 3/8” (O).
Figure 1
L
O
ZB*
ZA*
J
ZC**
* Previously installed / Installé auparavant
** Supplied by others / Fourni par d’autres.
Page - 3 of 19
214188 Rev. A