AC20021 Page 11
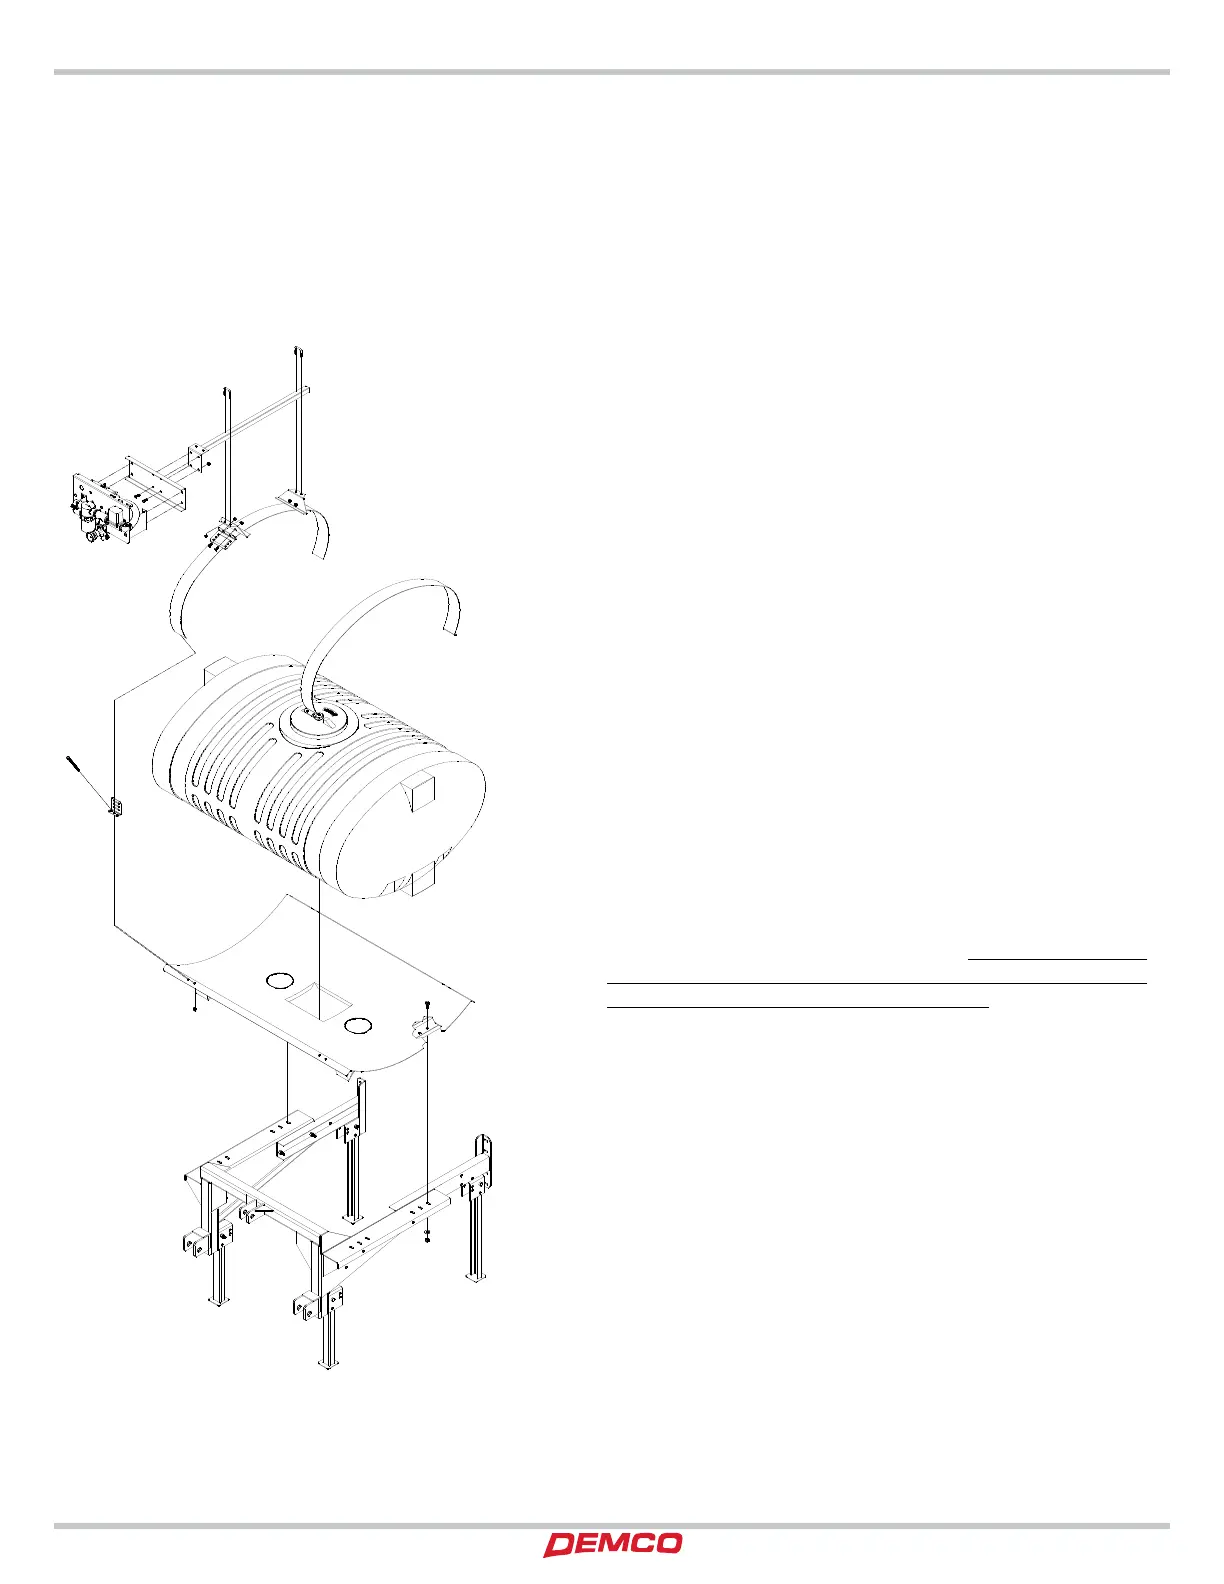
1. Begin by fastening the tank skid (#1) to the
mainframe (#3) using 1/2” x 1-1/4” hex head bolts
(#2), 1/2”flatwashers (#4), and 1/2” locknuts (#5).
2. Fasten mounting plates (#10), and strap anchors
(#11) to tank strap (#7) using 5/16” x 3/4” bolts
(#12), and 5/16” locknuts (#15). Refer to page 2
for strap and strap anchor routing.
3. Place tank (#6) onto the tank skid (#1). Using tank
straps (#7) fasten tank to skid with 3/8” x 6” hex
head bolts (#18), and 3/8” locknuts (#9).
4. Fasten panel mount stem (#13) to the
mounting plates (#10) using 5/16” sq. u-bolts (#14),
and 5/16” locknuts (#15). Used when 3 section
boom control is ordered.
5. Fasten panel mount plate (#16) to panel
mount stem (#13) using 5/16” x 1” hex head
bolts (#17), and 5/16” locknuts (#15).
6. Mount the control panel (#19) to the
mounting plate (#16) using bolts included with
control panel mounting package. REFER TO
CONTROL PANEL MANUAL FOR PARTS
BREAKDOWN AND INSTRUCTIONS.
NOTE: Do not let any agricultural chemical stand in the
applicator tank when not in use. Chemicals left
standing in equipment that is not in use, shorten
the life of the tanks, pumps, hoses, etc. The
longer the chemical stands, the more water
evaporates and the stronger the chemical
solution becomes.
3
6
1
2
4
5
9
7
18
10
13
16
17
15
14
14
11
15
12
19
7
ASSEMBLY
15
10
INSTALLATION
TANK AND TANK SKID MOUNTING