EasyManua.ls Logo

DENTSPLY AutoMate III User Manual

DENTSPLY AutoMate III
4 pages
To Next Page IconTo Next Page
Page #1 background imageLoading...
Page #1 background image
Tightening the matrix with AUTOMATE III tightening device
1. Until tightened, stabilize matrix to gingiva with finger.
Insert tip of AUTOMATE III tightening device into coil (do not use force).
Note: AUTO MATE III has sonic torque control, thereby requiring only minimal
rotational force.
2. Rotate knurled handle clockwise. After 2 to 3 sonic clicks, STOP! The band is
sub-gingivally tightened.
AutoMate
®
III
MATRIX TIGHTENING DEVICE
Format: 127 mm x 114 mm Farbe: schwarz
© 2009
DENTSPLY International
Manufactured by
DENTSPLY Caulk
38 West Clarke Avenue
Milford, DE 19963 USA
www.dentsply.com
DENTSPLY DeTrey GmbH
De-Trey-Str. 1
78467 Konstanz
GERMANY
www.dentsply.de
Question and Answer IconNeed help?

Do you have a question about the DENTSPLY AutoMate III and is the answer not in the manual?

DENTSPLY AutoMate III Specifications

General IconGeneral
BrandDENTSPLY
ModelAutoMate III
CategoryDental equipment
LanguageEnglish

Summary

AutoMate® III Matrix Tightening Device

Tightening the matrix

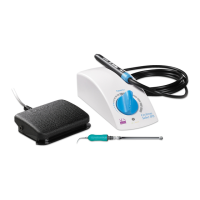
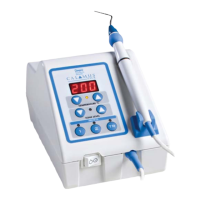
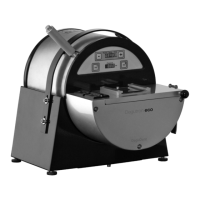
Instructions for tightening the matrix using the AUTOMATE III device, noting sonic torque control and minimal force.

Shaft Assembly Replacement

Replacing the shaft assembly

Procedure for removing an old shaft assembly and threading a new one for the AutoMate III or Dual Torque Matrix Tightening Device.

Related product manuals