INSTALLATION
Releasing the refrigerant to the unit
1. This air conditioning unit comes ready charged with refrigerant
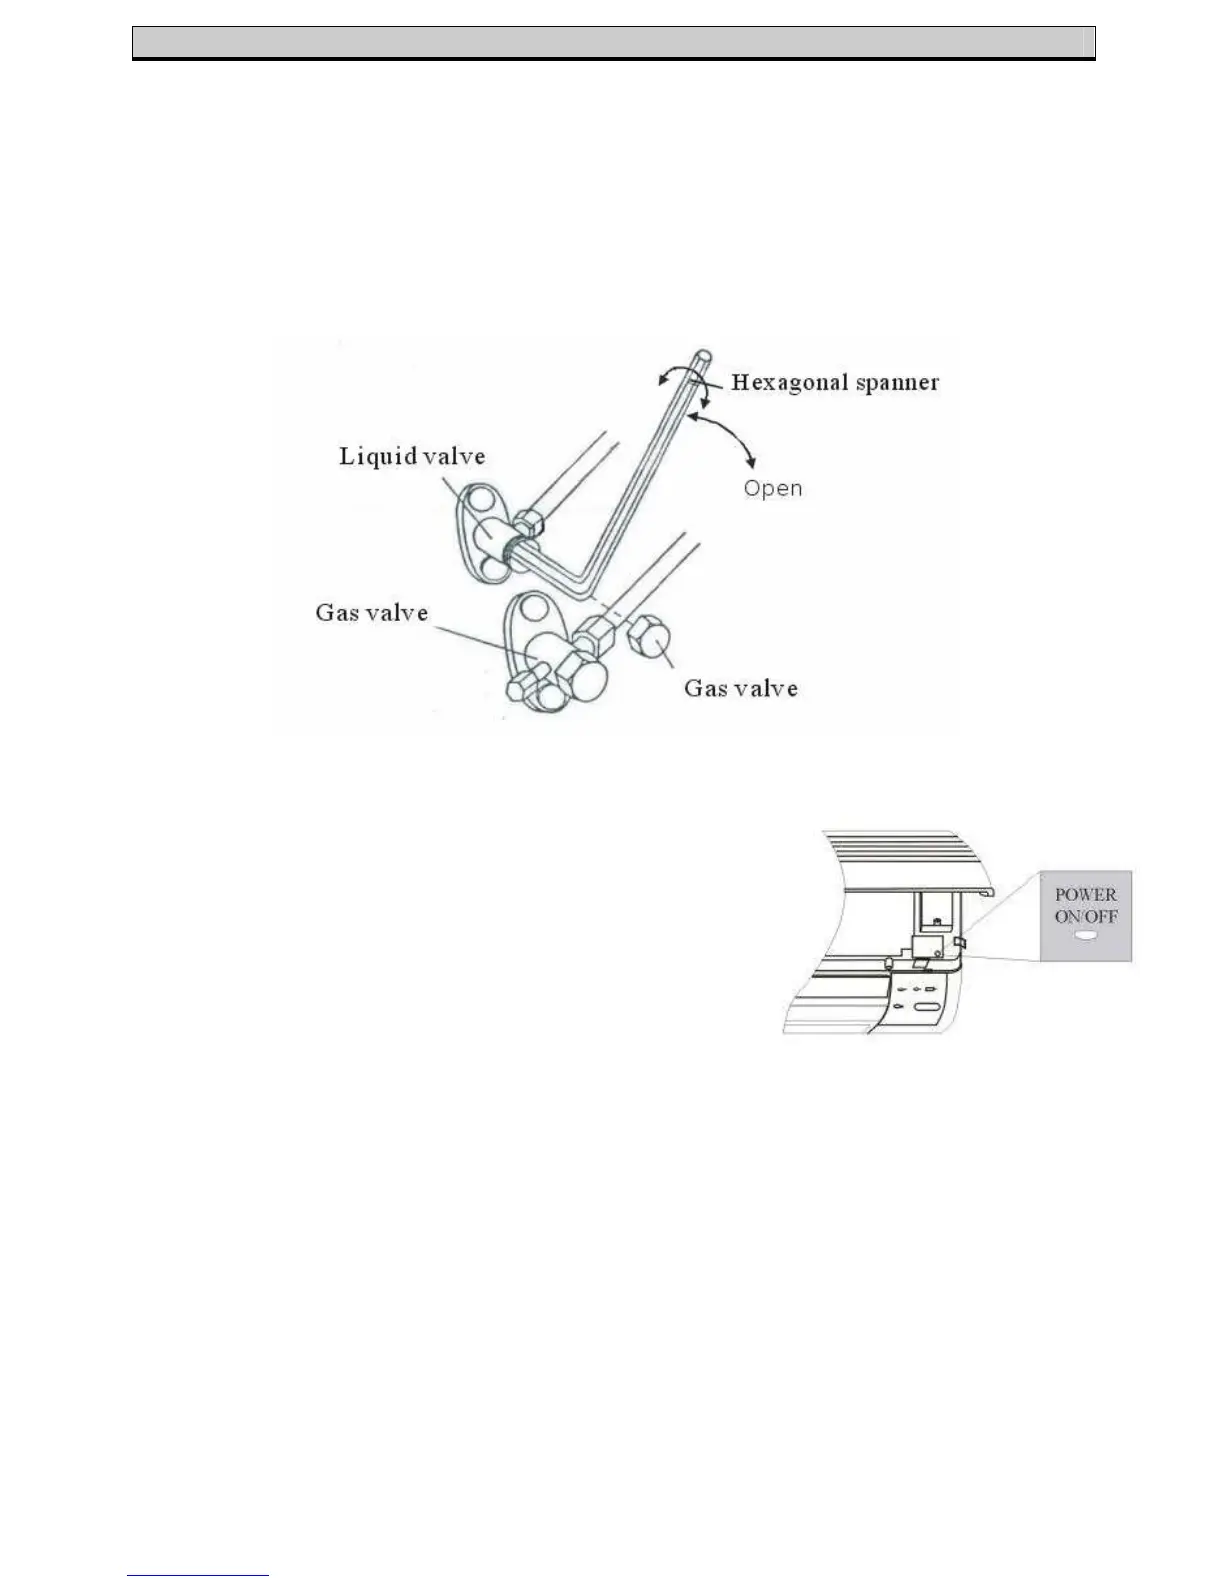
2. Tighten the screws on the outdoor unit with a 24mm spanner
3. Remove the gas valve cover and open, using the hexagonal spanner
provided
4. Replace the gas valve cover
5. Repeat stages 2-4 for the second gas valve
Testing the unit
1. Connect the mains power
2. Locate the emergency power switch under
the cover of the indoor unit and turn the
power on
3. The unit will sound once, the indoor fan will
start and all the lights on the unit will
illuminate
4. After 2 seconds, the lights will turn off
5. After 6 seconds, the fans will stop and the unit is ready to use
After testing the unit, the emergency power switch should only be used
when the remote control is lost or defective
When using the emergency power switch, the unit will operate in ‘Auto’
function according to the room temperatures below and the louvers will
oscillate in the ‘Standard’ cycle
• Cooling function if the room temperature is greater than 25
o
C
• Fan Function if the room temperature is between 20
o
C and 25
o
C
• Heating Function if the room temperature is less than 20
o
C
Please Note – Using the emergency power switch will cancel the
‘Timer’/’Sleep’ functions