H-5 95-852613.1
Switch Access Procedure
NOTE
It is strongly recommended to document all PIRECL gas detector network addresses as well as the addresses
of all other LON devices on the Address Identication Chart before disassembling and programming the
PIRECL gas detectors.
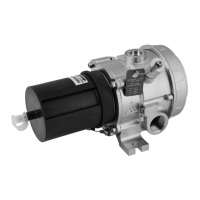
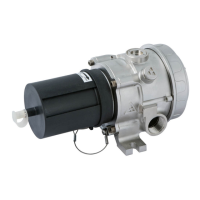
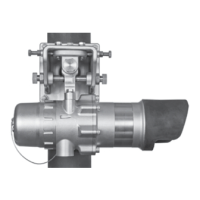
Removal of four stainless steel flange bolts and the front electronic module of the PIRECL IR gas detector from the
bulkheadisrequired inorderto gainaccess tothe networkaddressDIPswitch.Tools requiredfor thisprocedure
include a 4mm hex wrench and a torque wrench capable of accurately measuring 40 inch-pounds.
1. Remove 24 Vdc power from the PIRECL detector. Remove the weather baffle from the detector.
2. Removethe fourstainlesssteelflange bolts using a 4mm hexwrench. Takecaretoproperly support the
electronic module as the last flange bolt is removed.
3. Carefullyremovetheelectronicmodulebyextractingitstraightoutfromthebulkhead.
4. Setthenetworkaddressswitches.
5. Ensure that the module O-ring is intact and undamaged.
6. Reinstalltheelectronicmodulebyinsertingitstraightintothebulkhead.
NOTE
Take care to properly align the module’s electrical connector with the bulkhead connector before attempting to
fully insert the module. Failure to do so may result in damage to the module and/or bulkhead.
7. Insert and tighten the four flange bolts in an opposing consecutive order in two stages — first partially
tighten all four bolts equally, and then fully tighten each bolt in an opposing order to 40 inch-pounds (4.5
Nm) of torque. (Bolts are M6 per ISO 965 with M5 head, SST with a yield stress of 448 N/mm
2
(65.000 PSI)
minimum.)
8. Apply power after all network addresses have been programmed and all field enclosures are properly
installed.
TYPICAL APPLICATIONS
Figure C-3 is a simplified drawing of a typical EQP system. This system includes an EQP Controller, DCIO and various
LON field devices.