Table 3 – Checklist After Installation
Items to be checked Possible malfunction
Has the unit been fixed firmly? The unit may drop, shake or emit noise
Has the refrigerant leakage test been performed? It may cause insufficient cooling (heating)
Is thermal insulation sufficient? It may cause condensation
Is water drainage satisfactory? It may cause water leakage
Is the voltage in accordance with the rated voltage It may cause electric malfunction or damage the unit
marked on the nameplate?
Is the electric wiring or piping connection installed It may cause electric malfunction or damage parts
correctly and securely?
Has the unit been securely grounded? It may cause electrical leakage
Is the inlet or outlet blocked? It may cause insufficient cooling (heating)
Have the refrigerant charge and the length The refrigerant charge is not accurate
of connection pipes and been recorded?
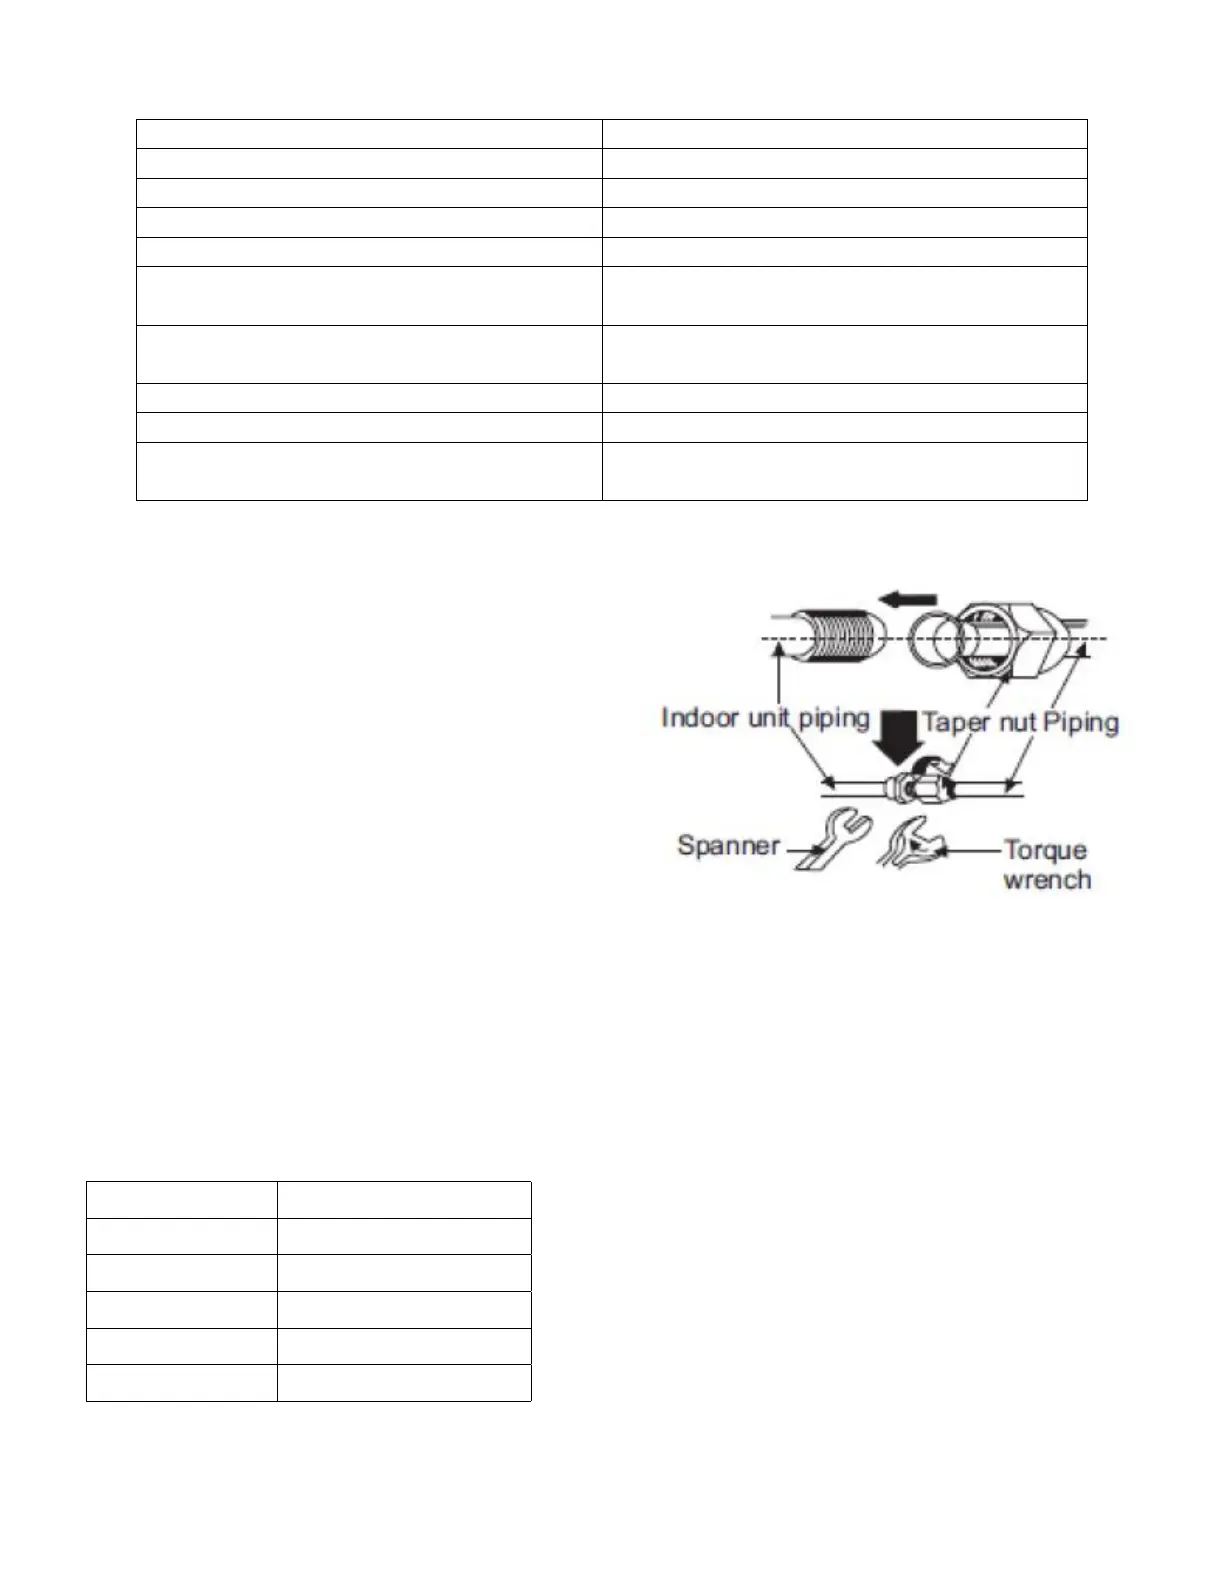
3.8 Connection Pipes
Align the center of the pipe flare with the relevant
valve. Screw in the flare nut by hand and then tighten
the nut with spanner and torque wrench following the
specifications.
Both refrigerant lines must be separately insulated
in order to avoid condensation and to ensure proper
efficiency.
Table 2 – Tubing Torque Tightening
Hex Nut Diameter Tightening Torque (N·m)
φ6 15-20
φ9.52 30-40
φ12 45-55
φ16 60-65
φ19 70-75
Figure 4 – Tube Tightening
3.9 Operation Test
Before operation test
1. Do not switch on power before installation is
completely finished;
2. Electric wiring must be connected correctly and
securely;
3. Cut-off valves of the connection pipes should be
opened;
4. All the impurities such as scraps and thrums must
be cleared from the unit.
Operation test method
Switch on power and call for heating or cooling on
thermostat to check whether the operation is normal or
not.
8
 Loading...